Sign In
Log in to your Screenza account.
- Navigate to
app.screenza.tvin your browser. - Enter your email address and password.
- Click Sign In to access your dashboard.


Tip: Bookmark app.screenza.tv for quick access.
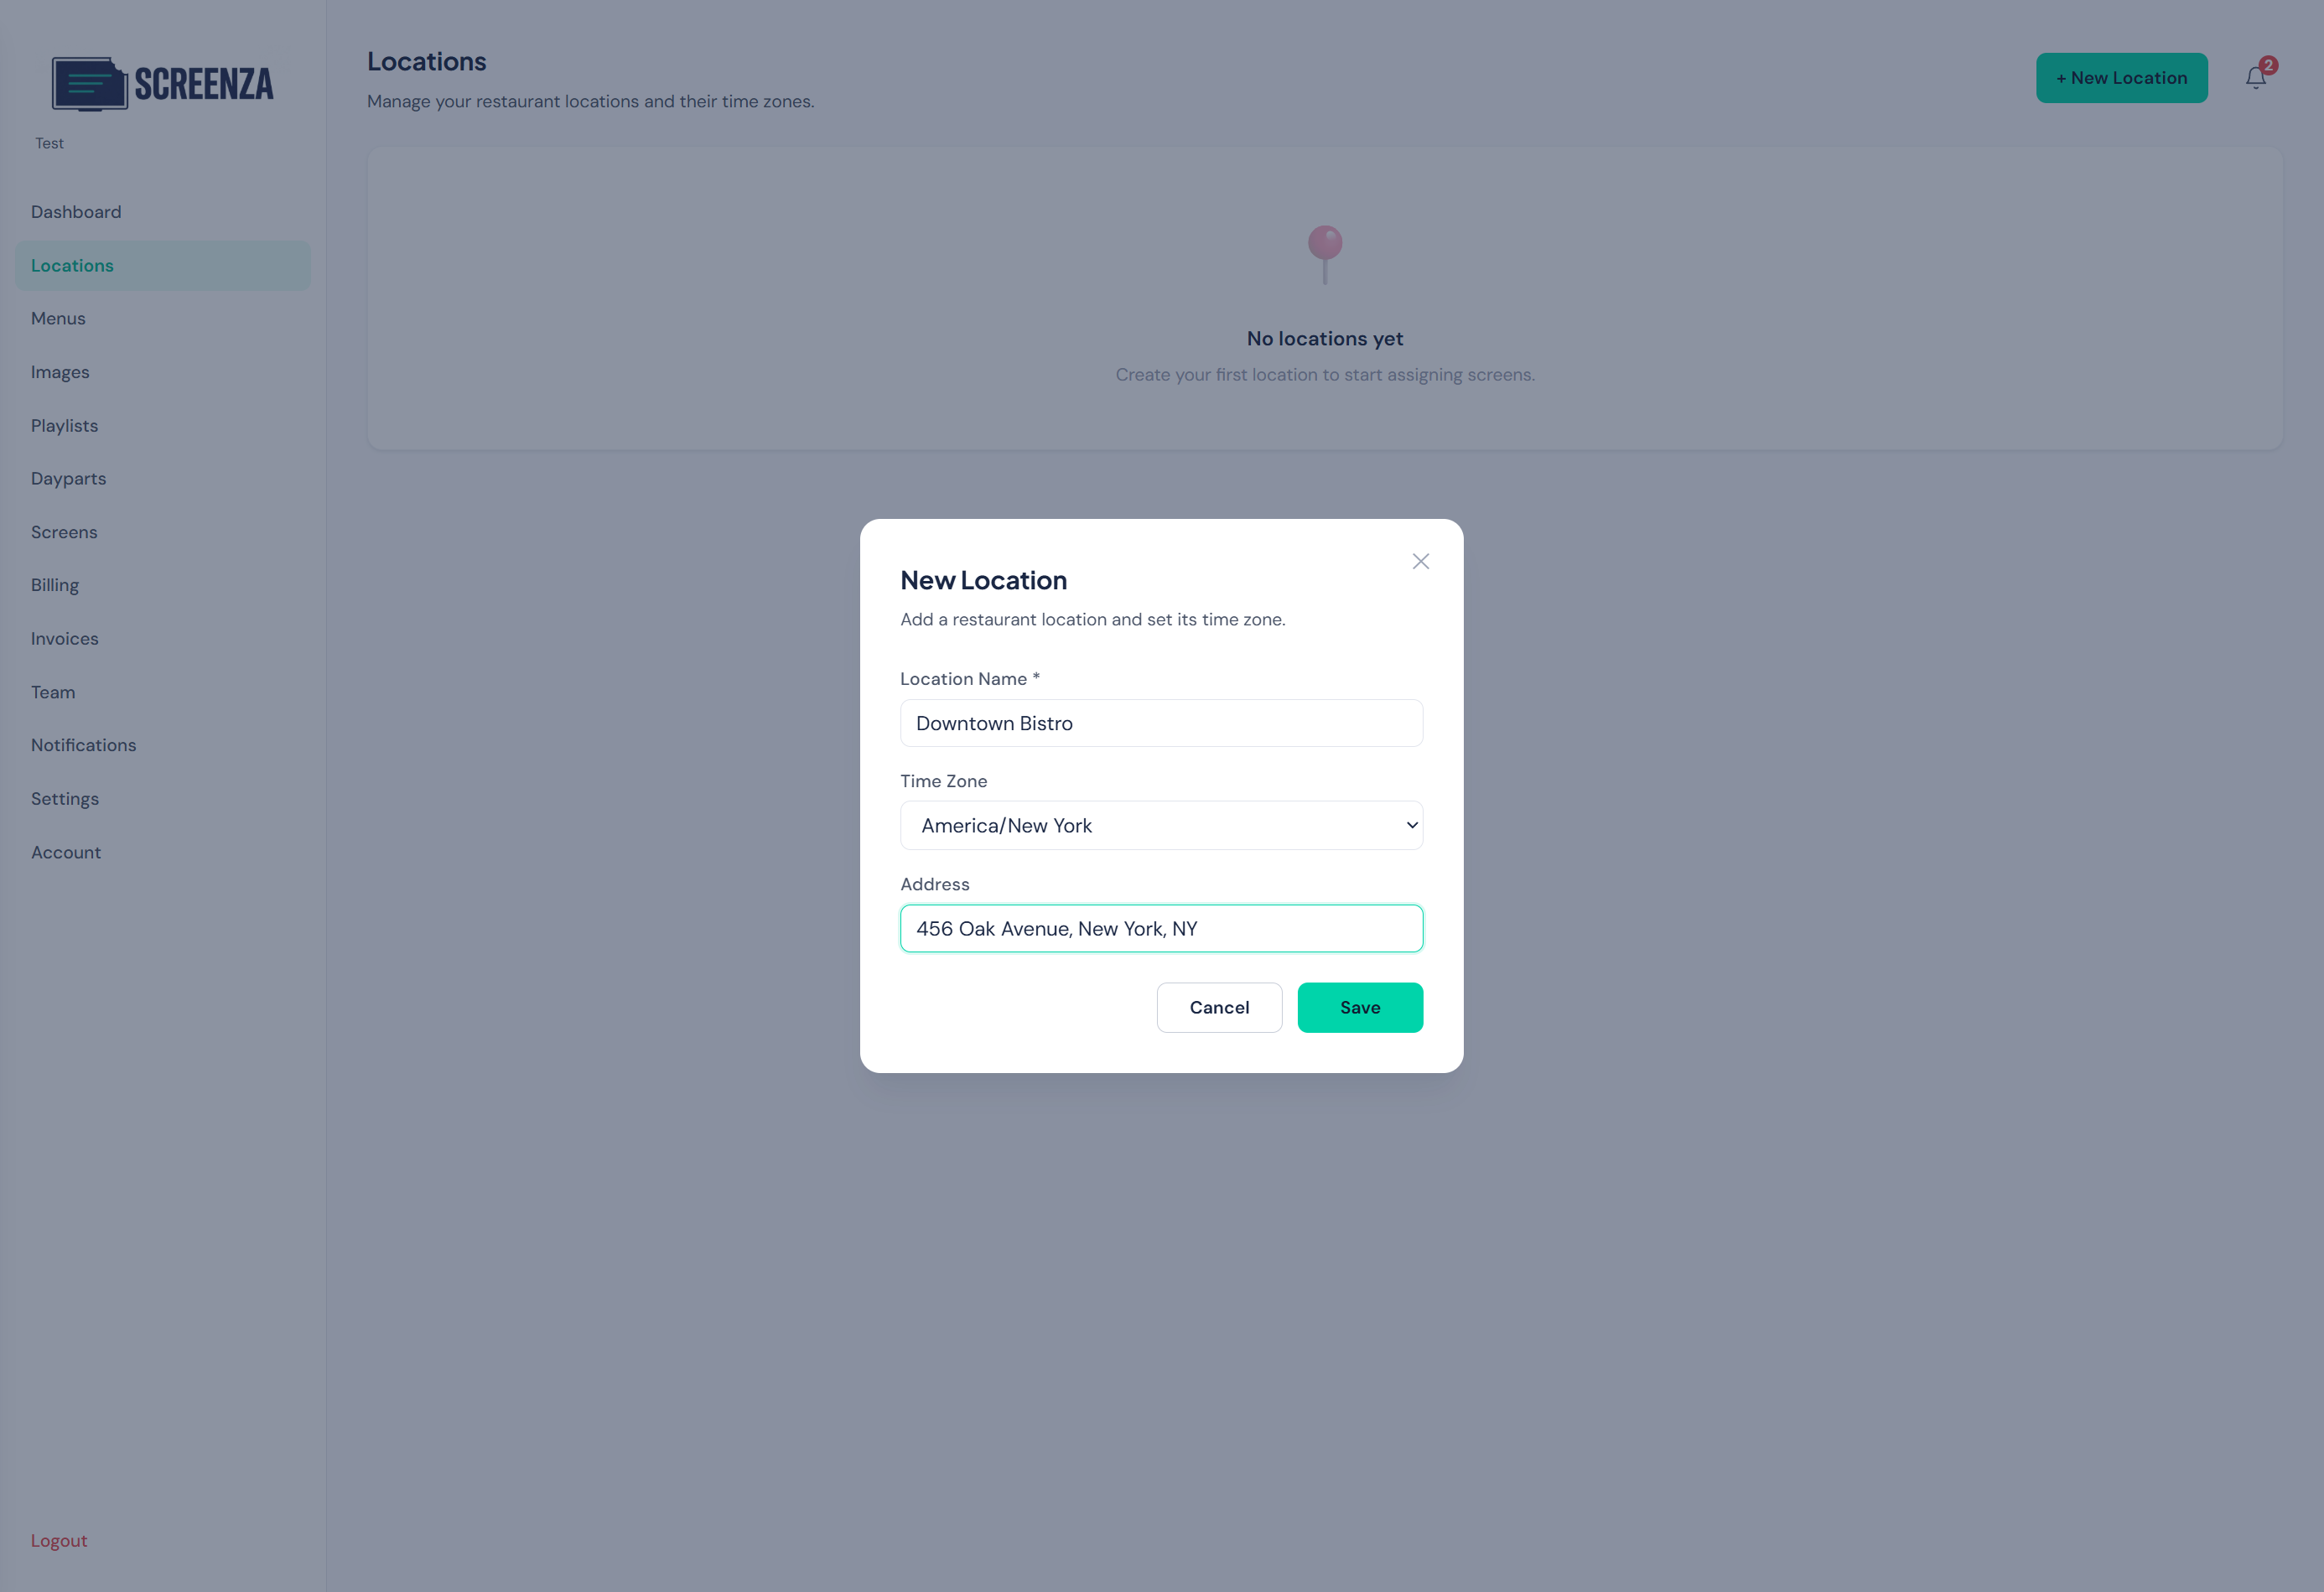
Create a Location
Add your restaurant’s physical location.
- Click Locations in the sidebar.
- Click + New Location.
- Fill in your restaurant’s name, timezone, and address.
- Click Save.
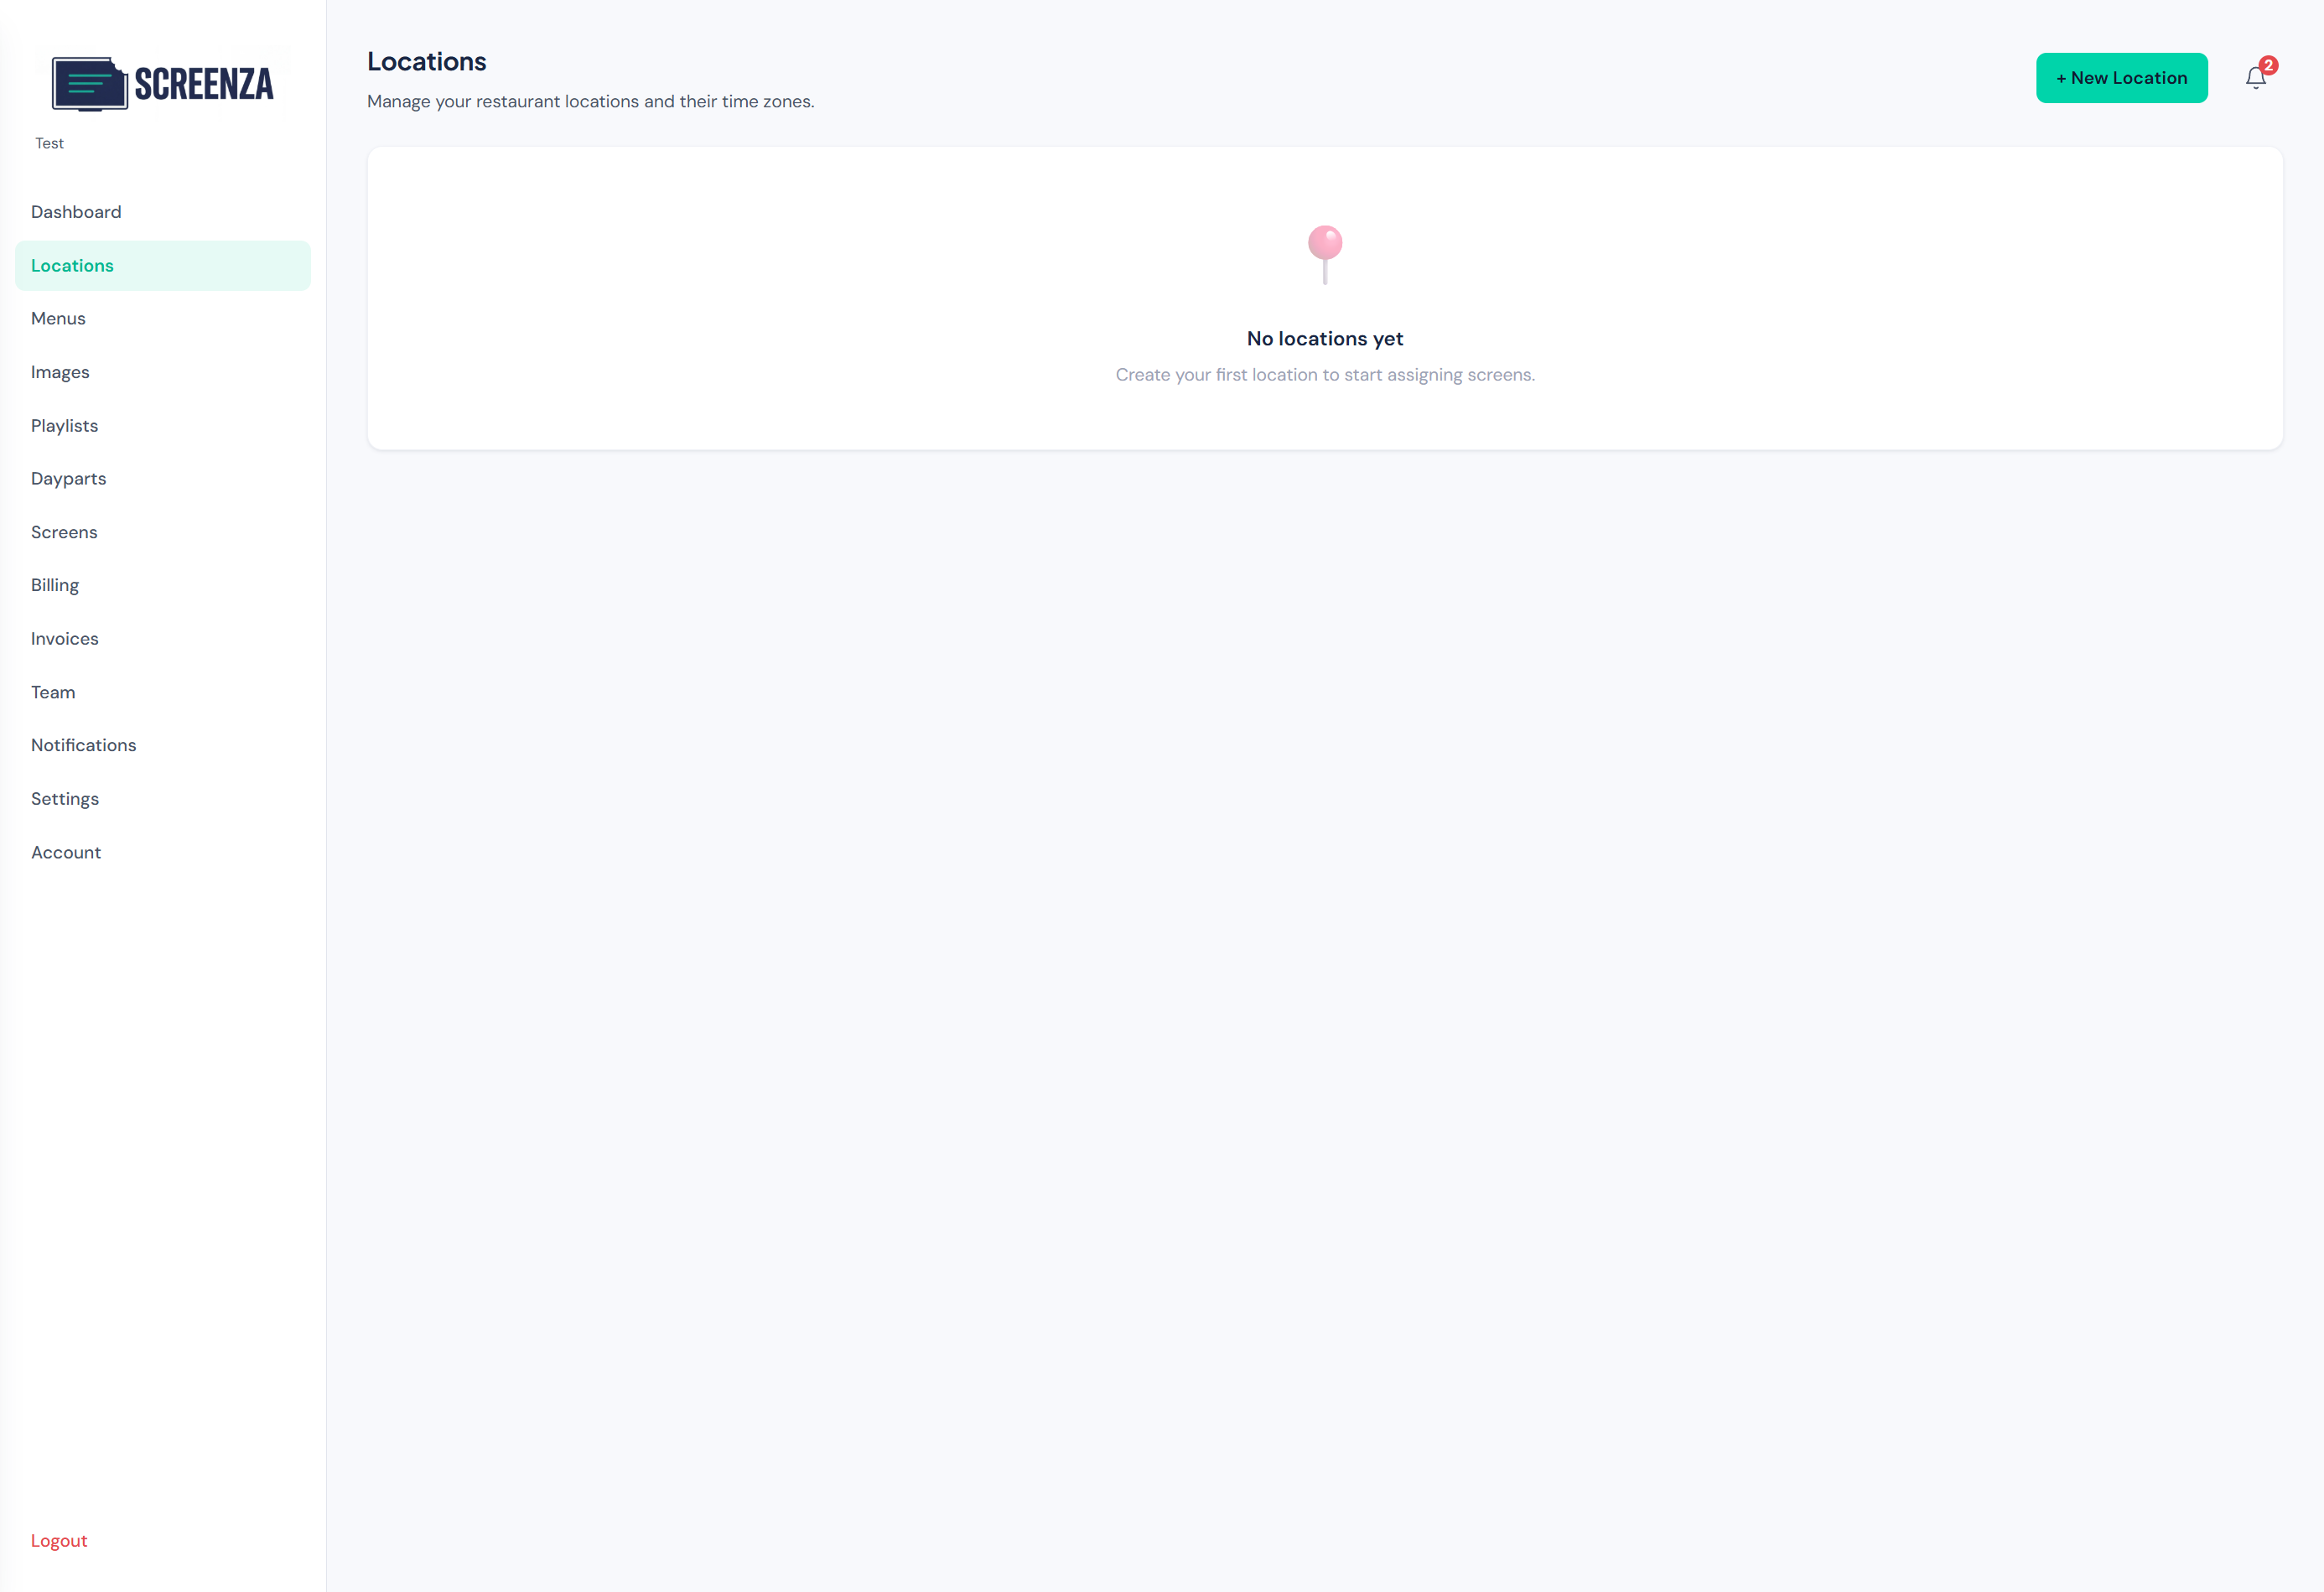
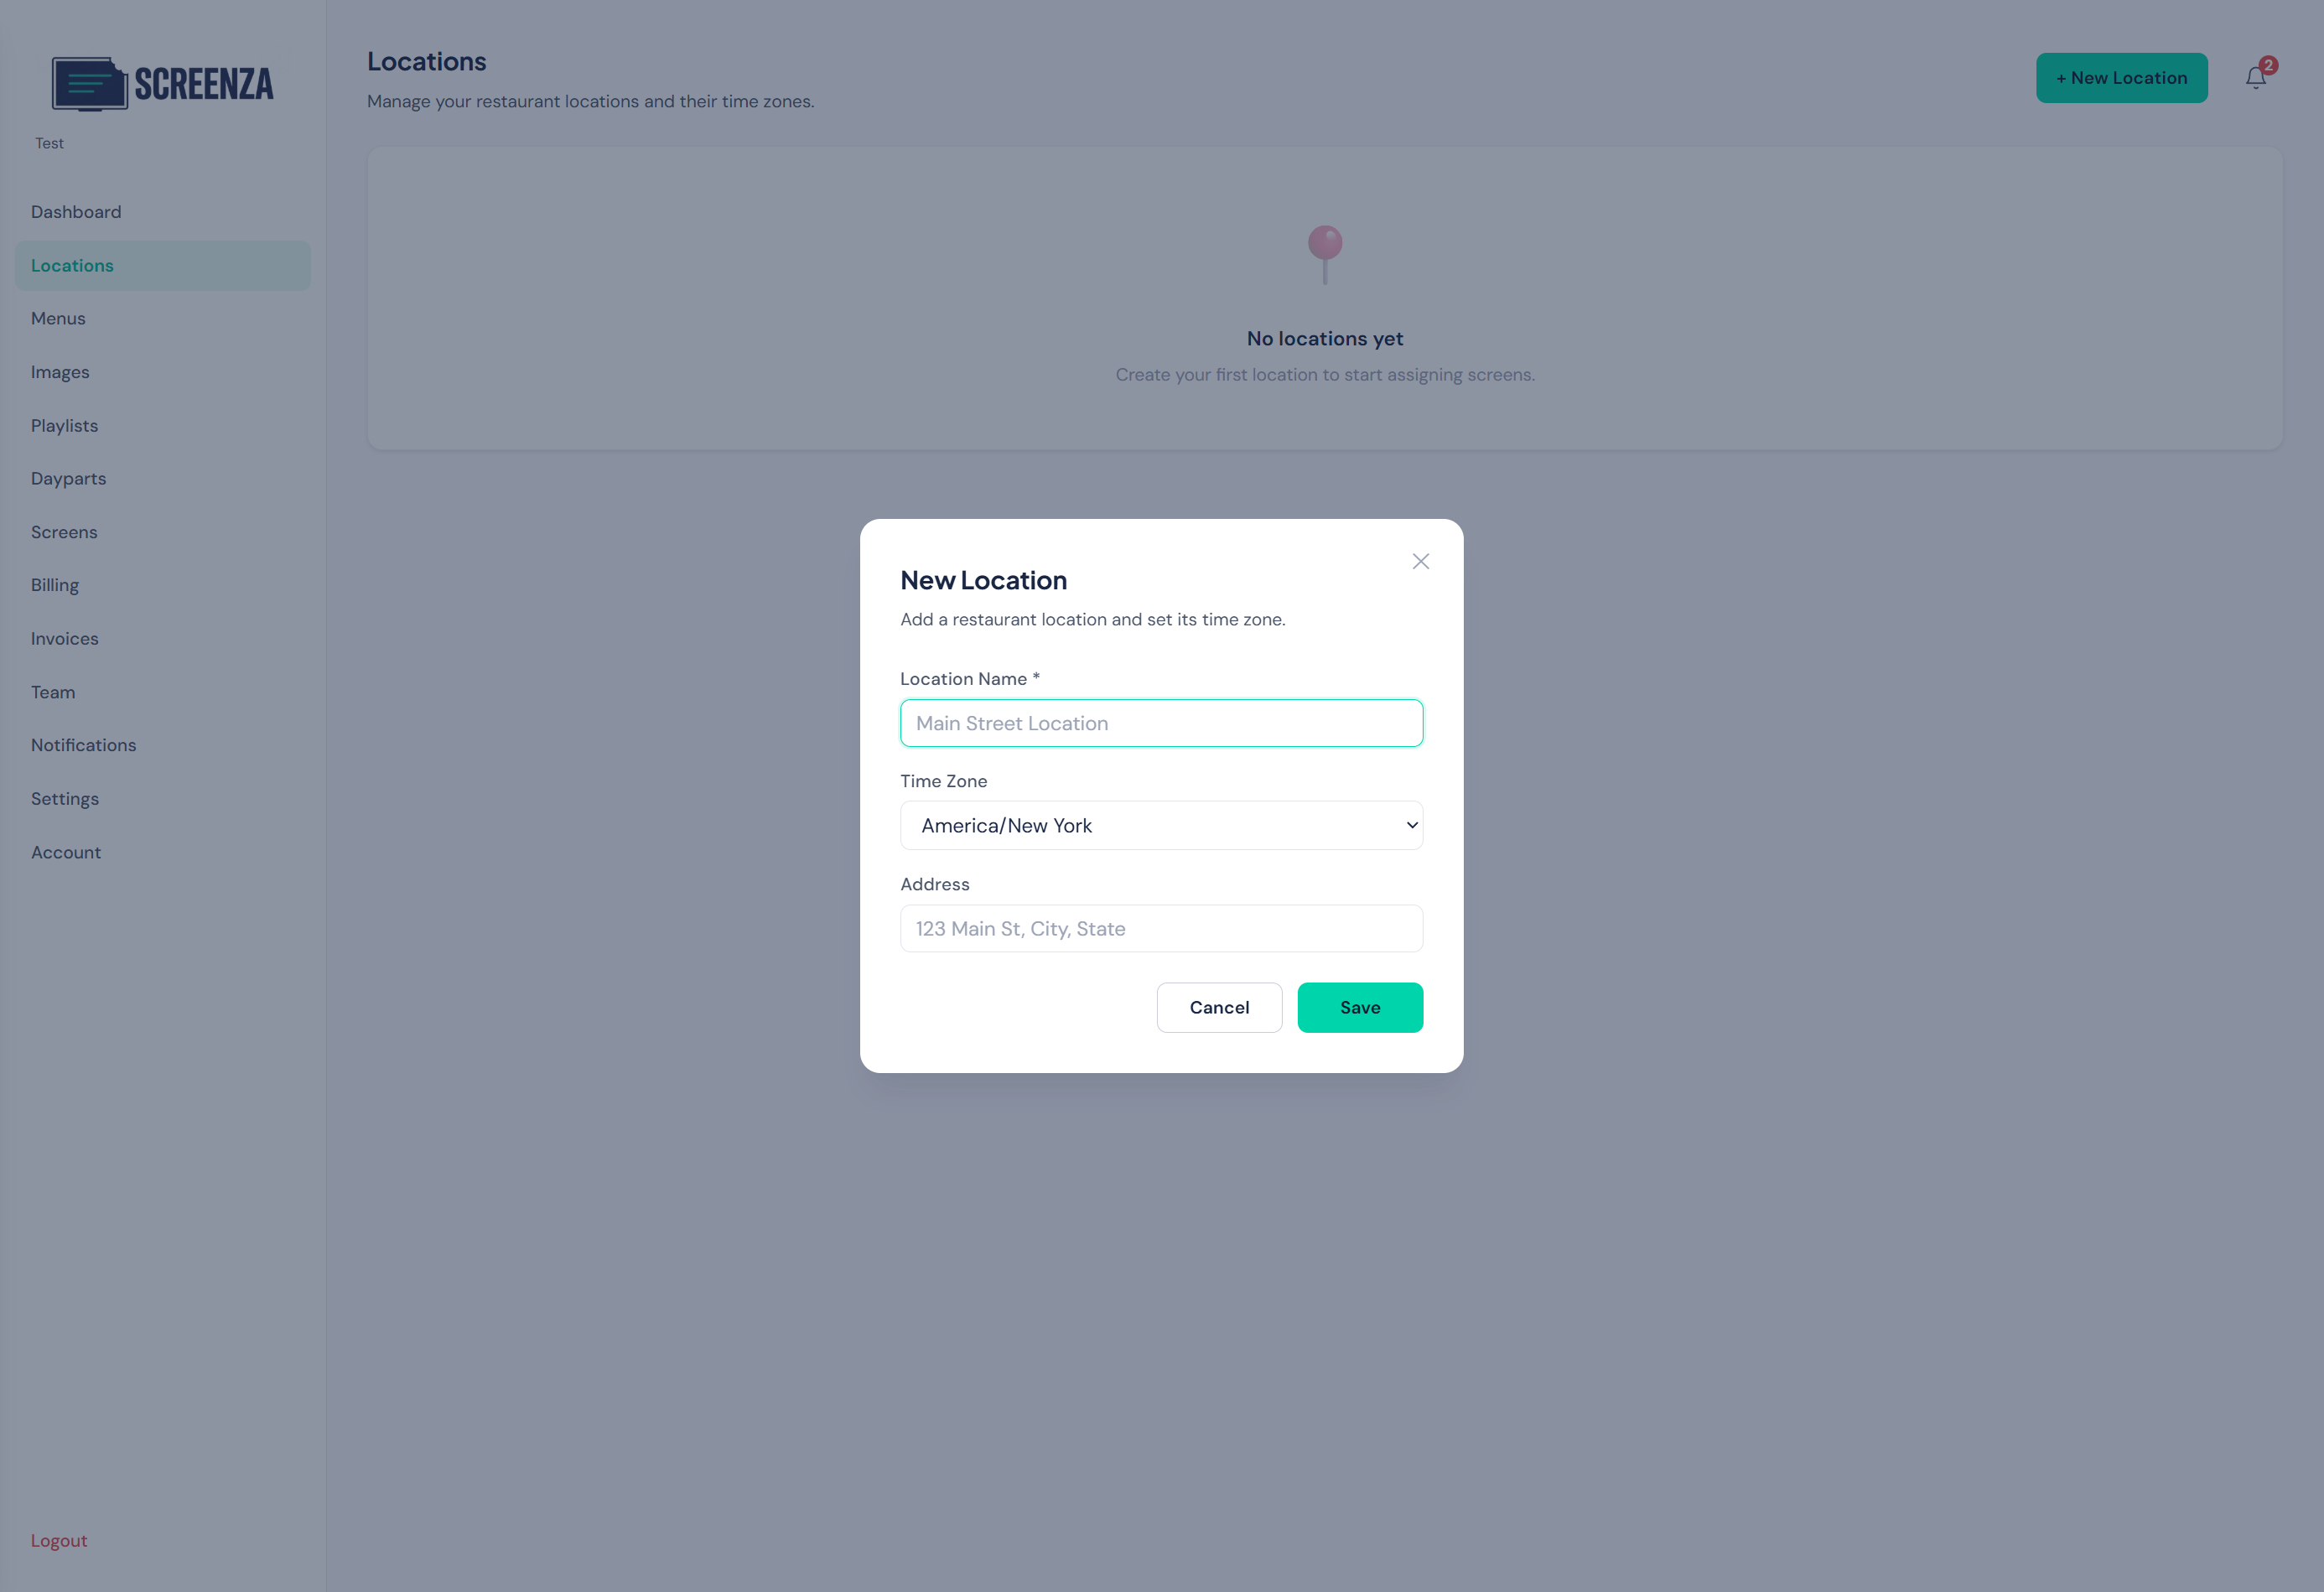

Tip: You can create multiple locations for different restaurant branches.
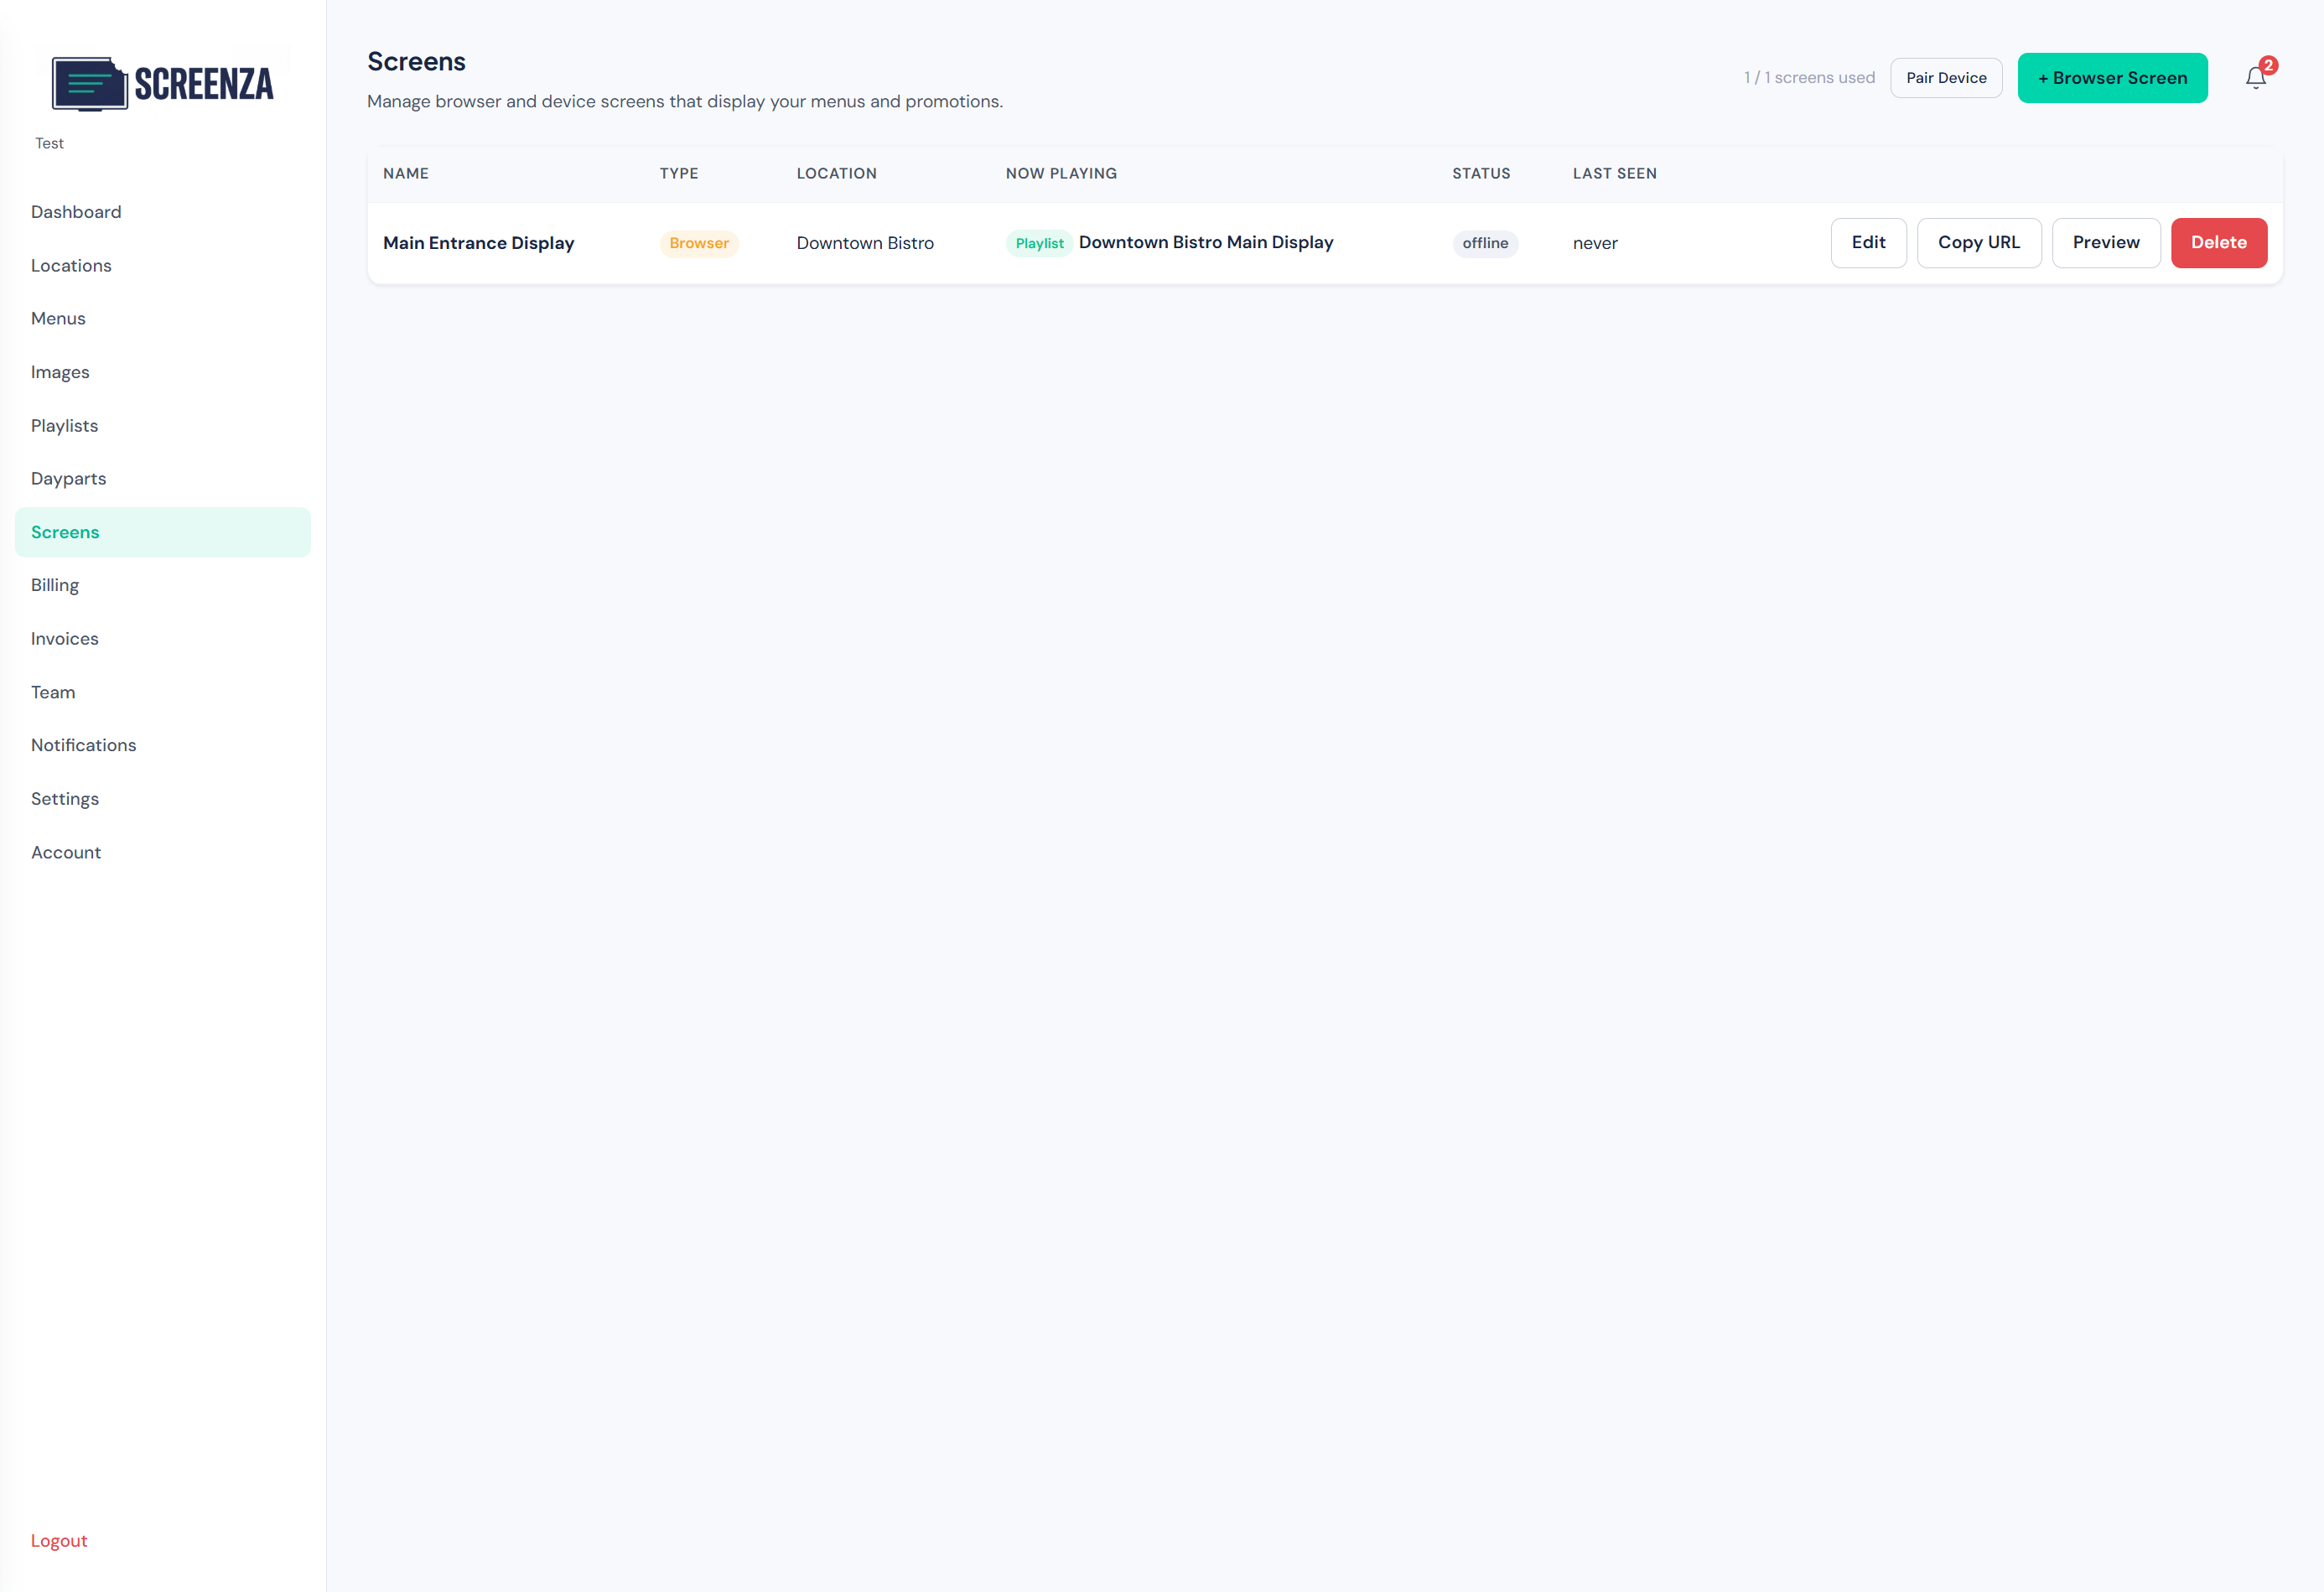
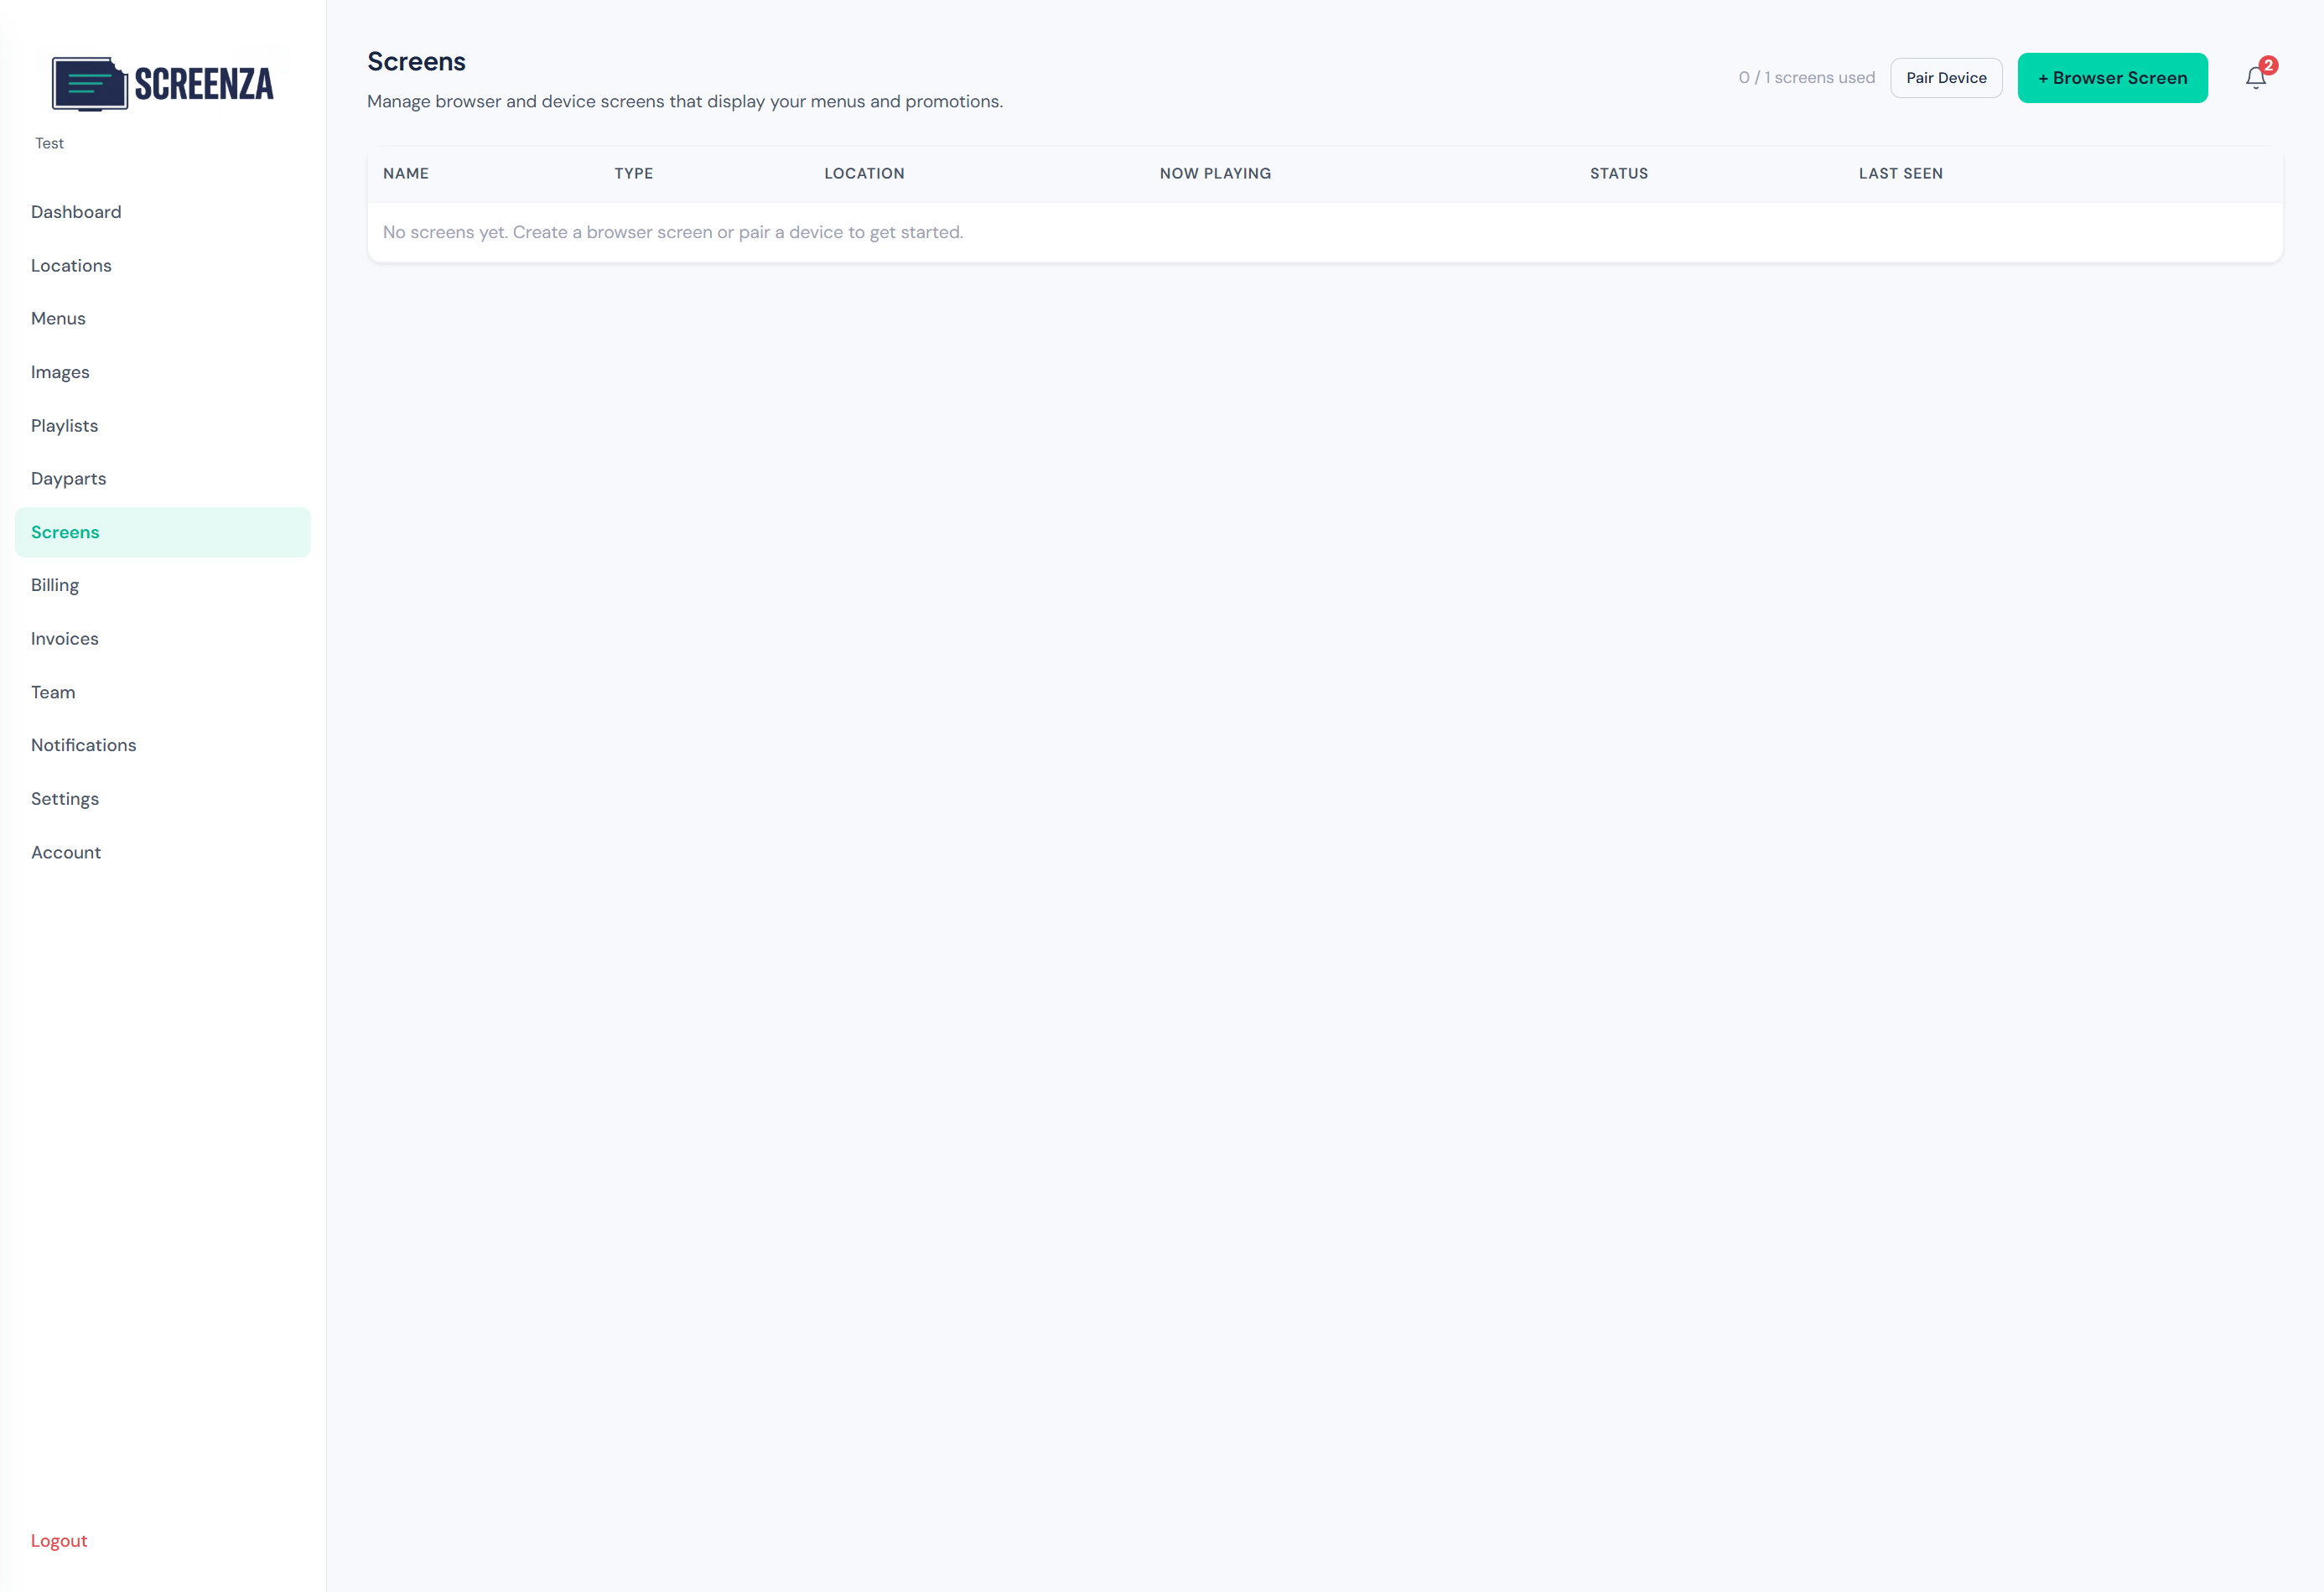
Create a Screen
Set up a display screen for your content.
- Click Screens in the sidebar.
- Click + Browser Screen to create a browser-based display.
- Set a screen name and select your location.
- Click Create Screen.
If you have an Android device or Windows mini PC running the Screenza Player app, you can also click Pair Device to add it using the pairing code shown in the app.
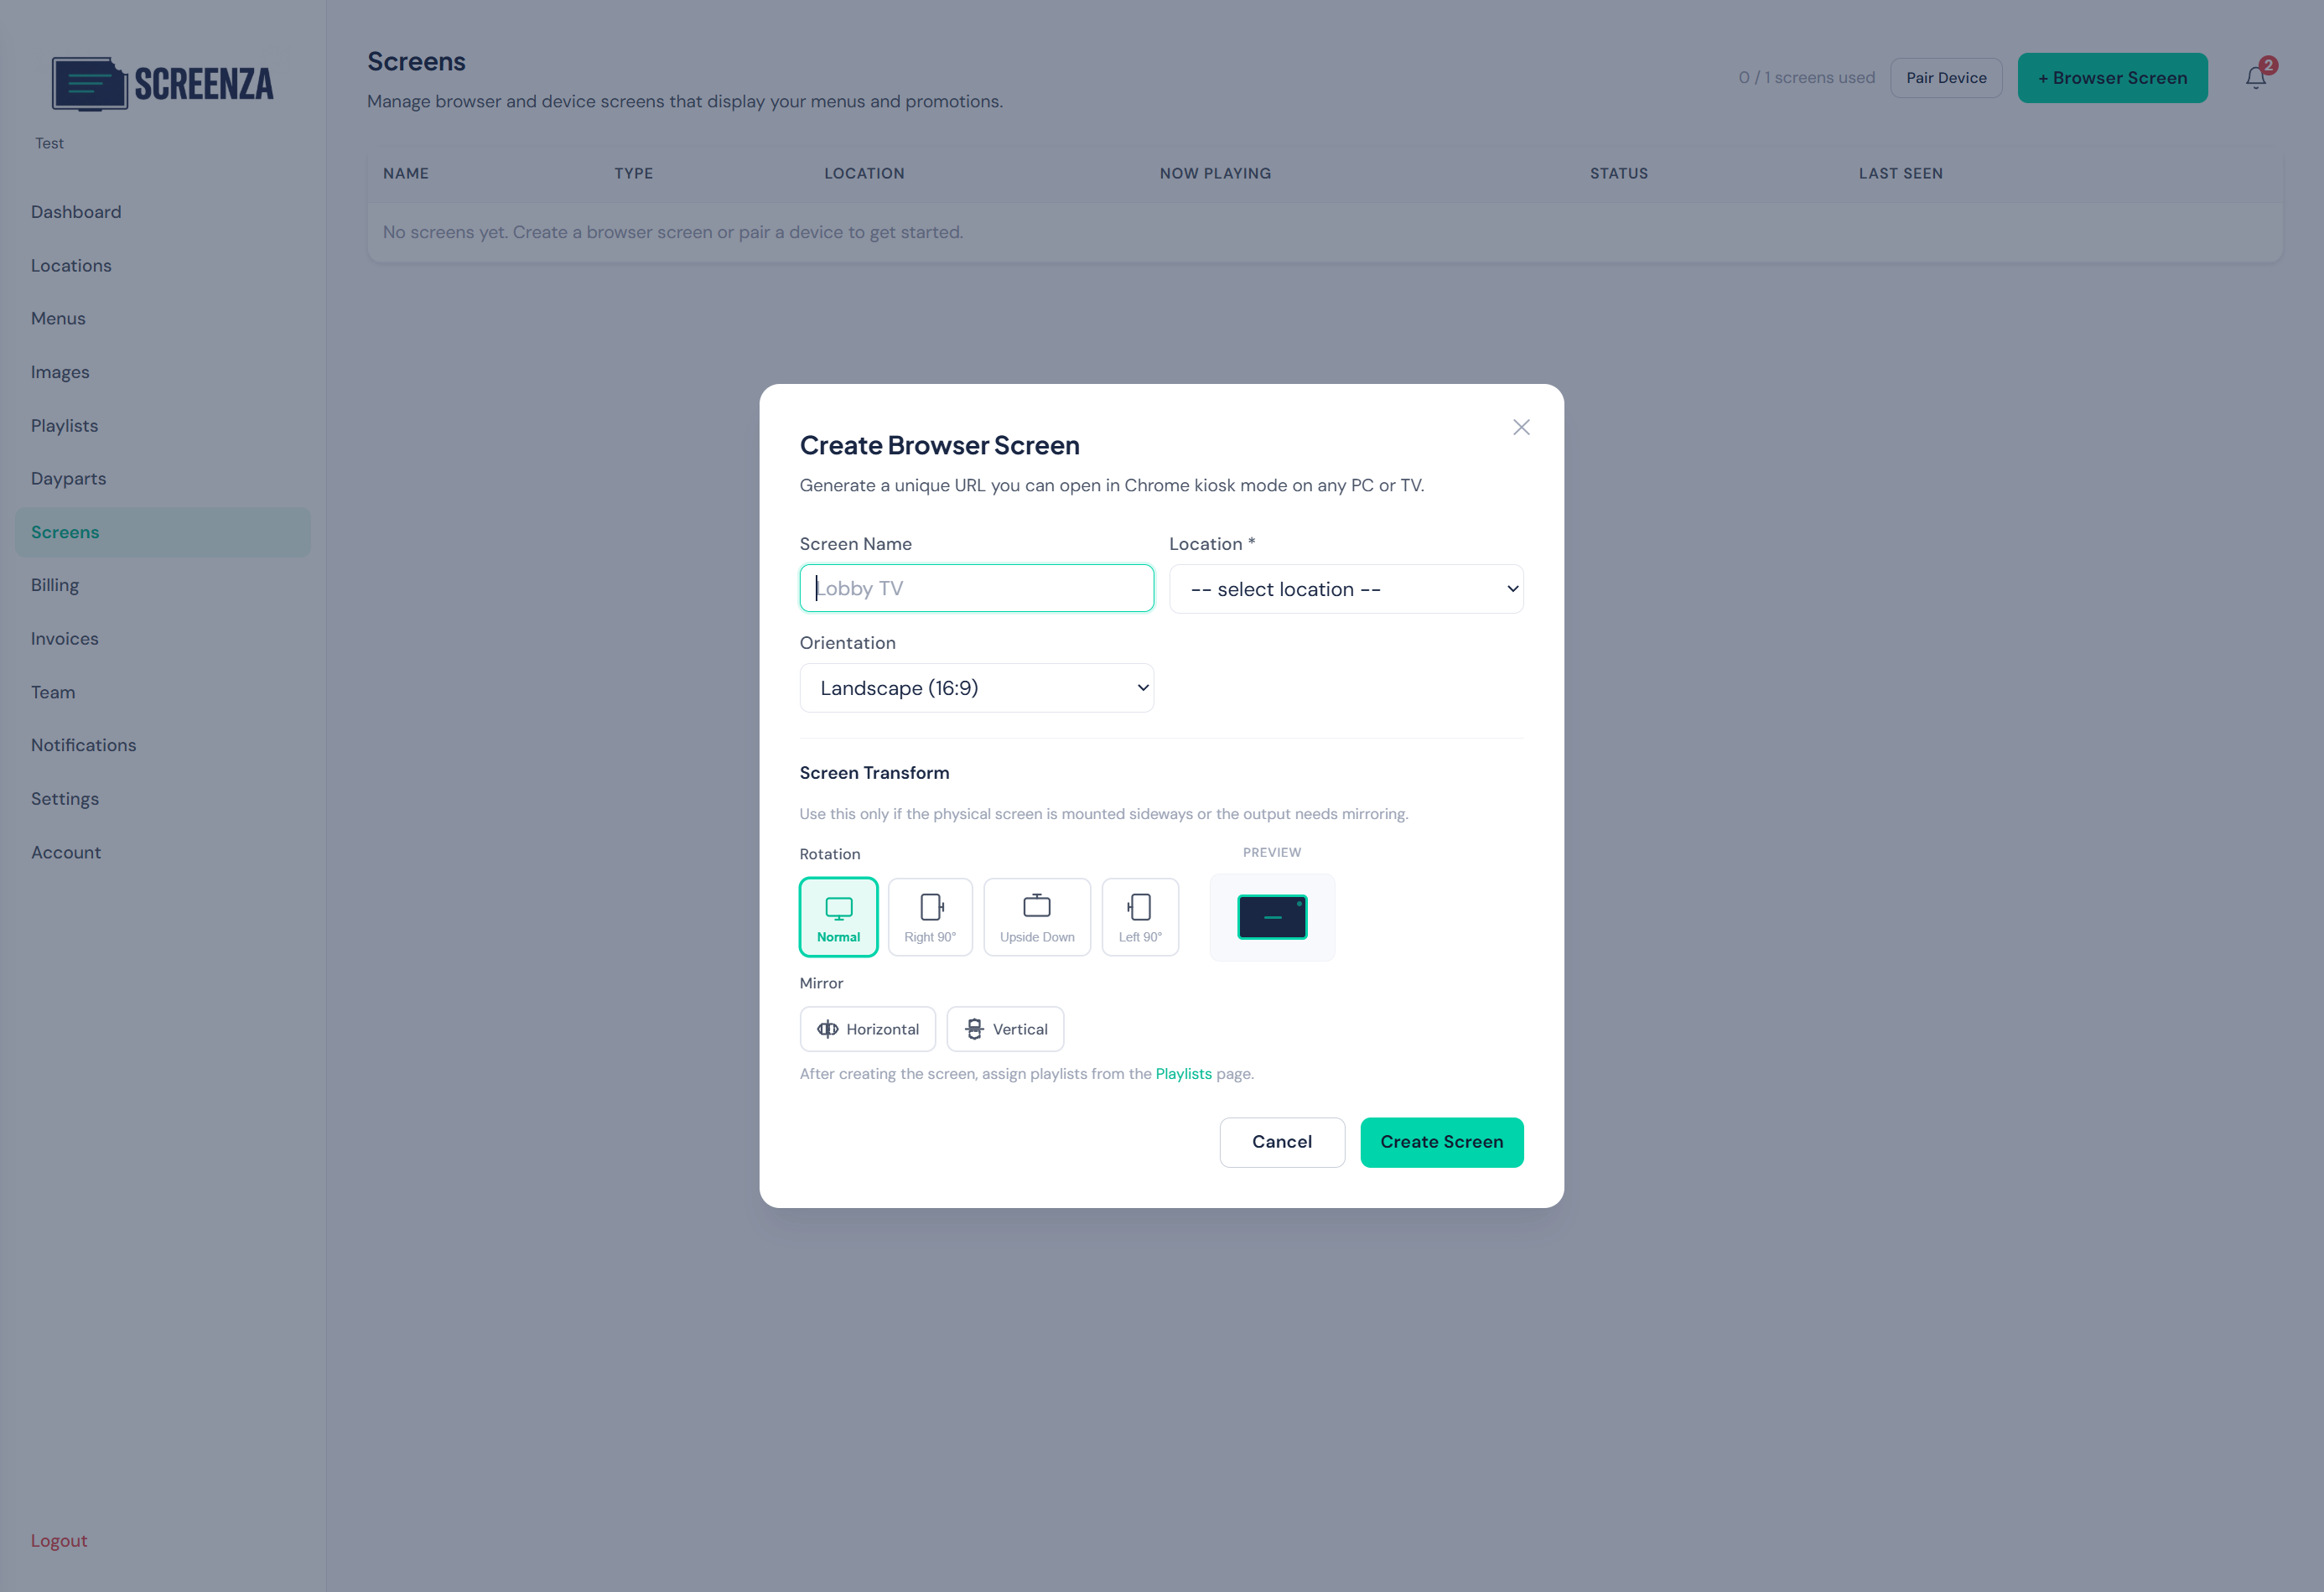
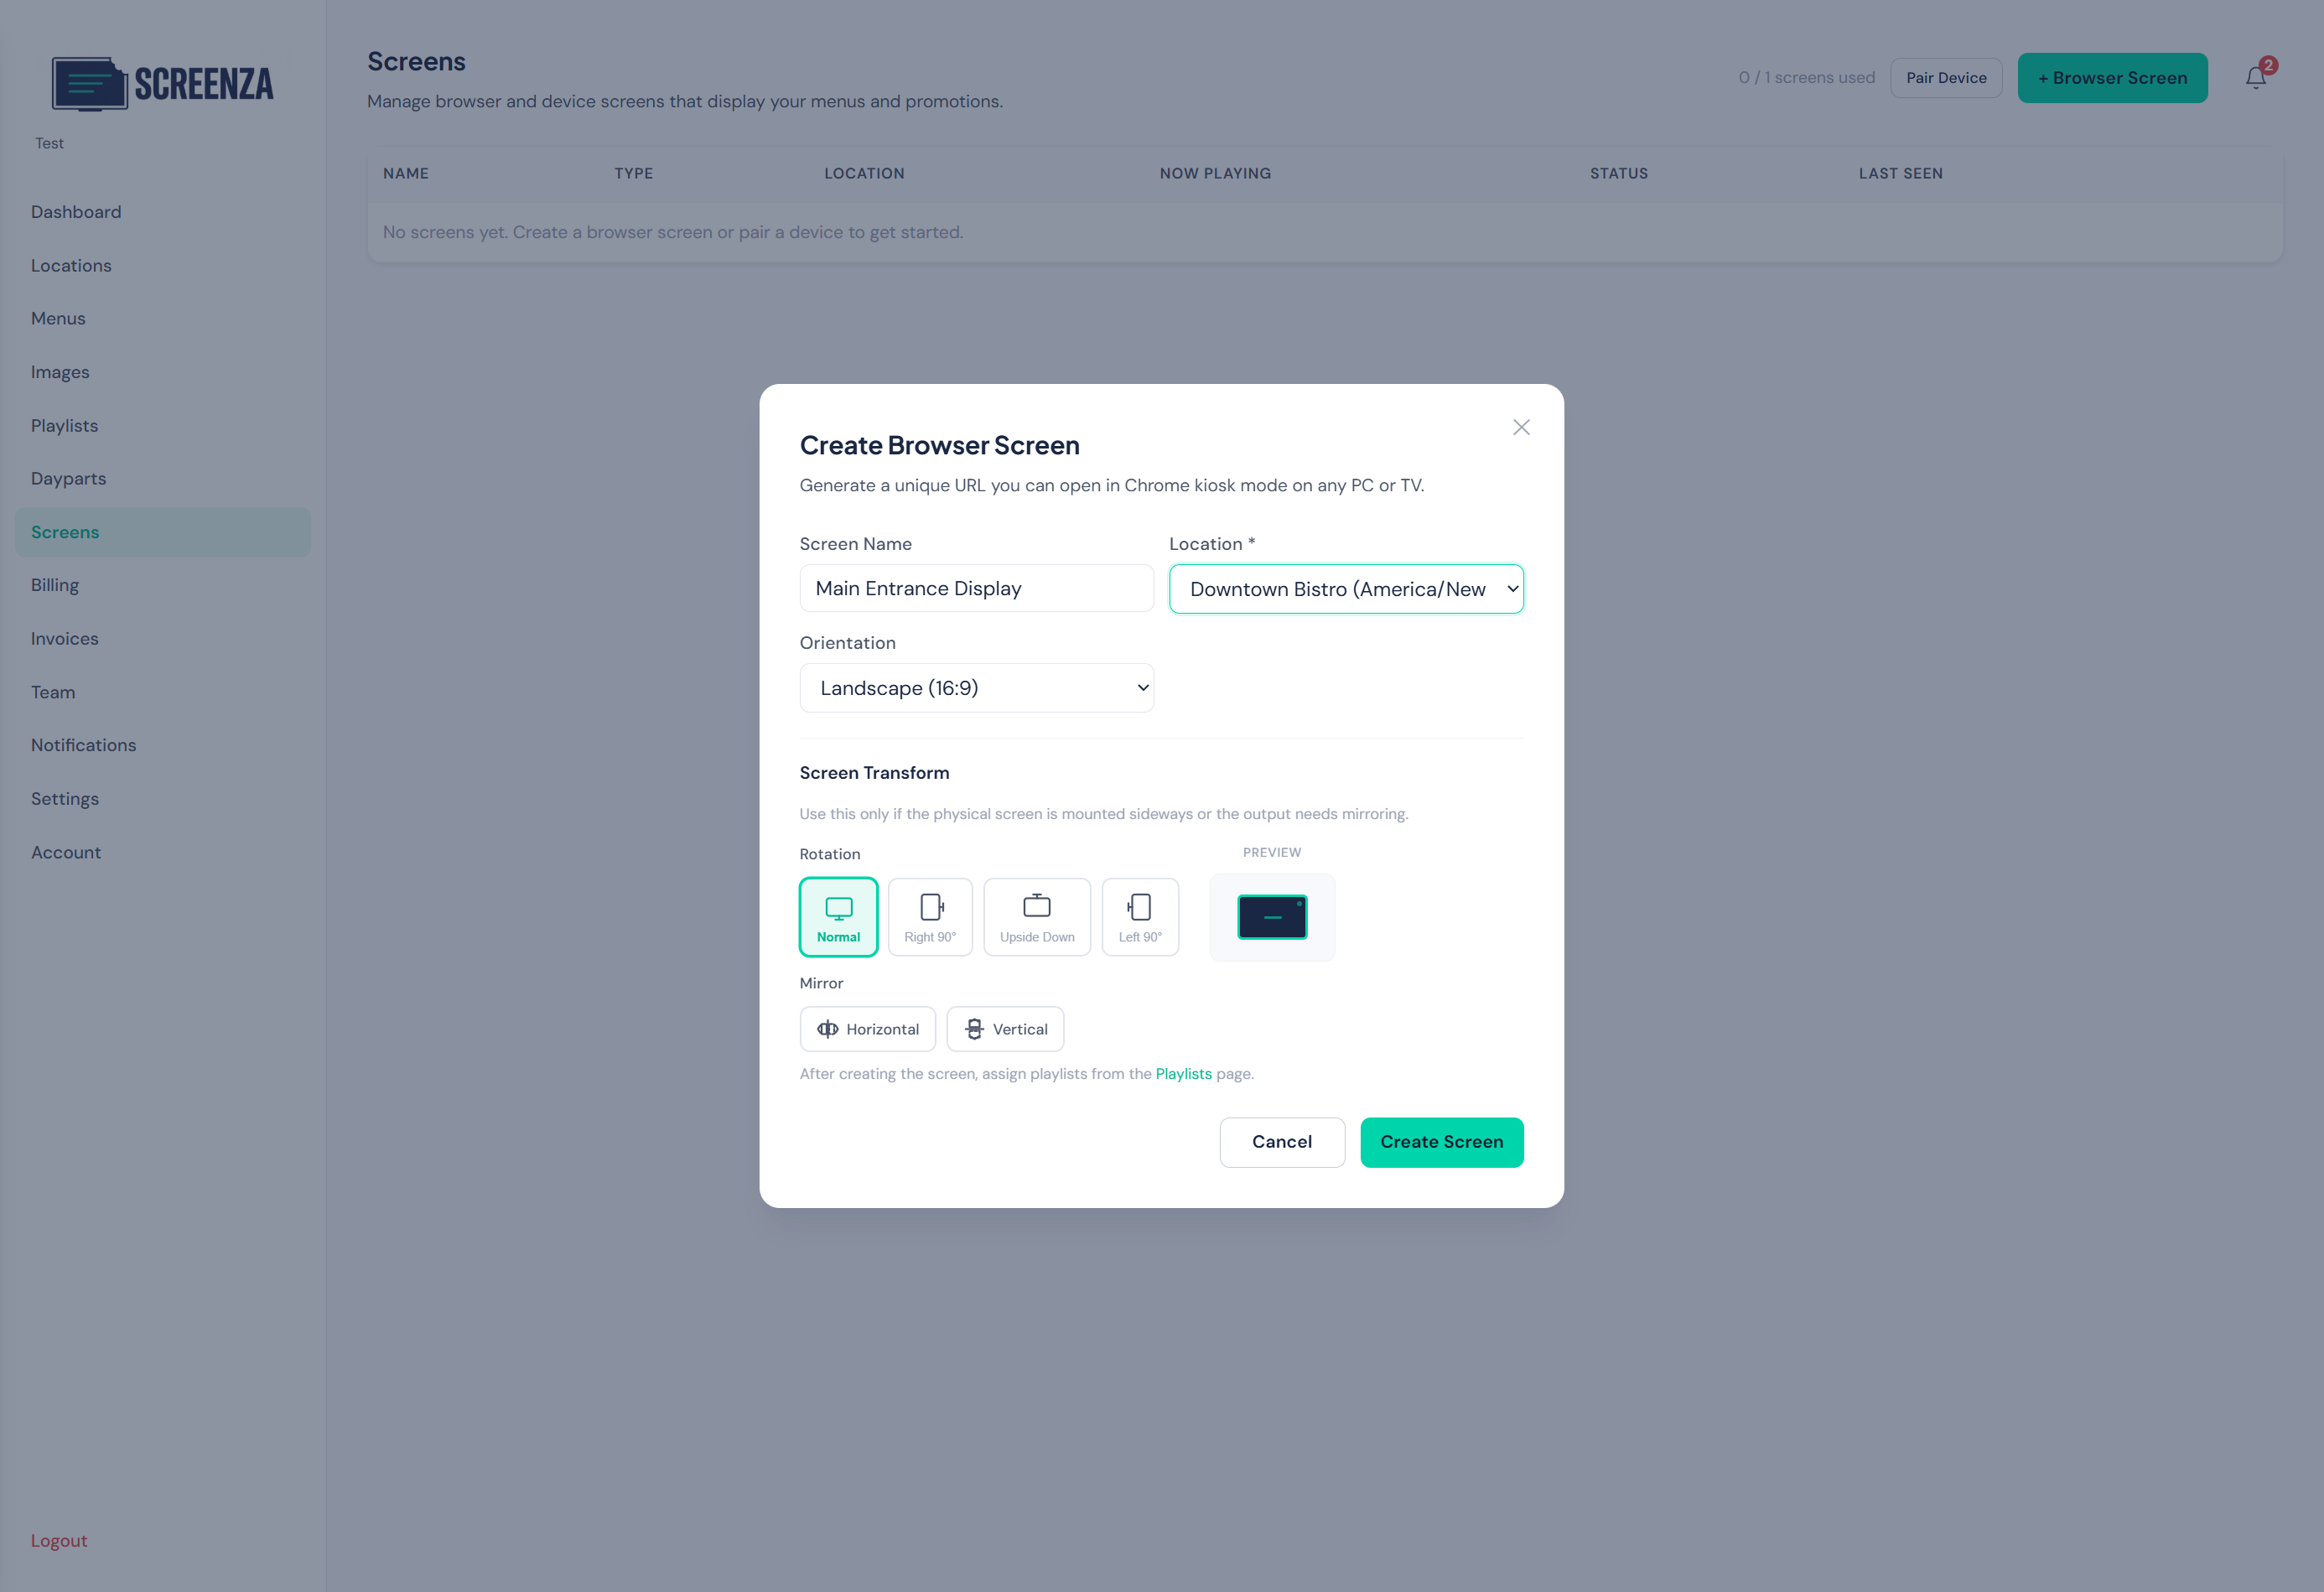
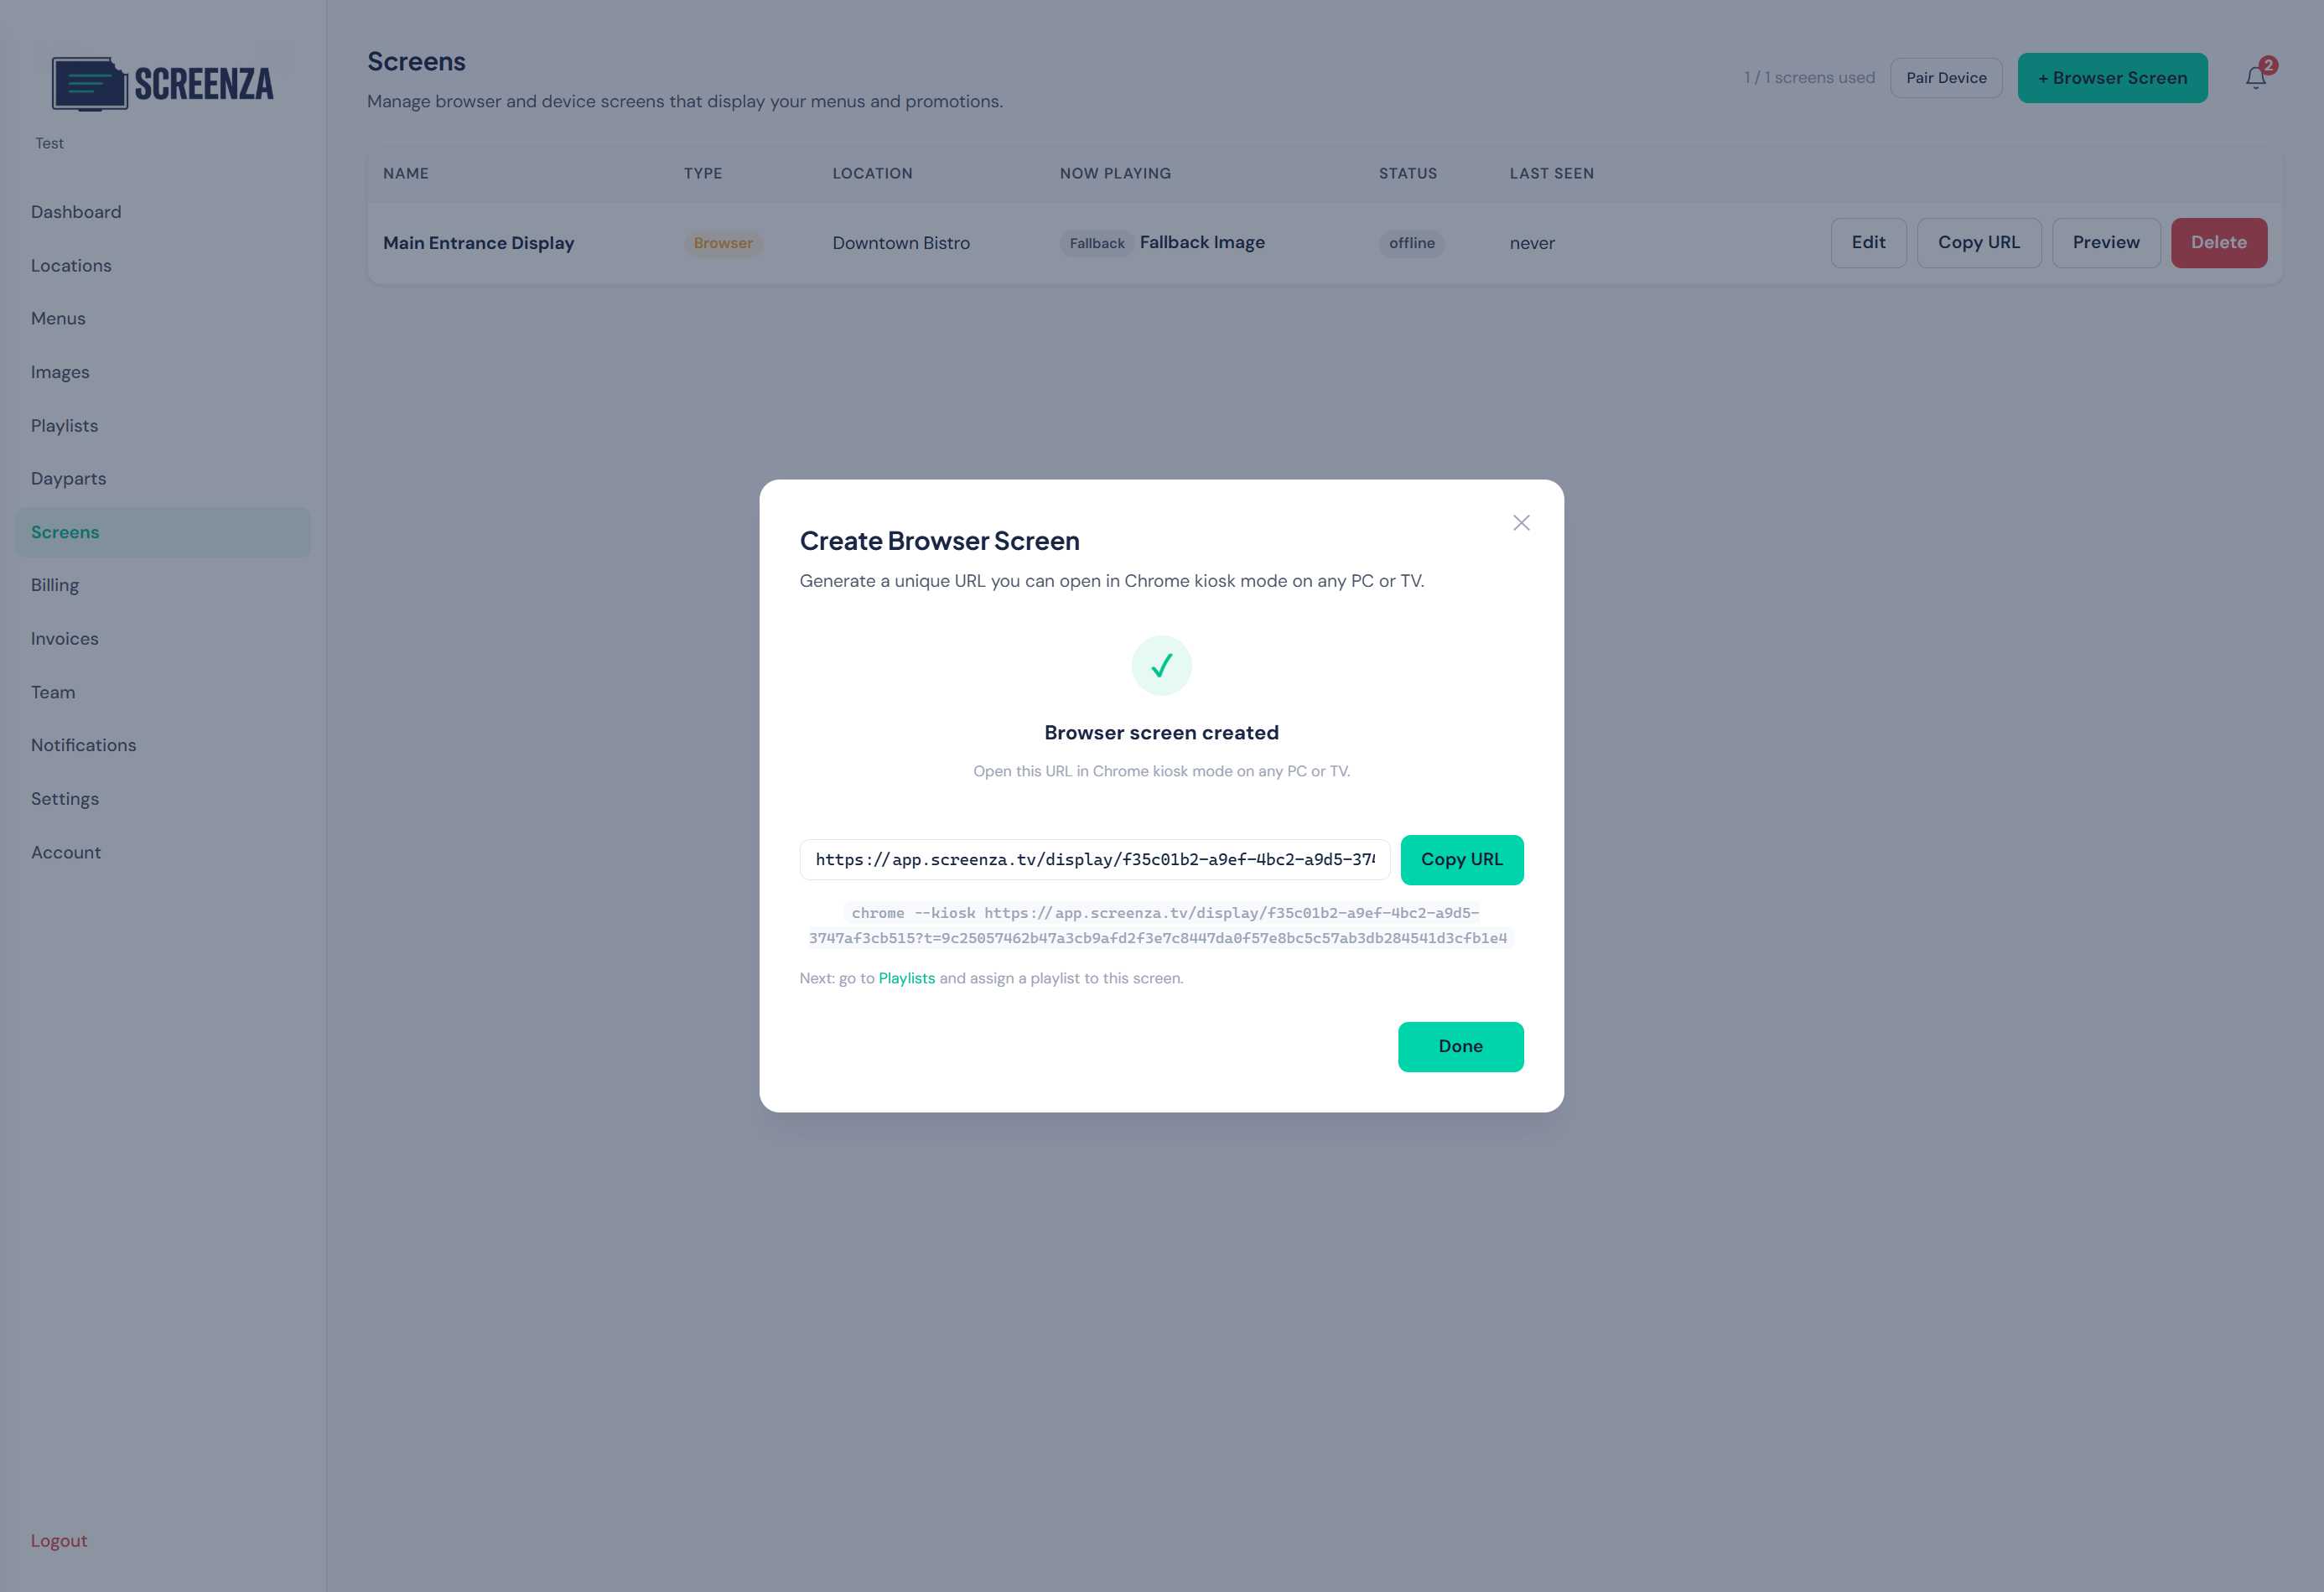
Tip: Copy the generated URL to open it in Chrome kiosk mode on any TV or PC.
Generate a Menu Board
Create an AI-powered menu board image from your menu.
- Click Images in the sidebar, then select the Menu Board tab.
- Choose your menu from the dropdown and enter your restaurant name.
- Choose the Image Size that matches your display — for example, use 4K for ultra-sharp results on 4K screens, or 1K for quicker generation on smaller displays.
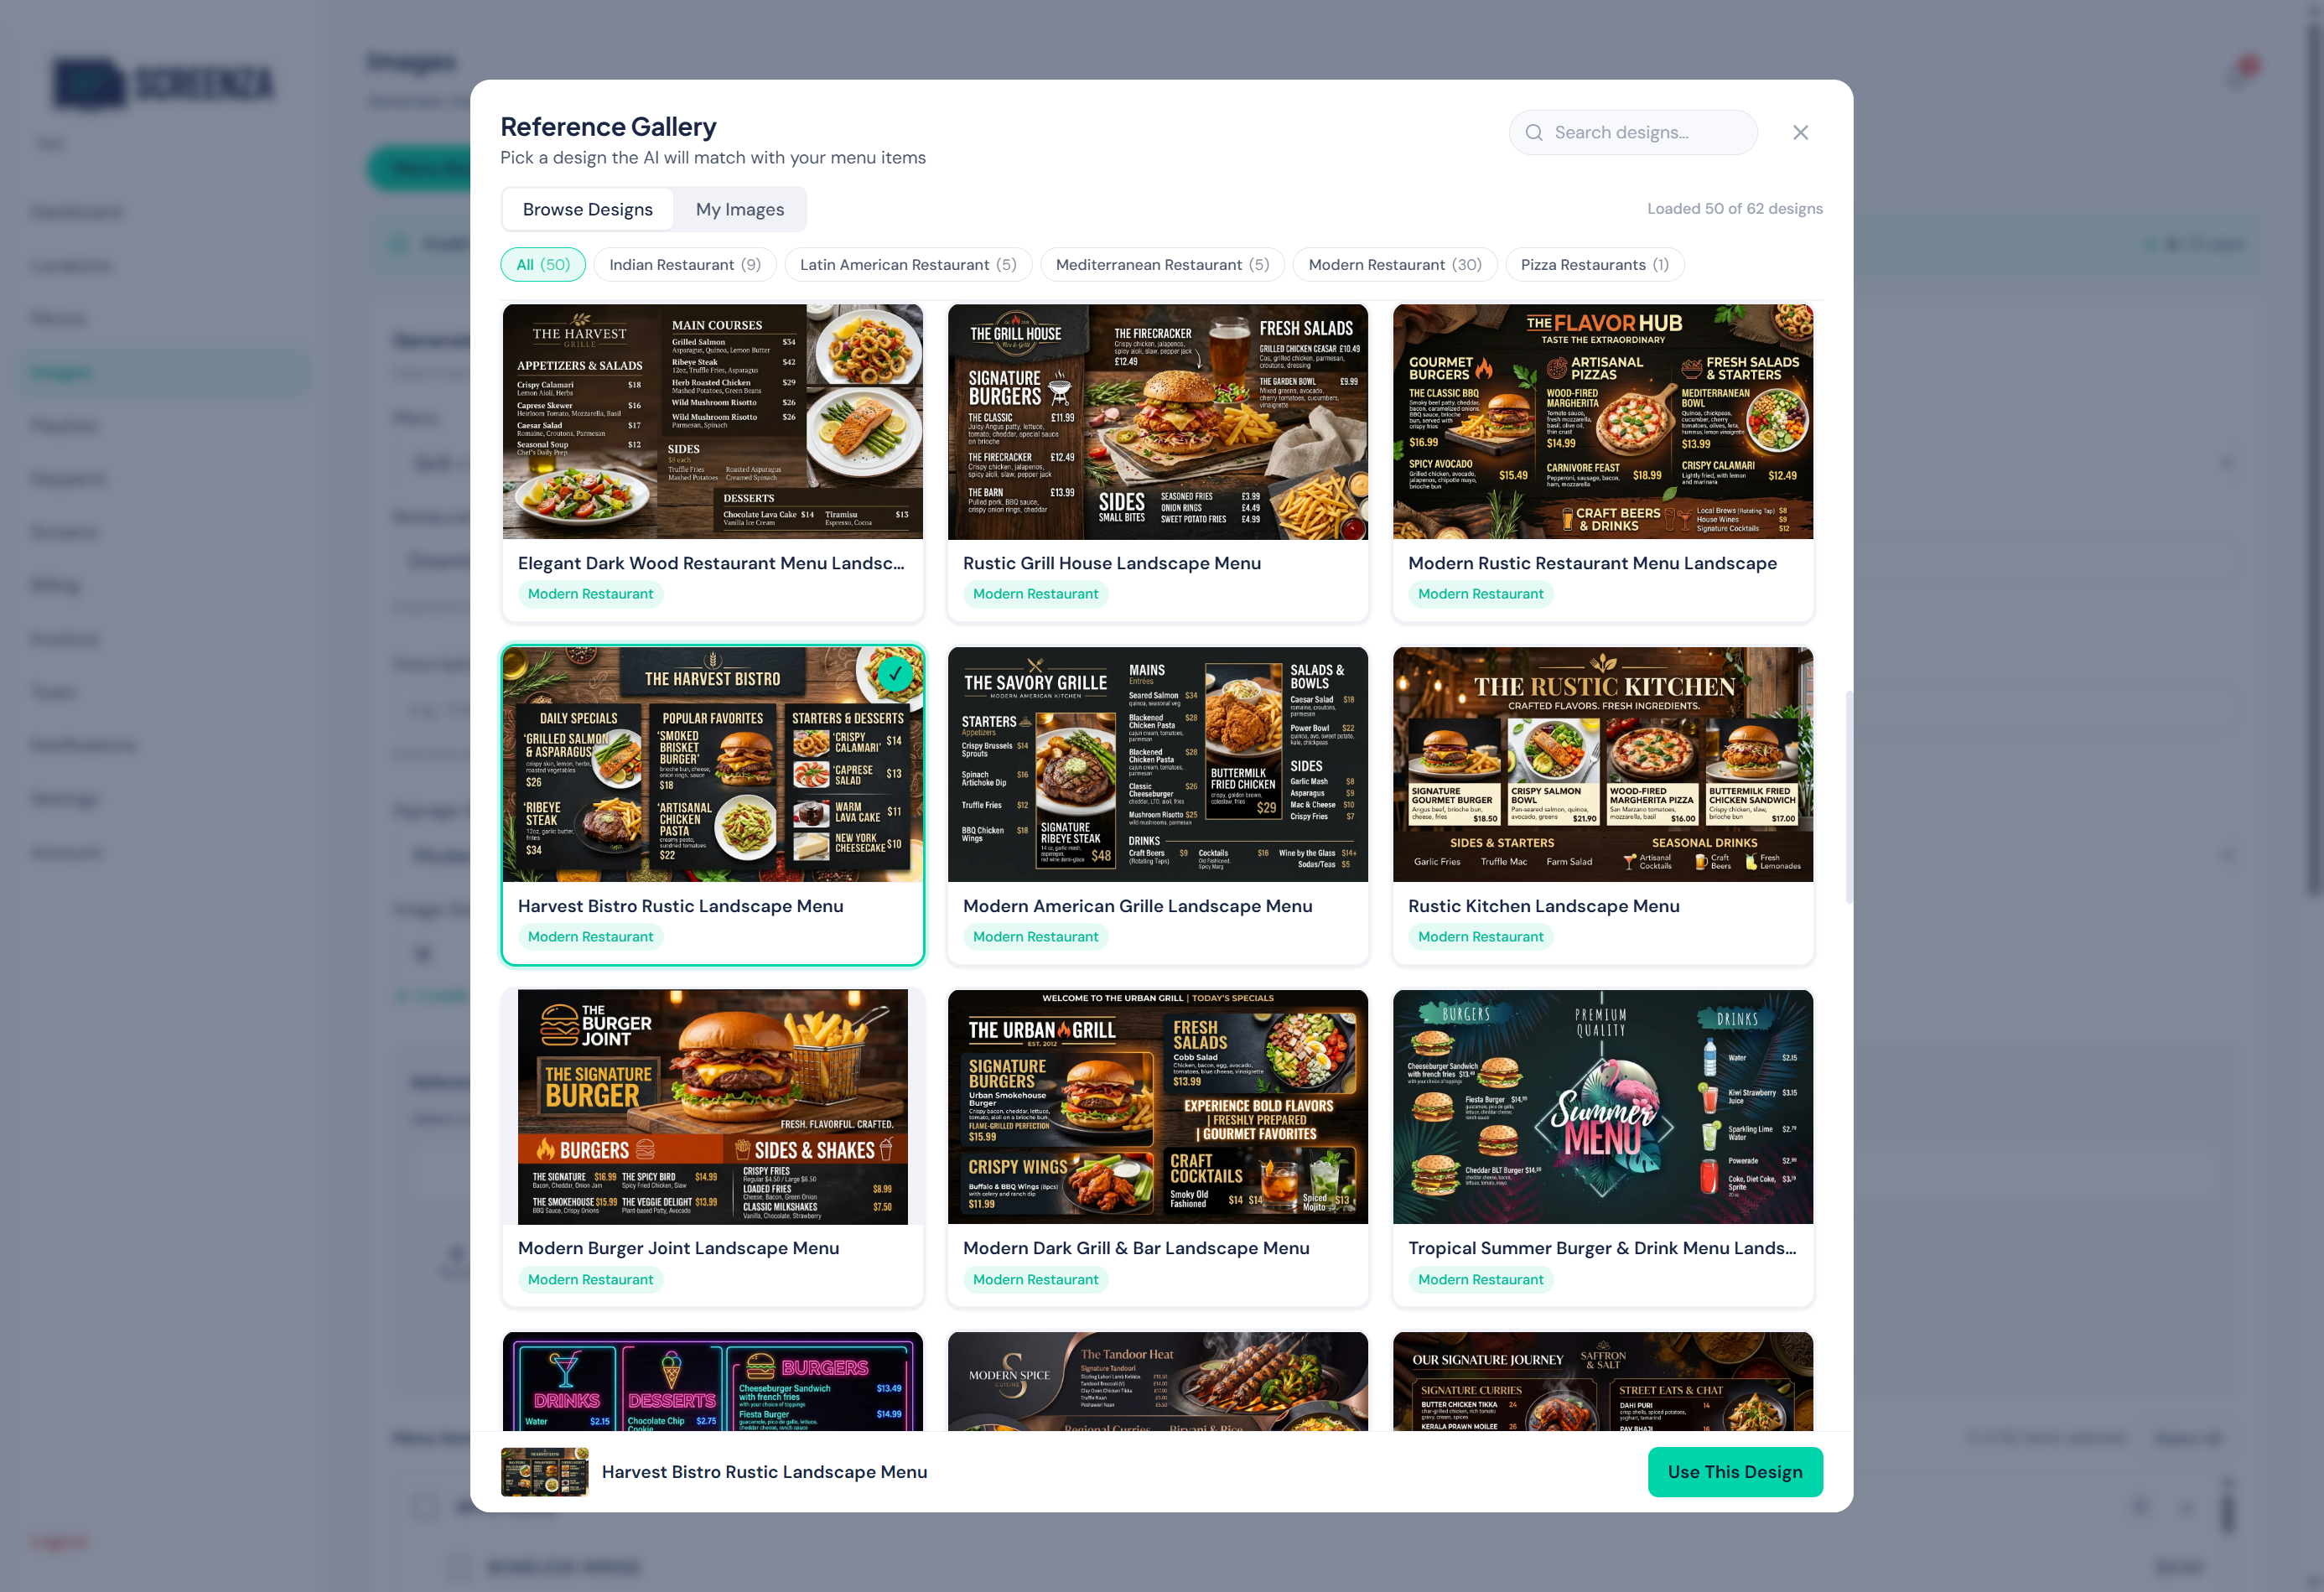
- In the Reference Design section, click Browse Designs and pick a design you like from the gallery — the AI will match its layout and style with your menu items.
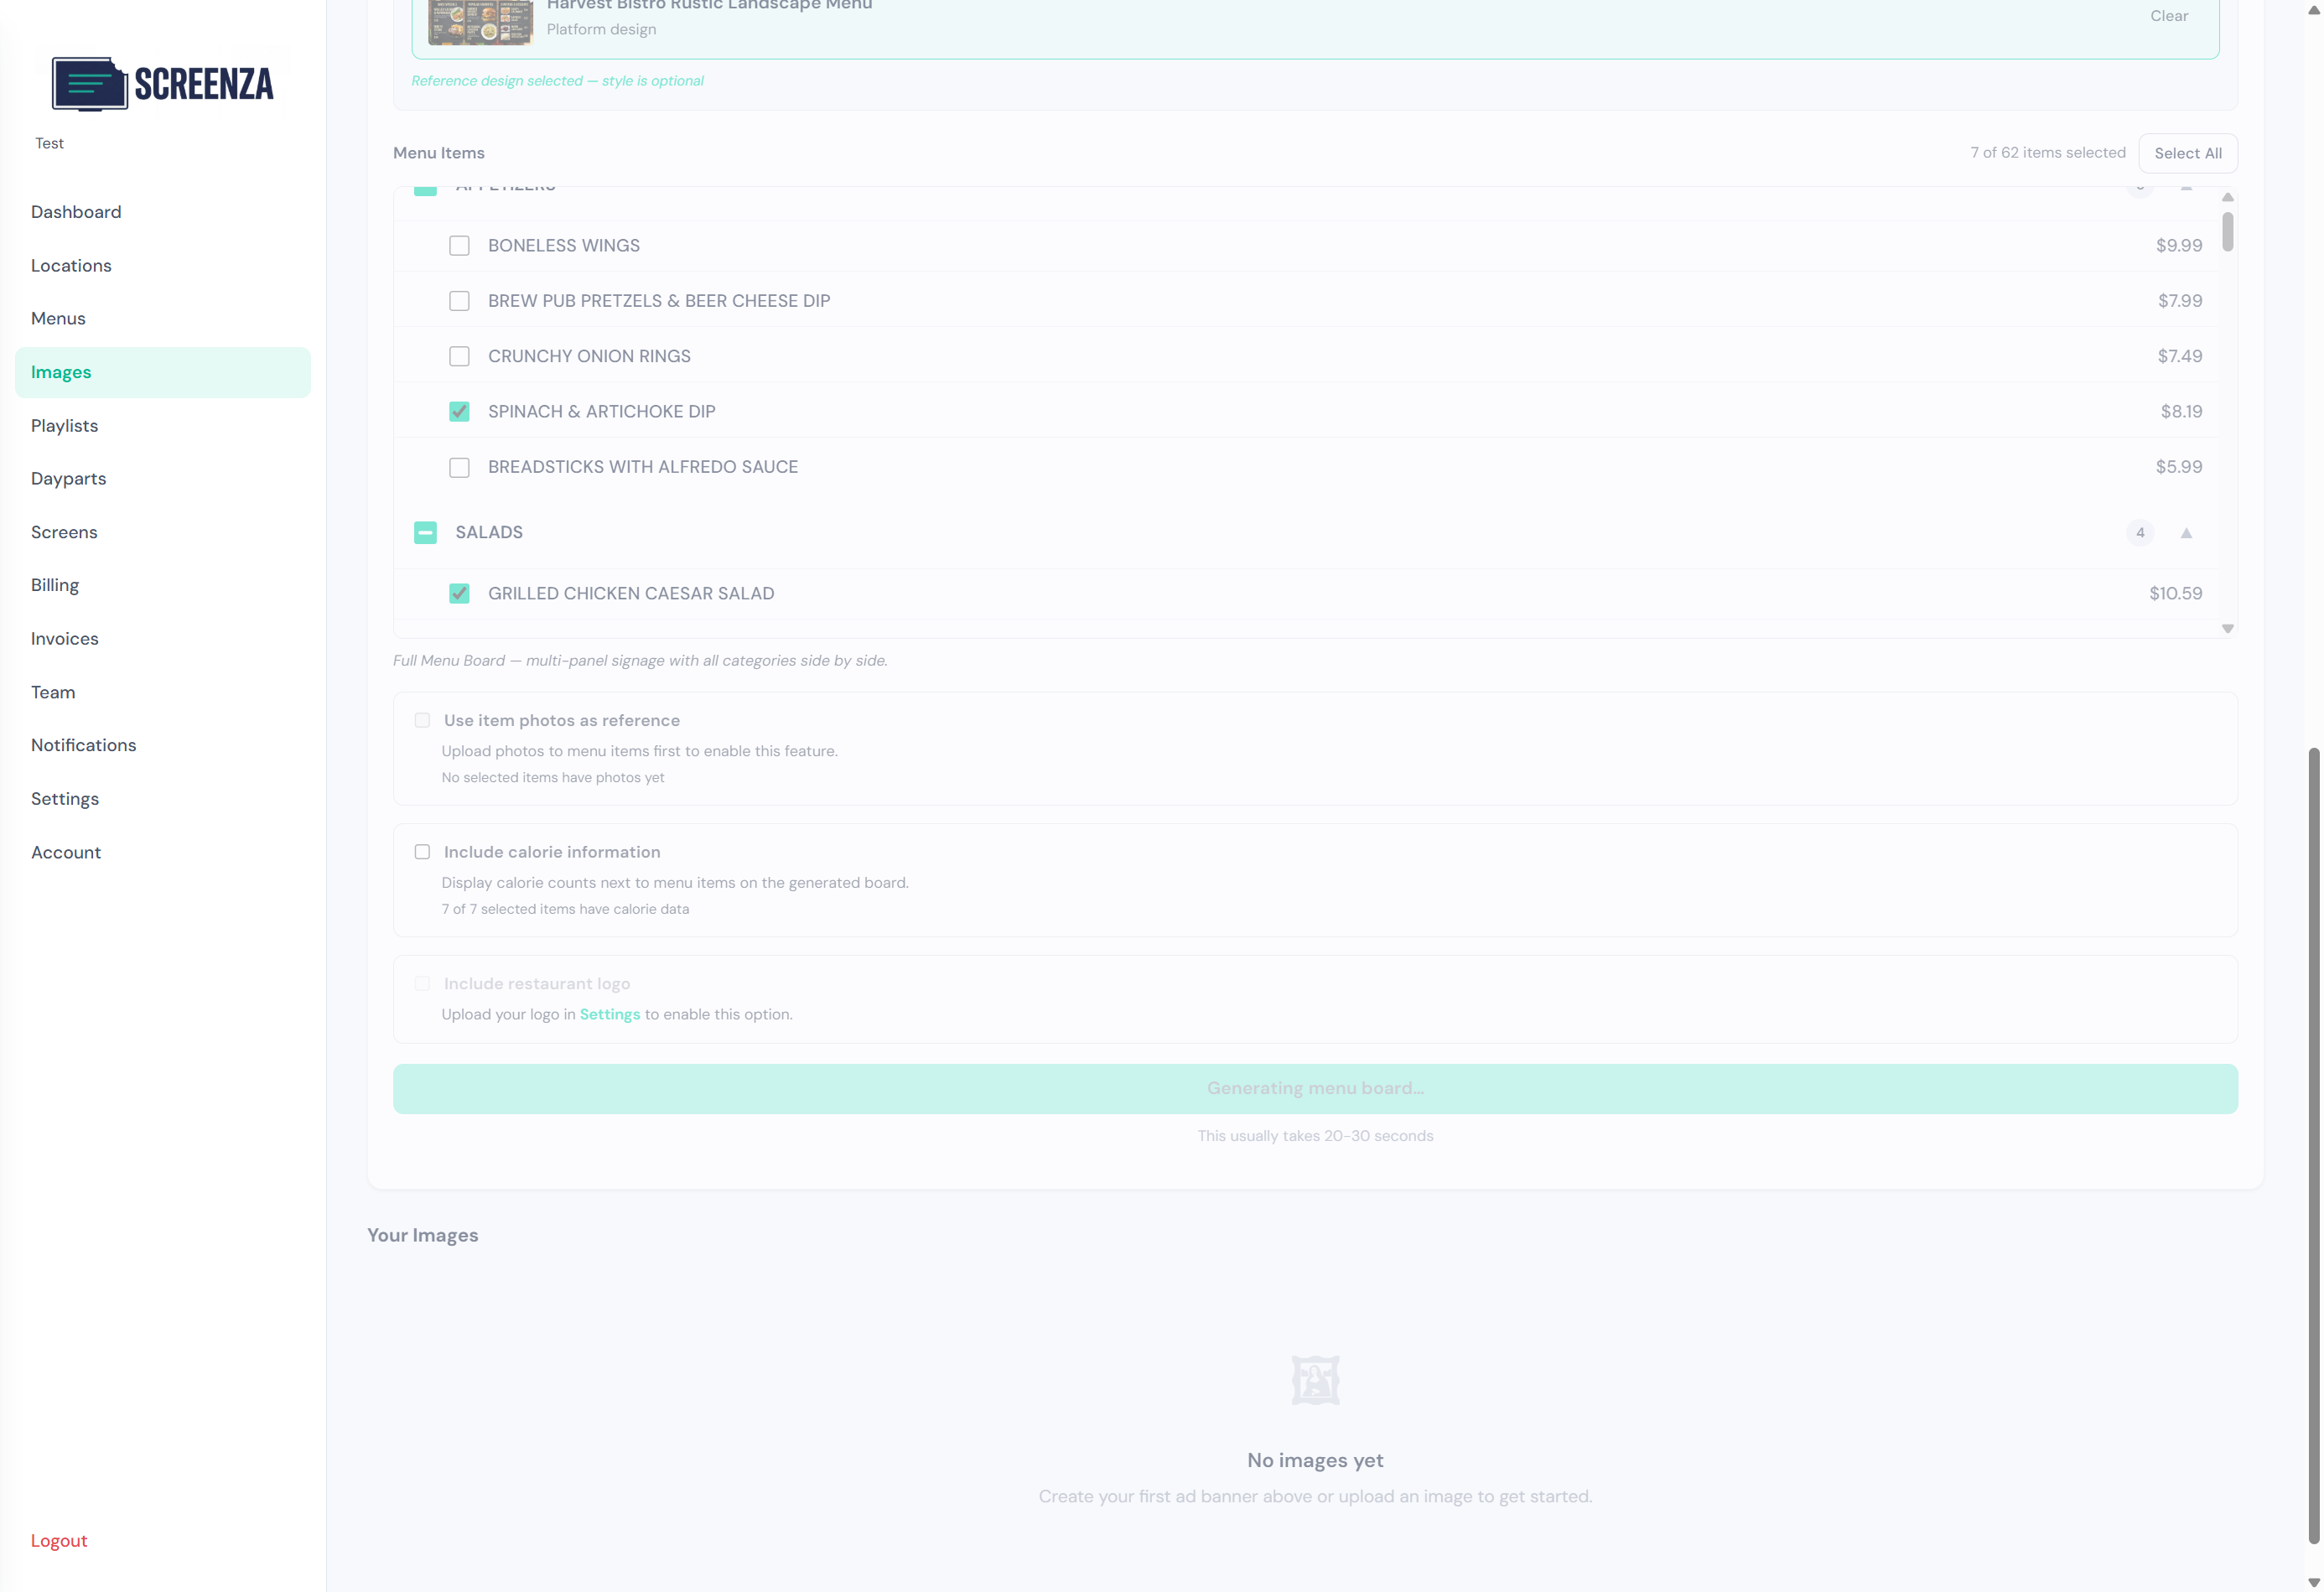
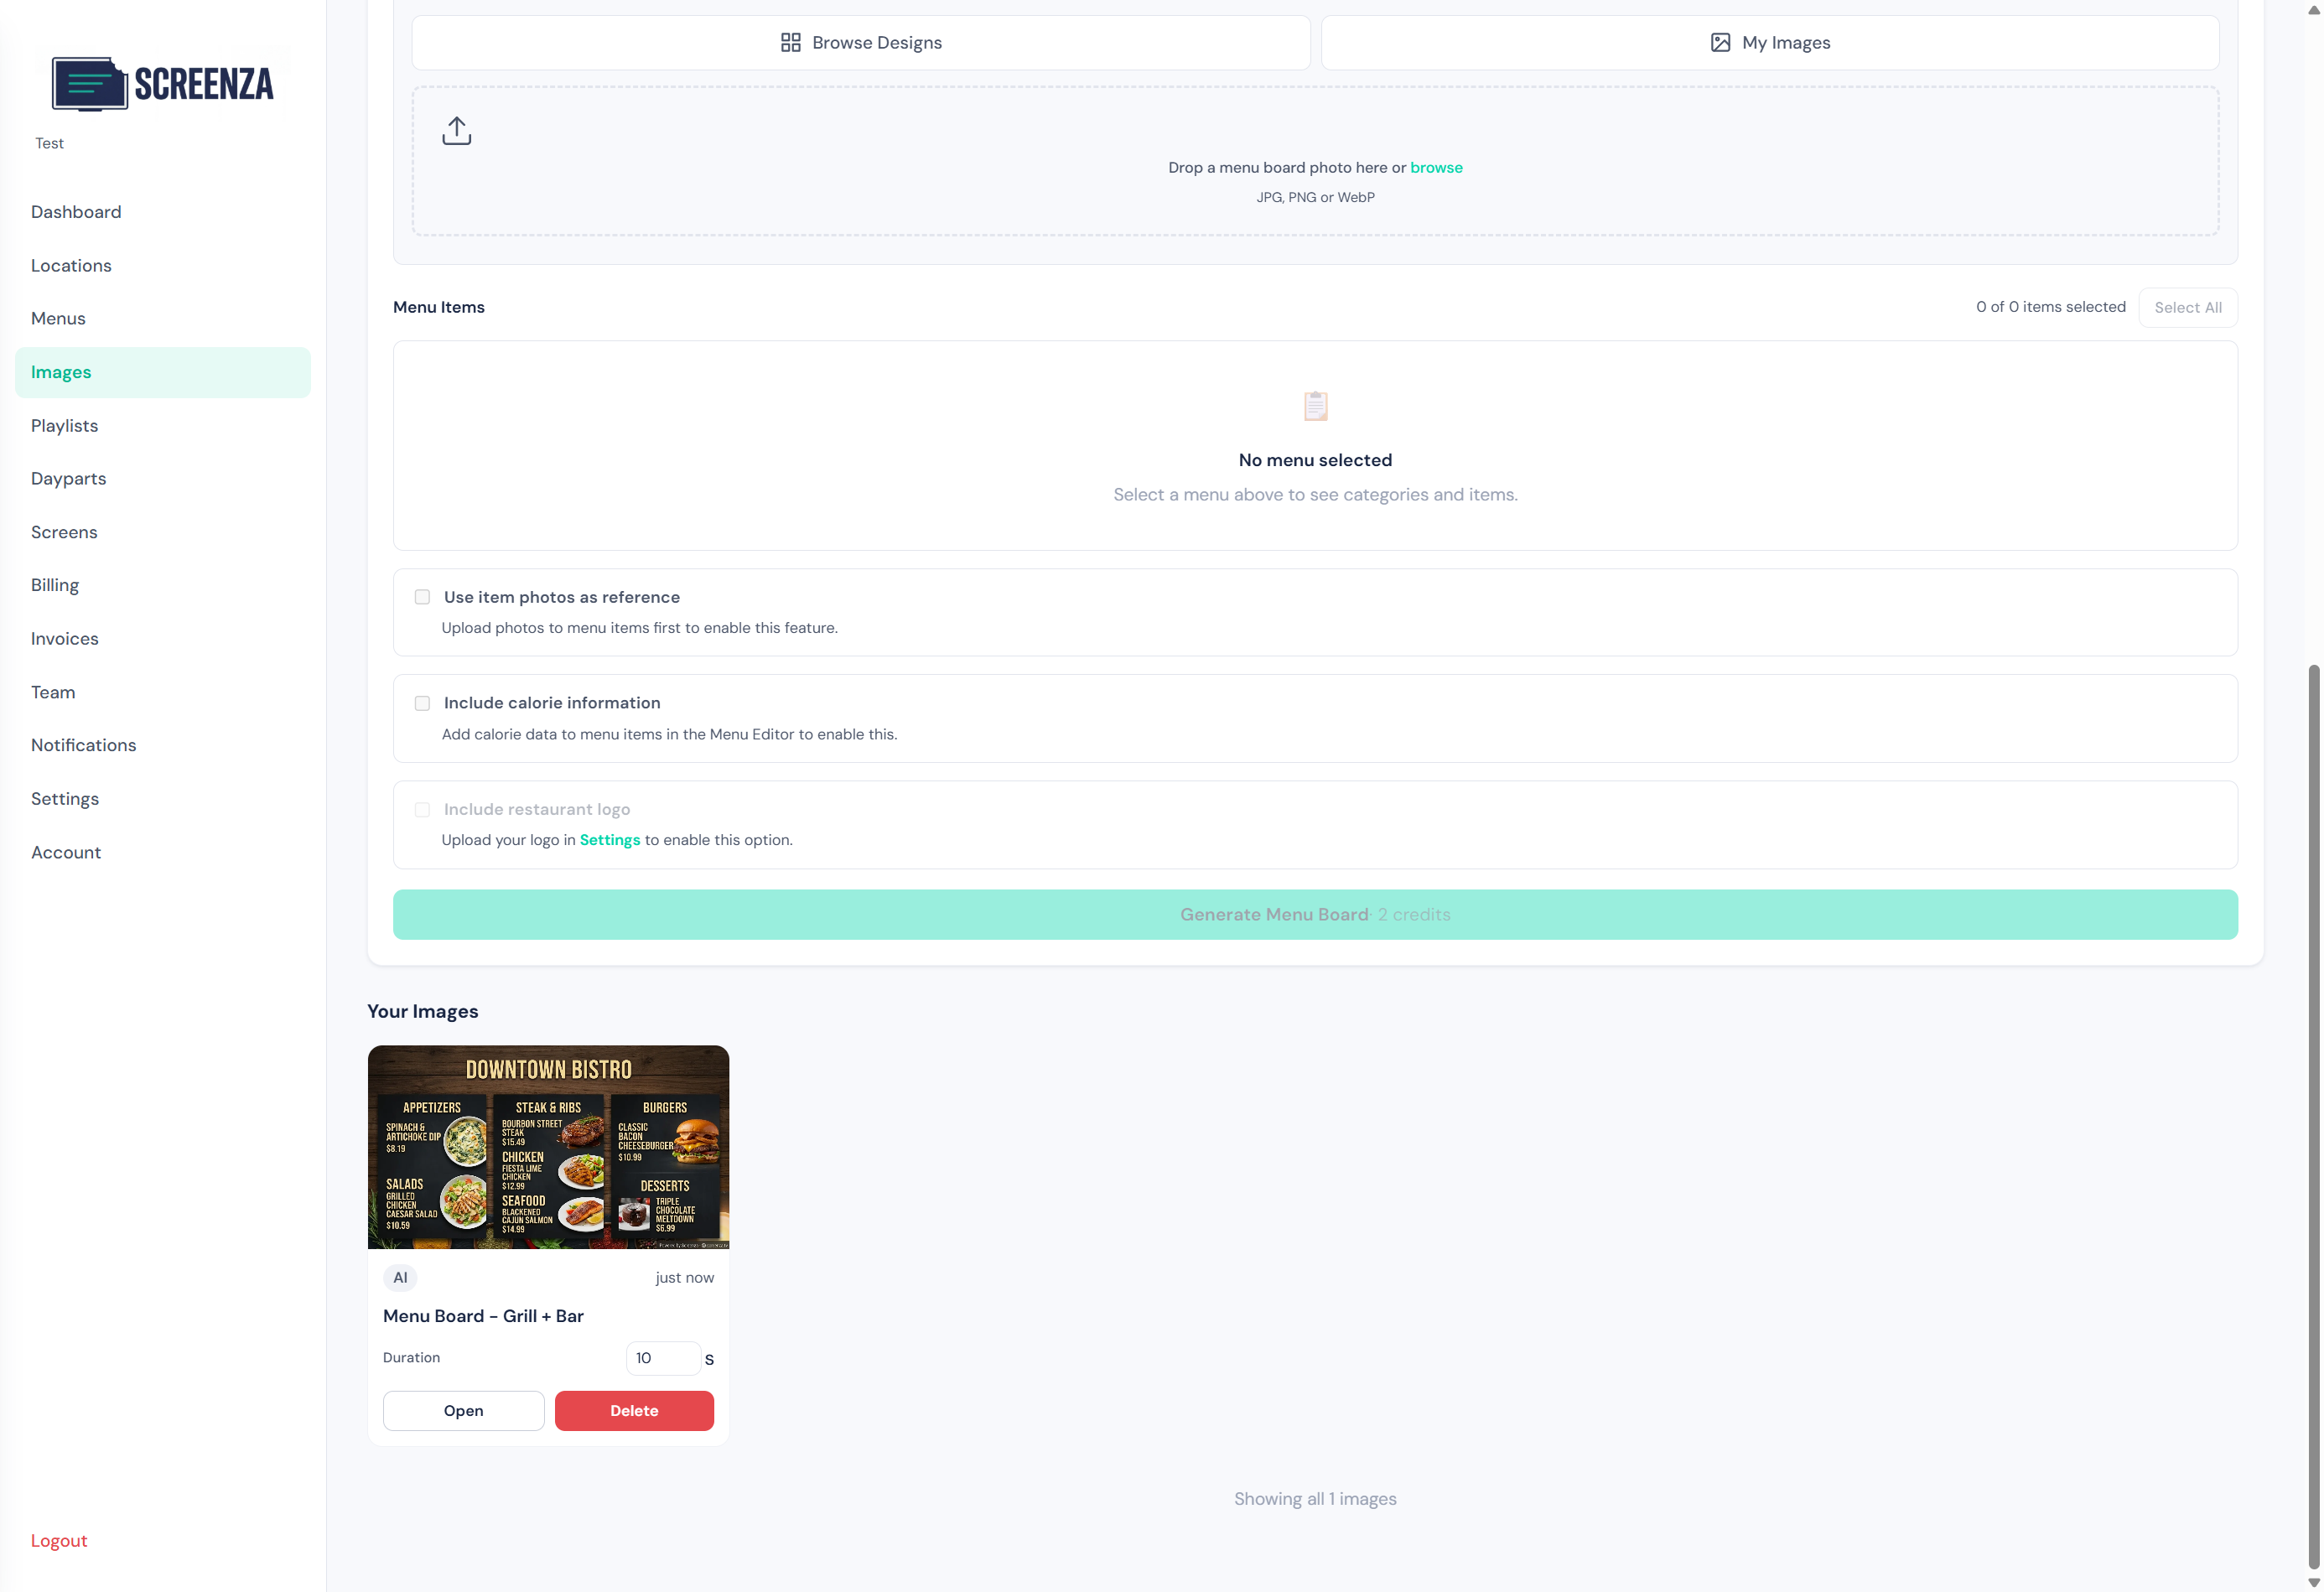
- Select the menu items you want to feature, then click Generate Menu Board.
You can also upload your own reference image or even snap a photo of a menu board you like — the AI will use it as a style guide. The signage style is automatically matched to your chosen reference, so there is no need to set it manually.
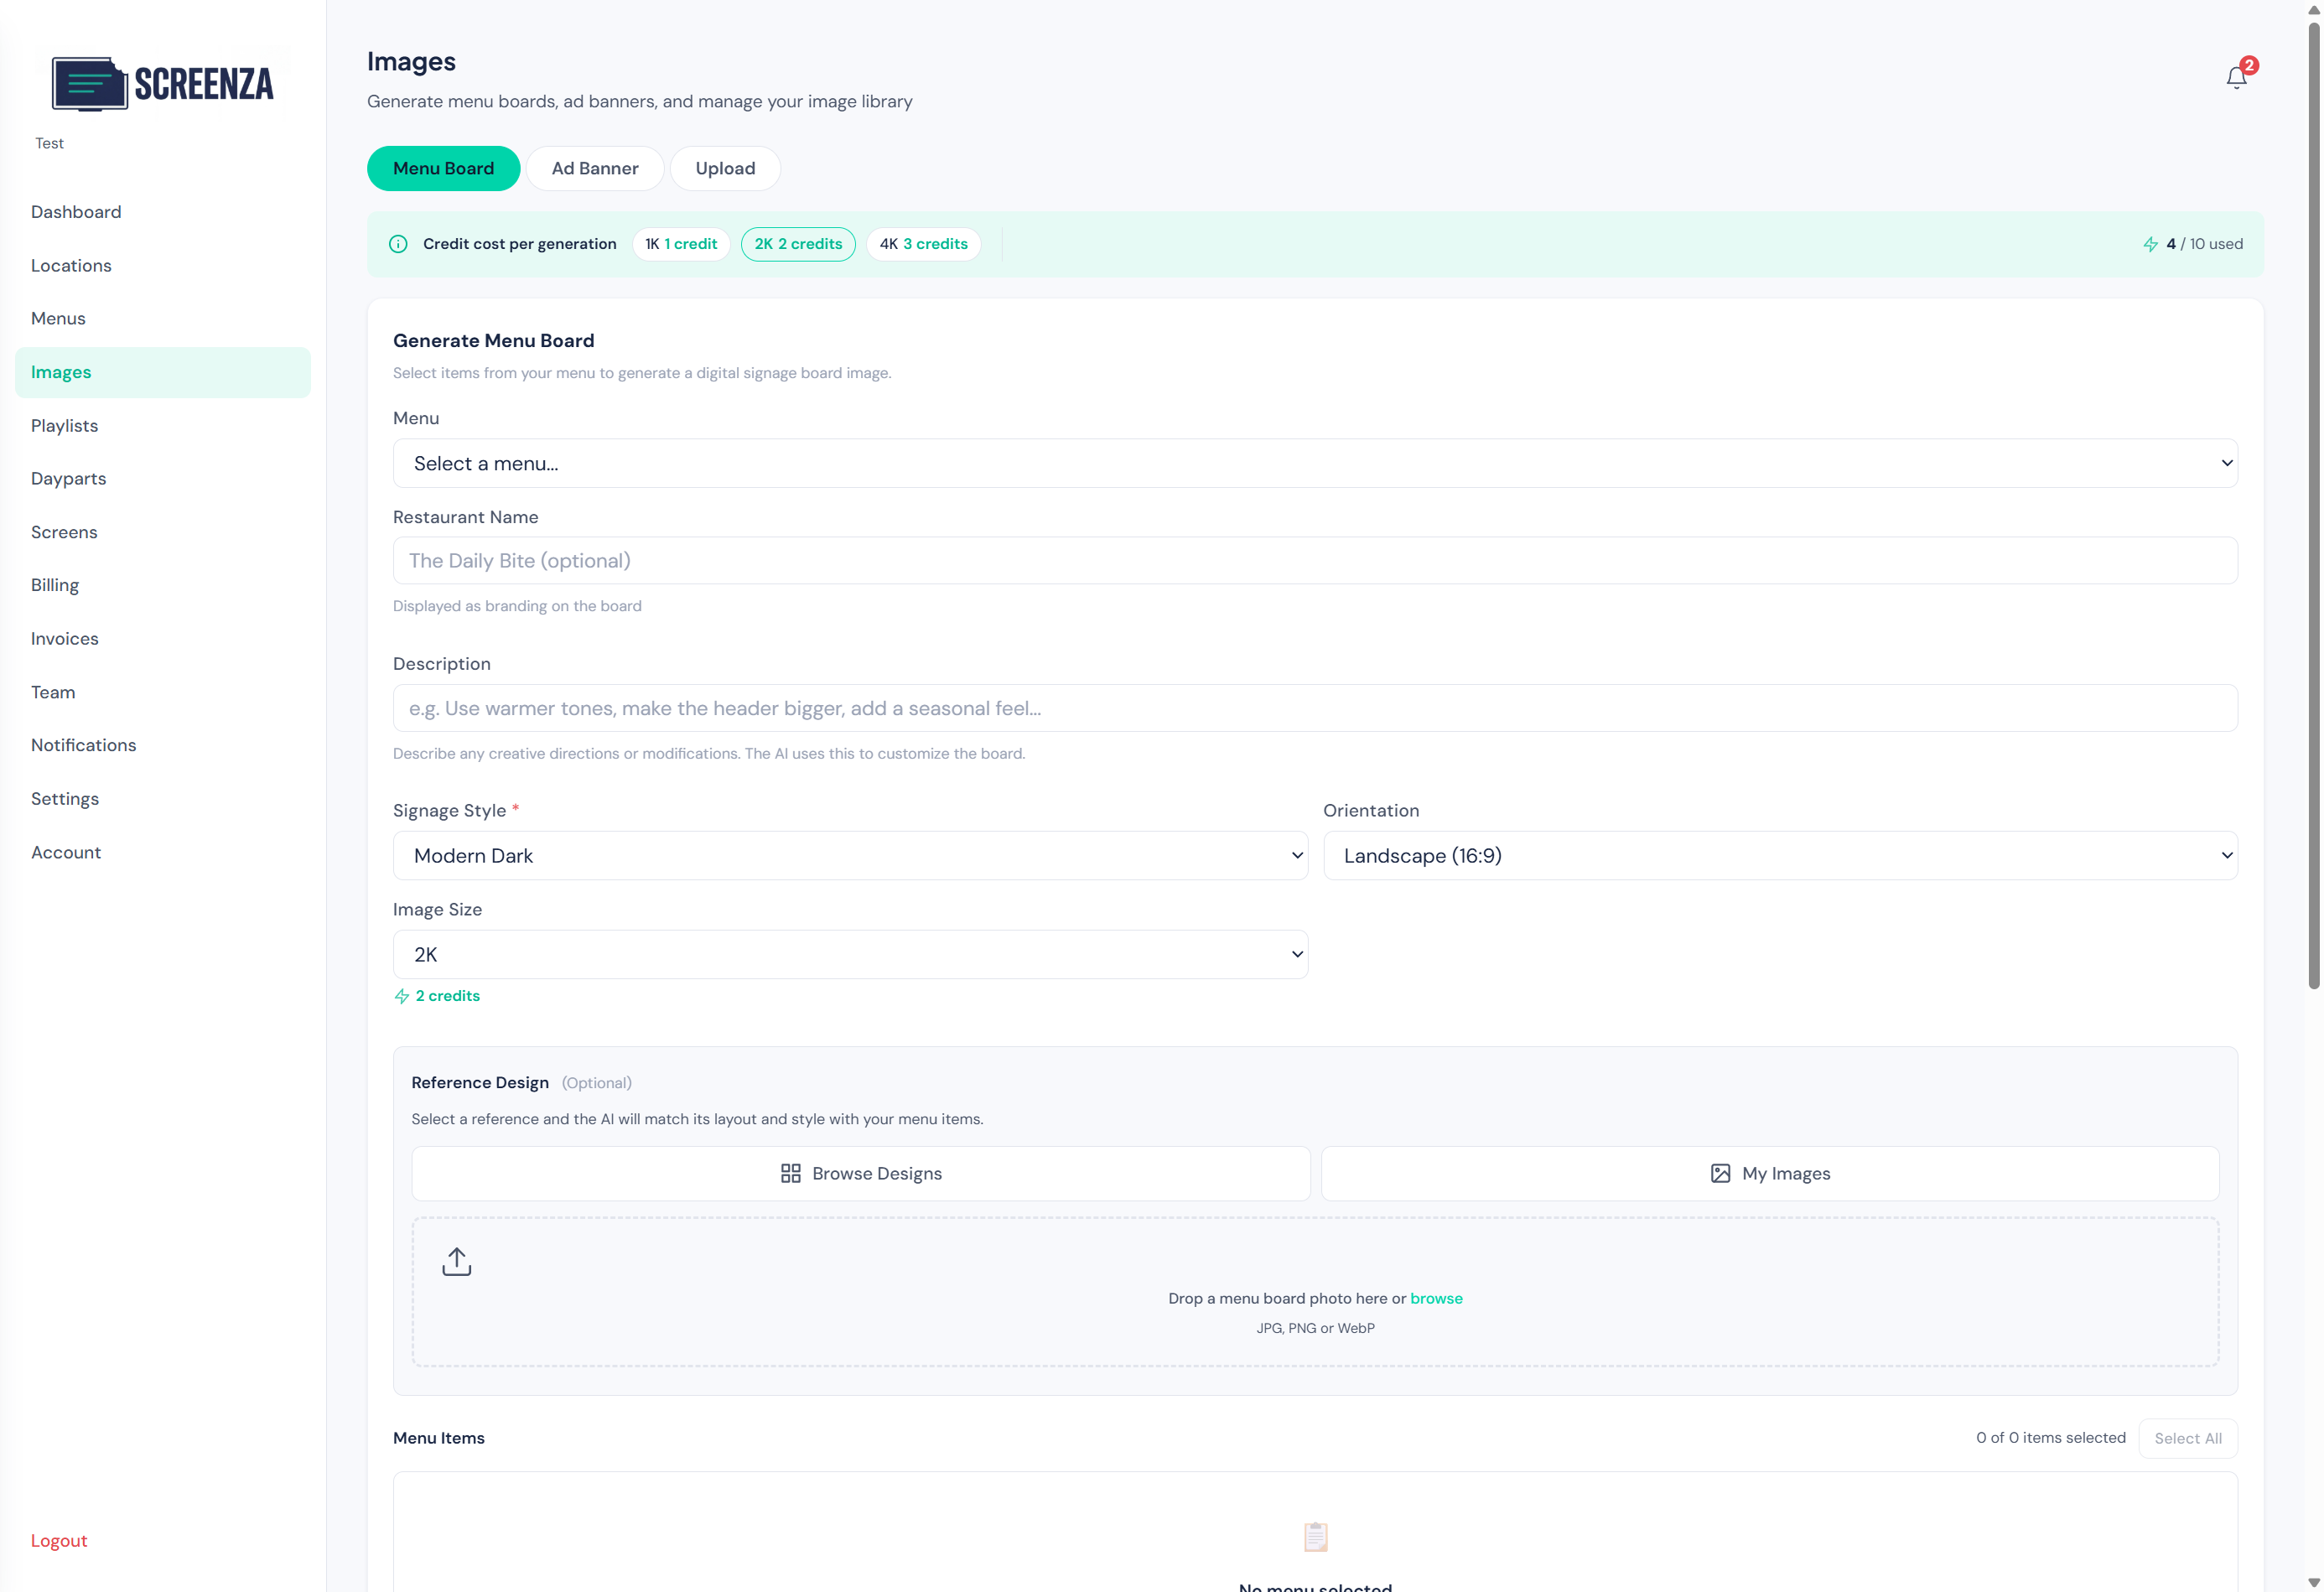
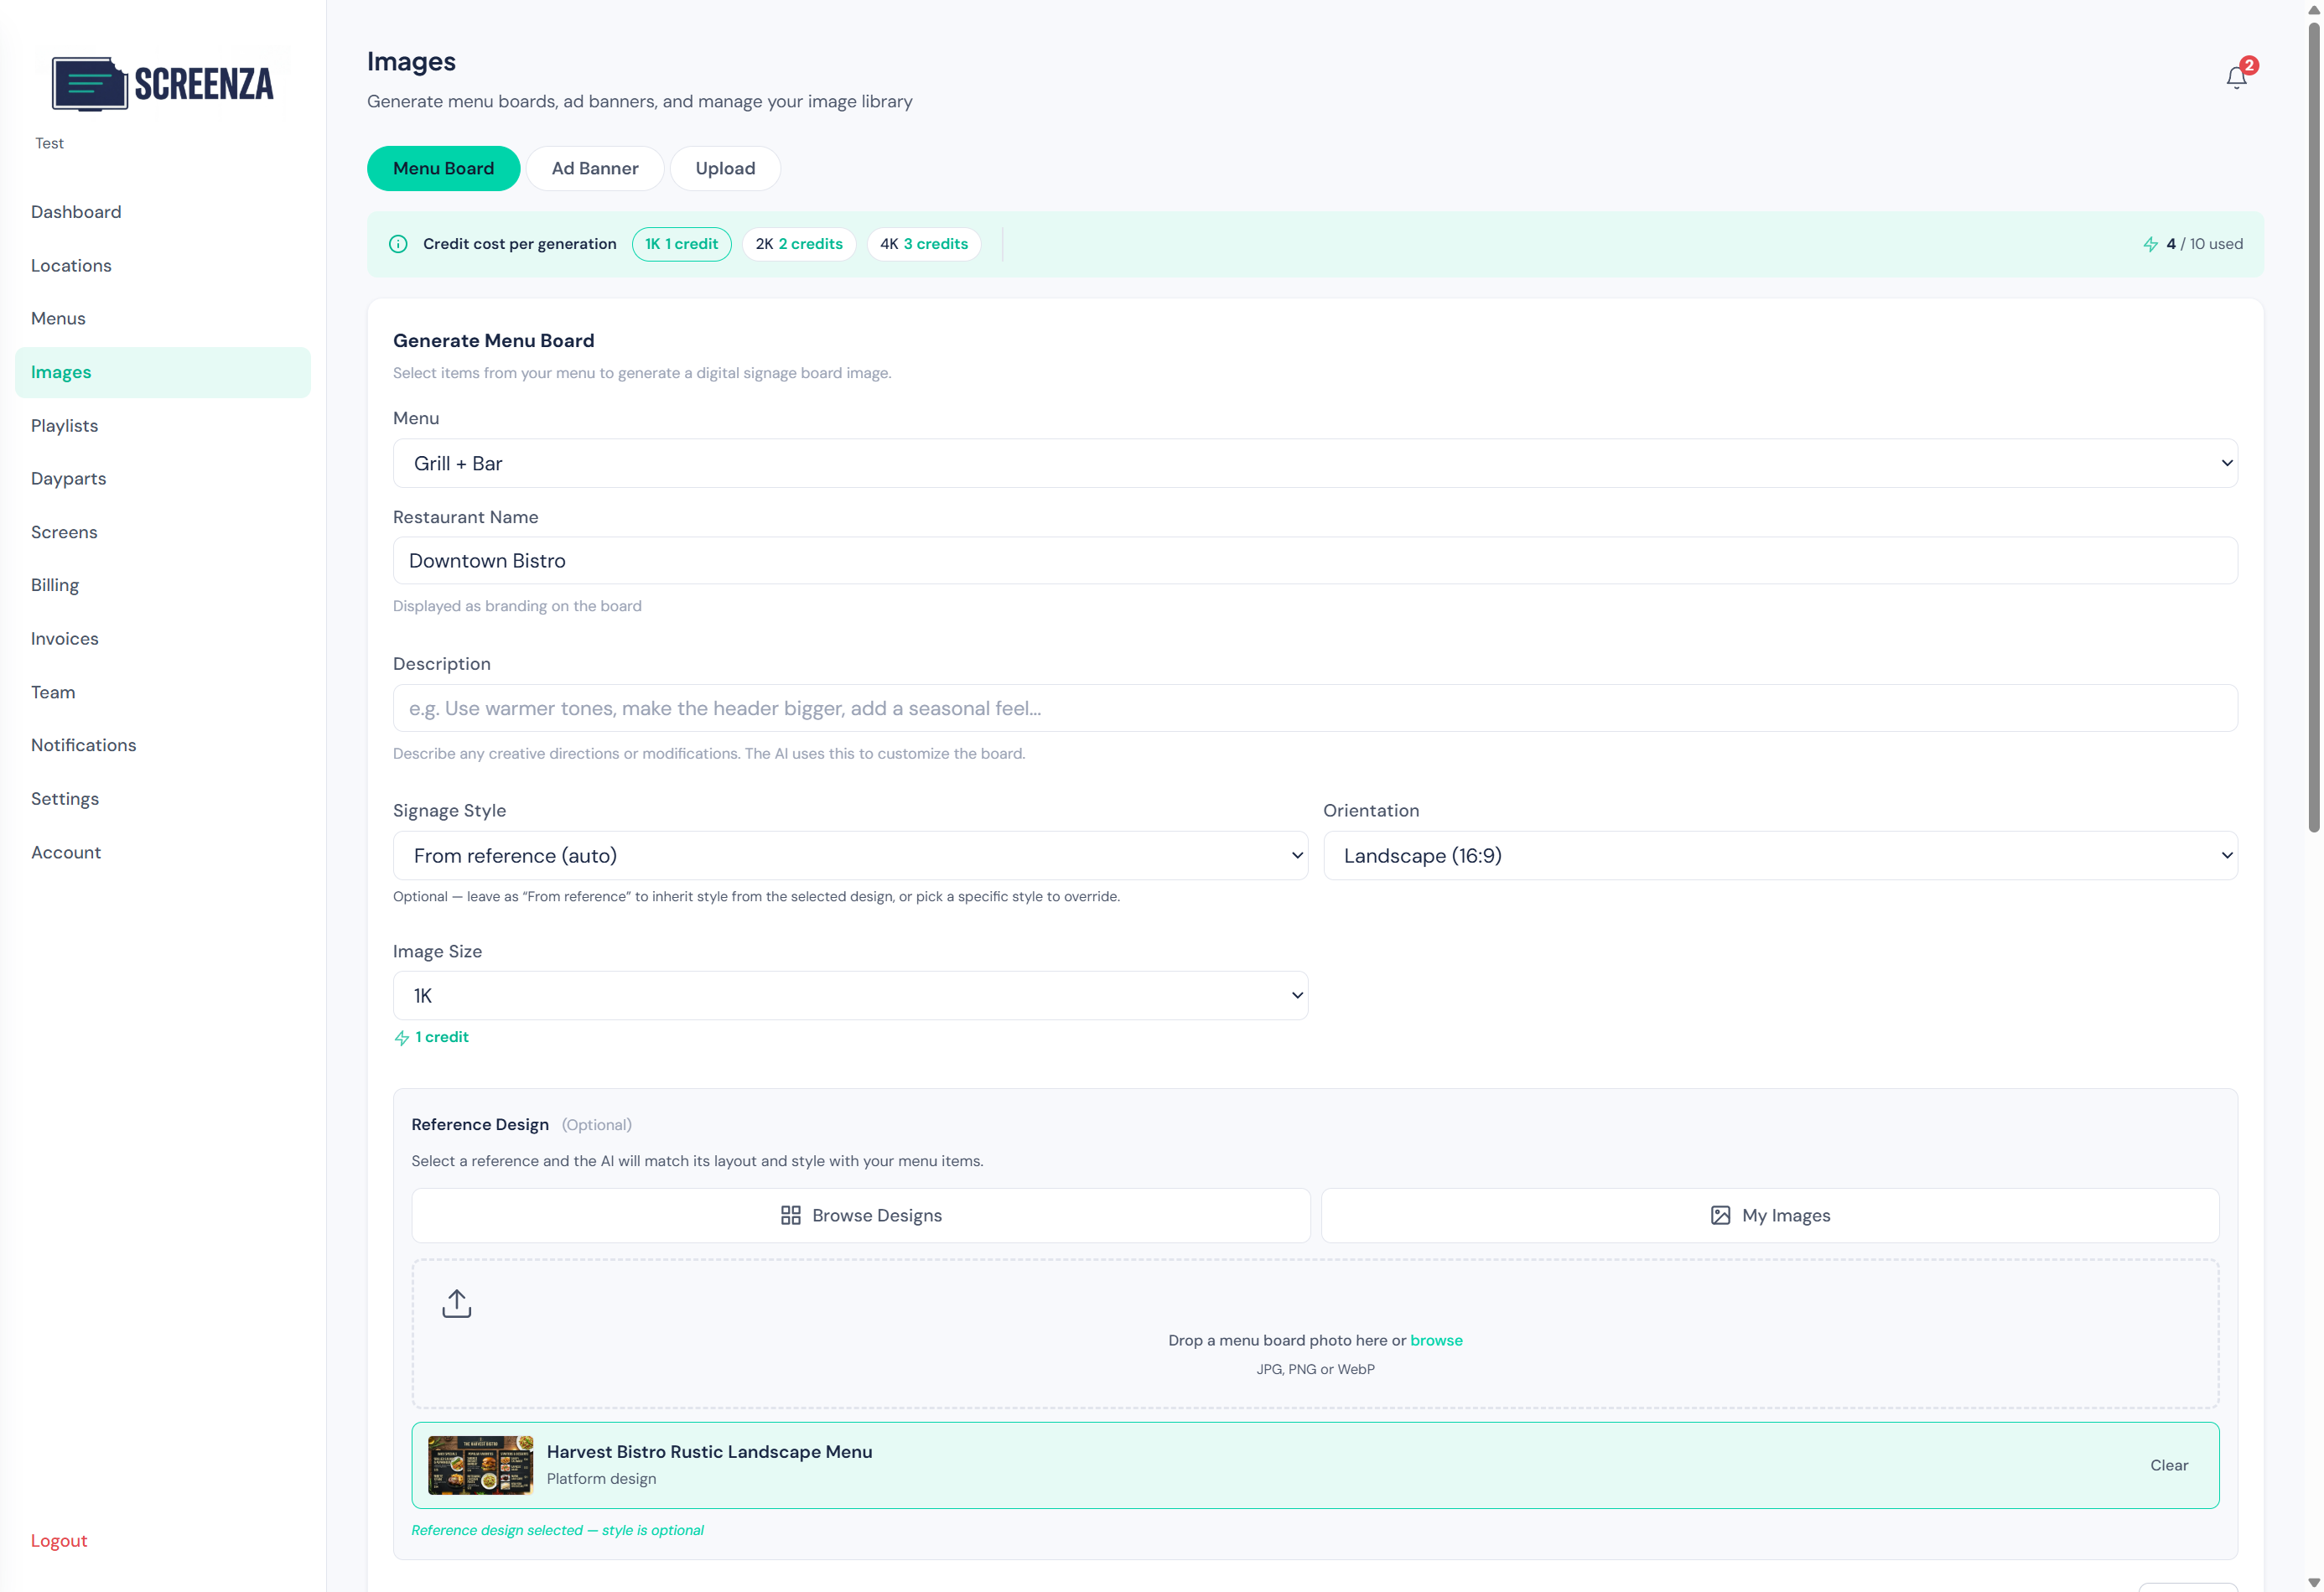
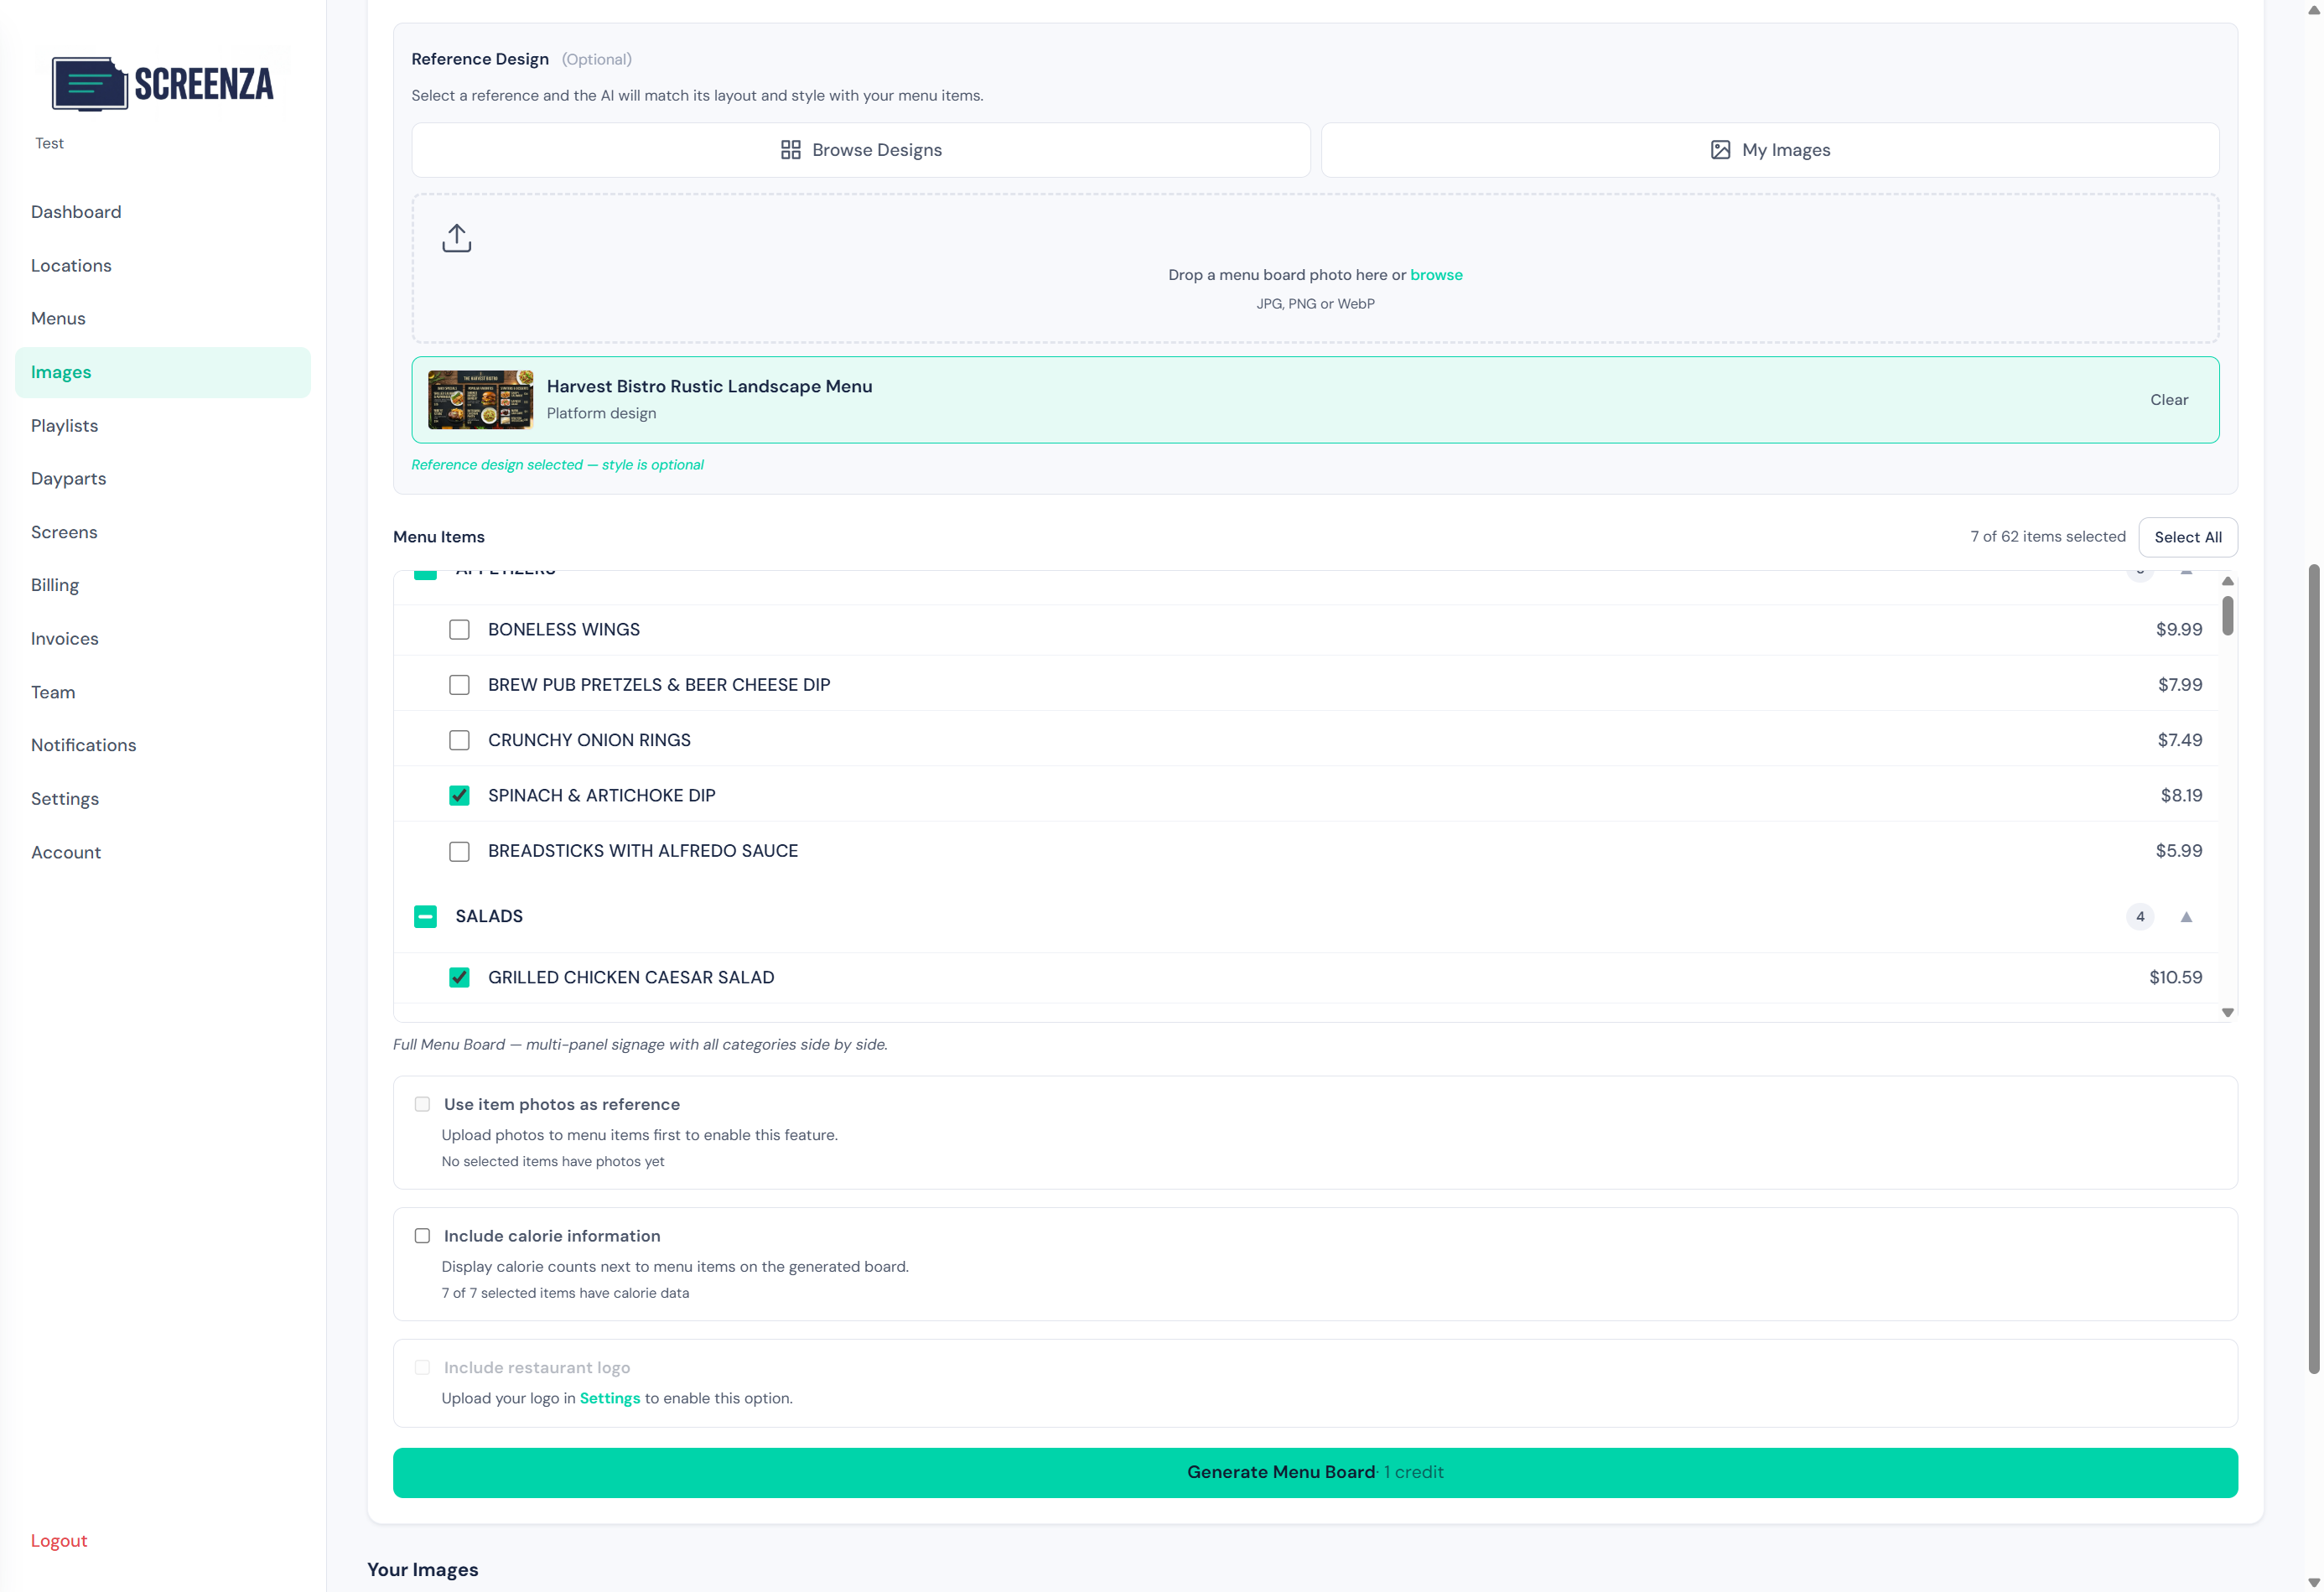
Tip: You can select as many menu items as you want, but for the best visual result we recommend featuring a focused selection — a handful of items or a few categories per board. The ideal count also depends on the reference design you pick; some layouts work better with more items, others with fewer. When in doubt, start small and generate another board later for additional items.
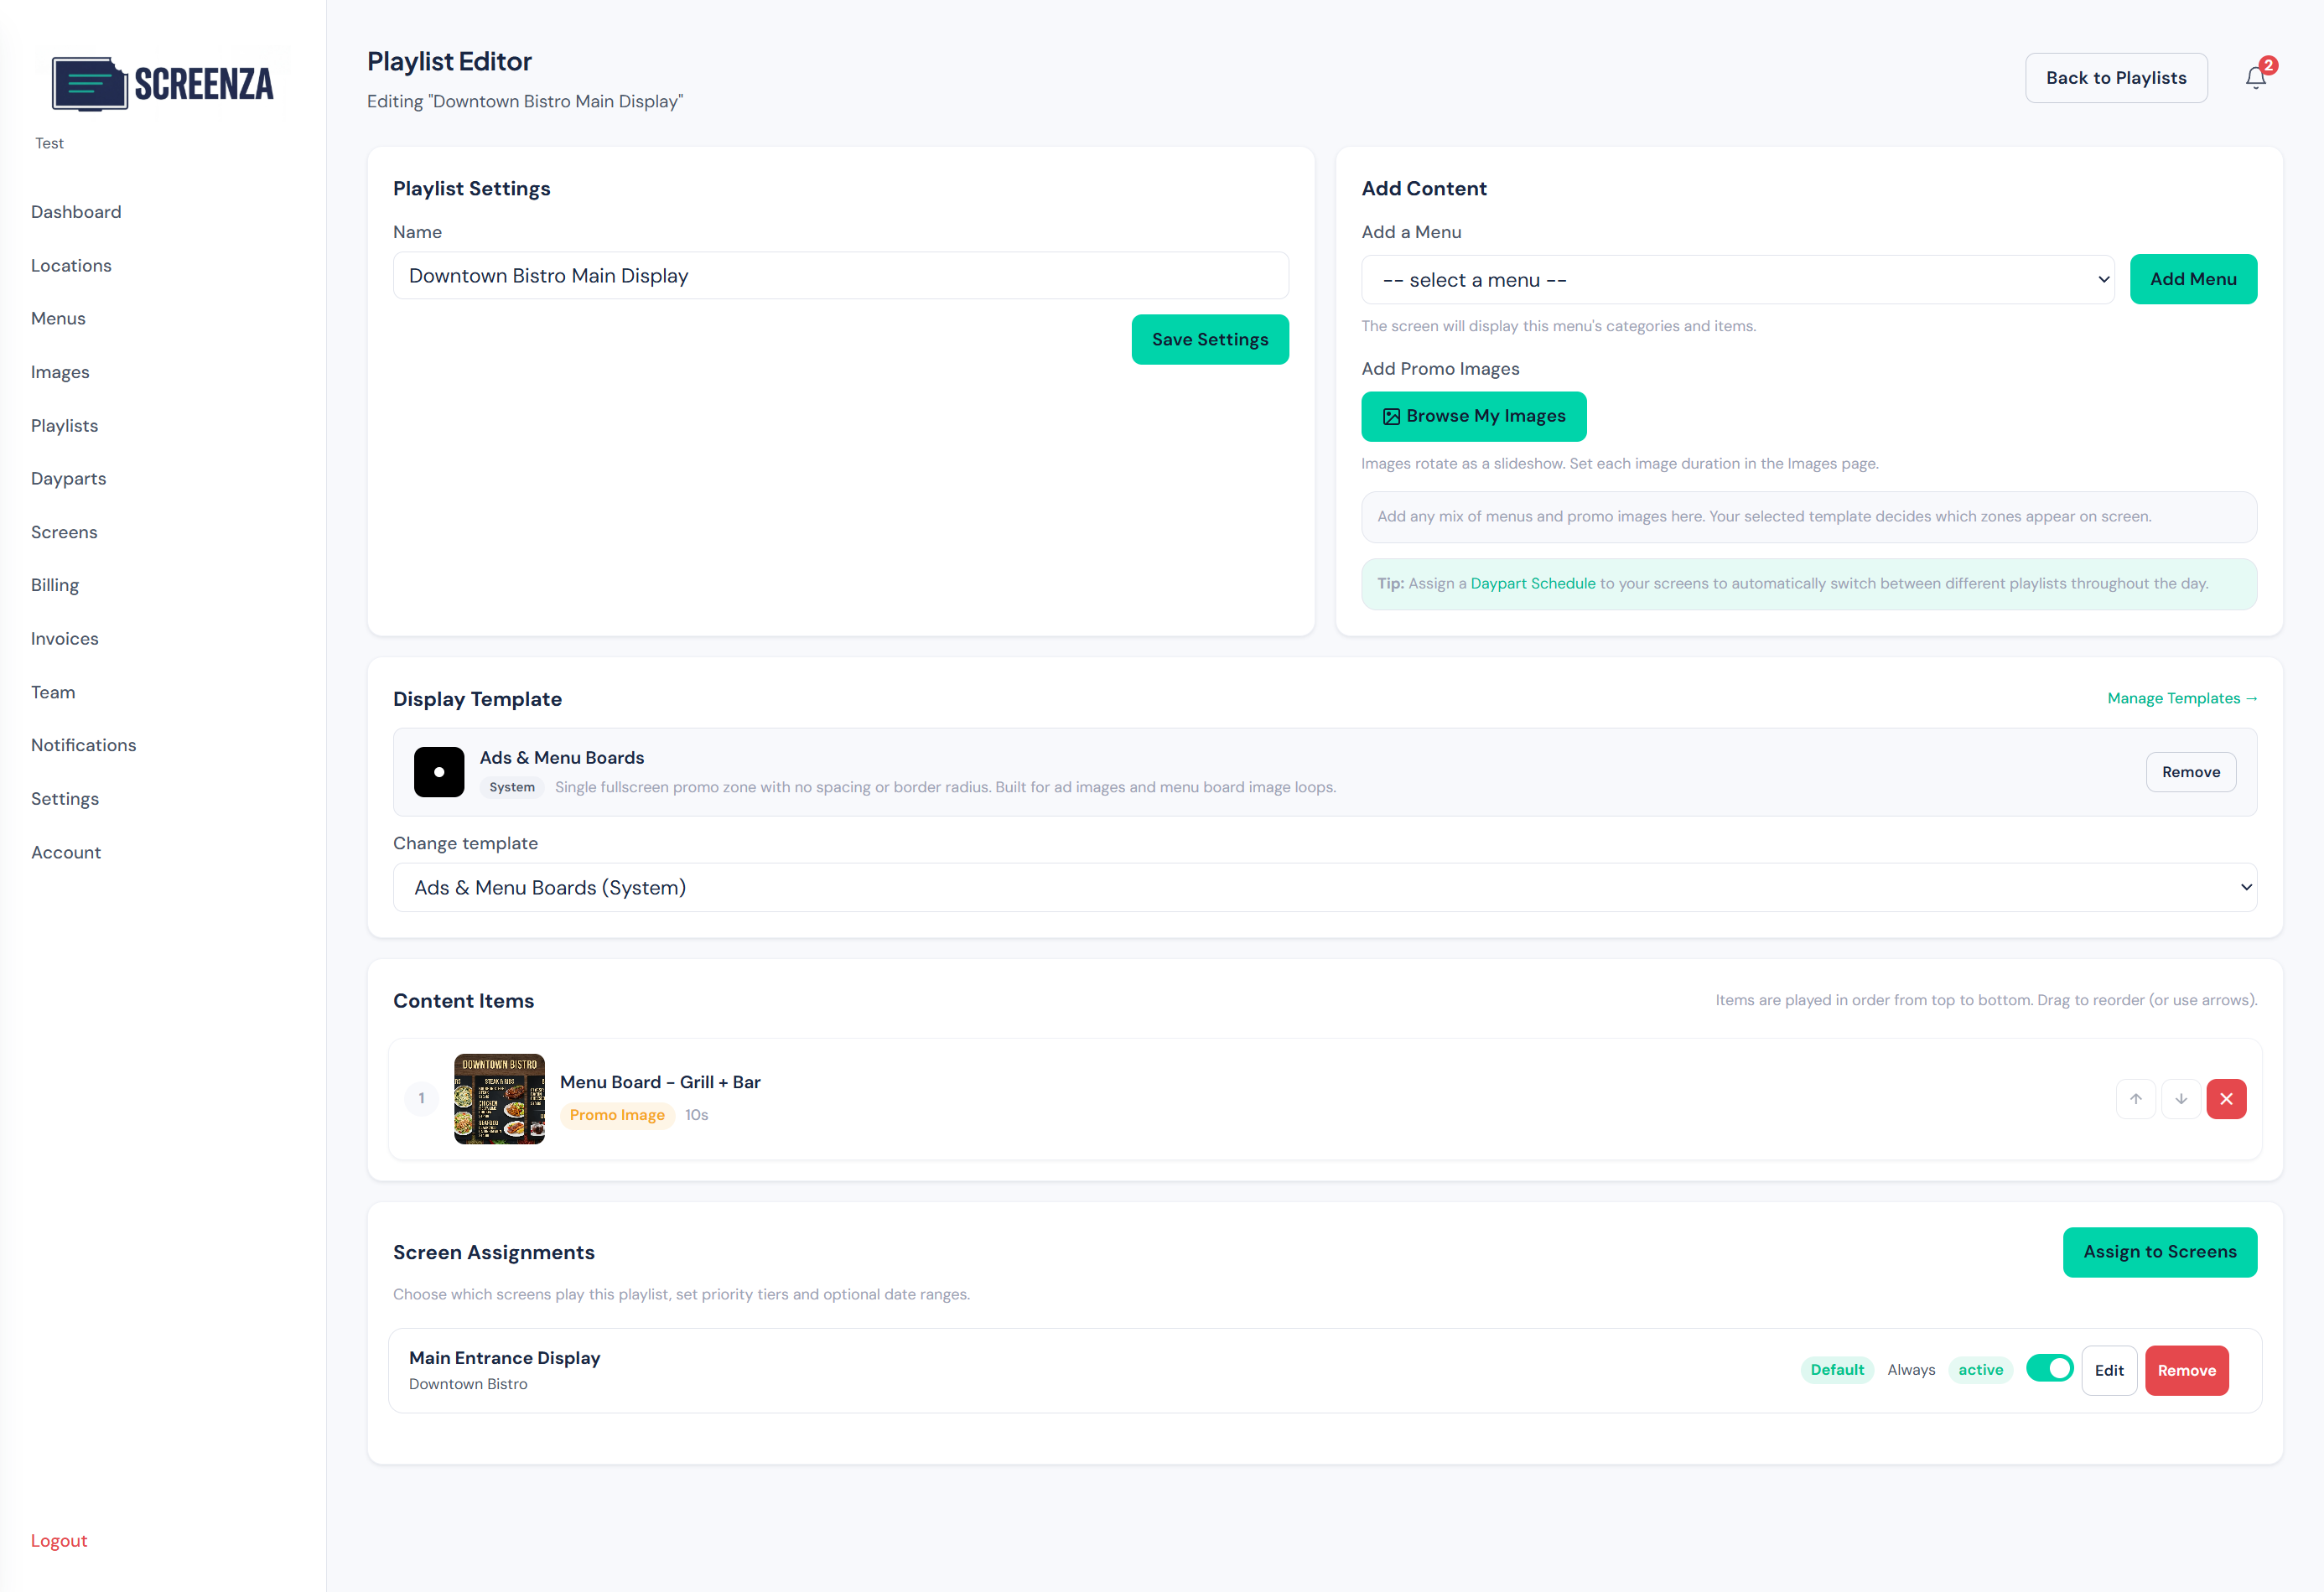
Create a Playlist
Build a playlist to organize your content.
- Click Playlists in the sidebar.
- Enter a name for your playlist.
- Click Create.
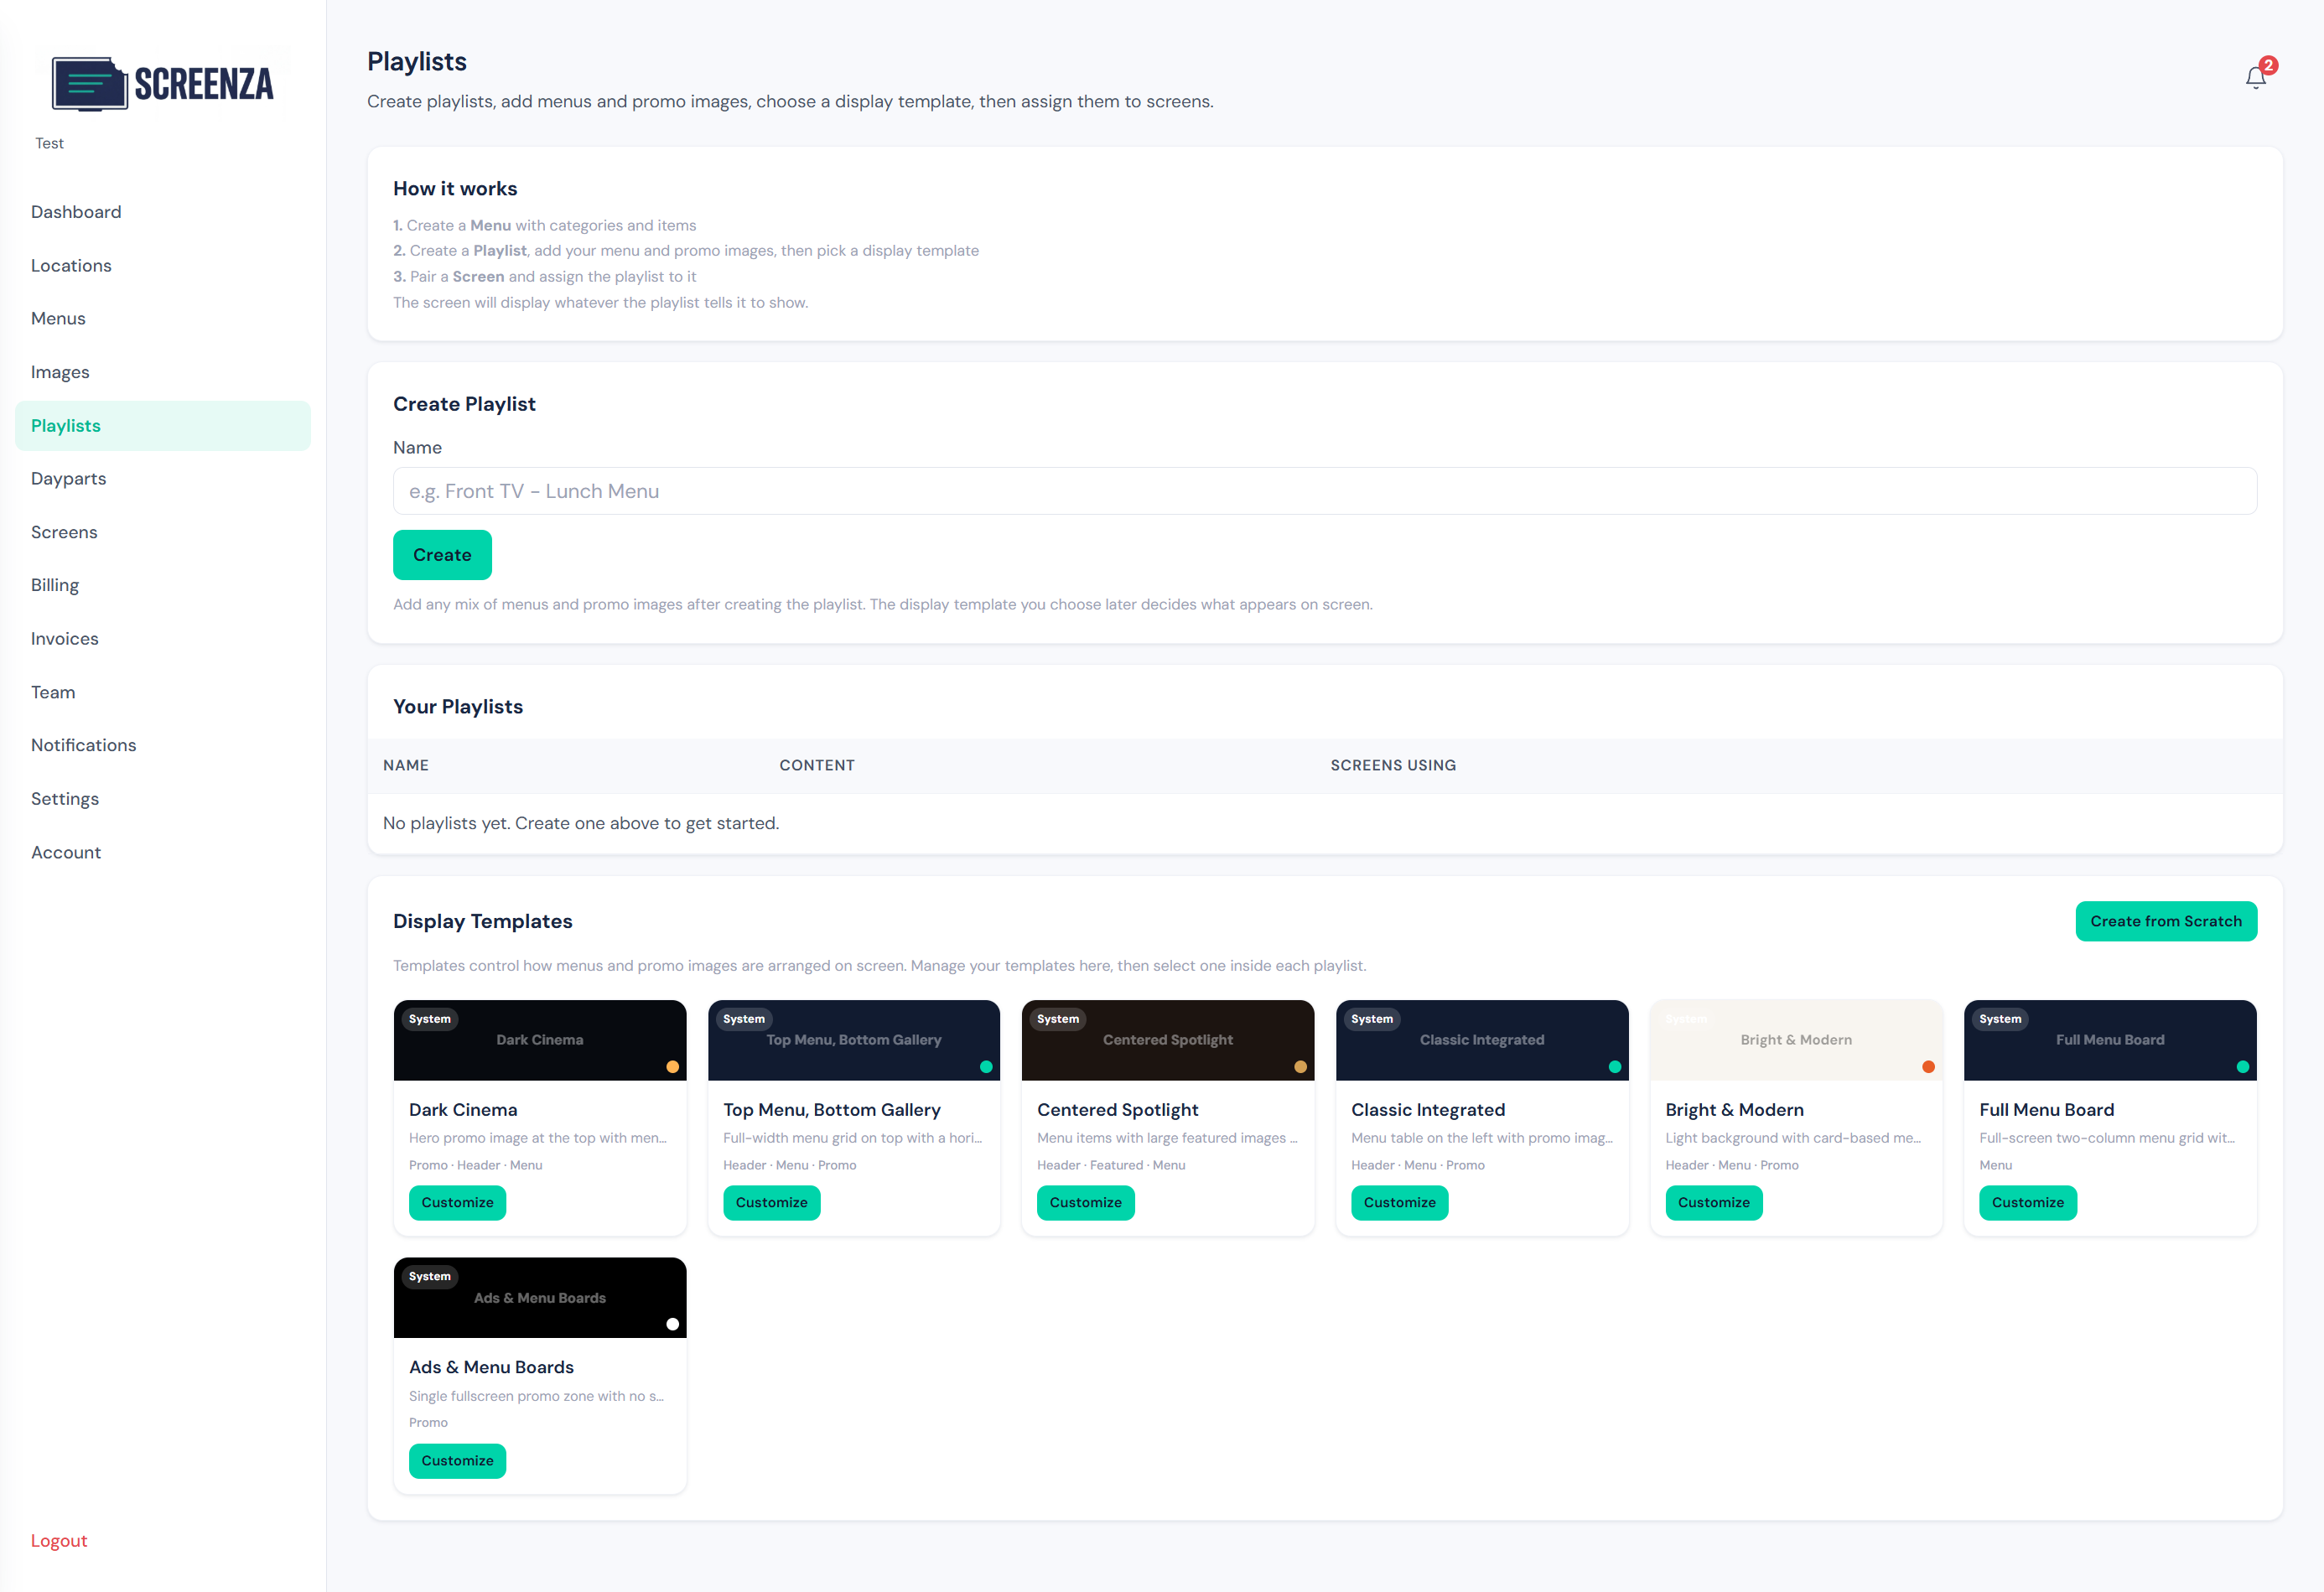
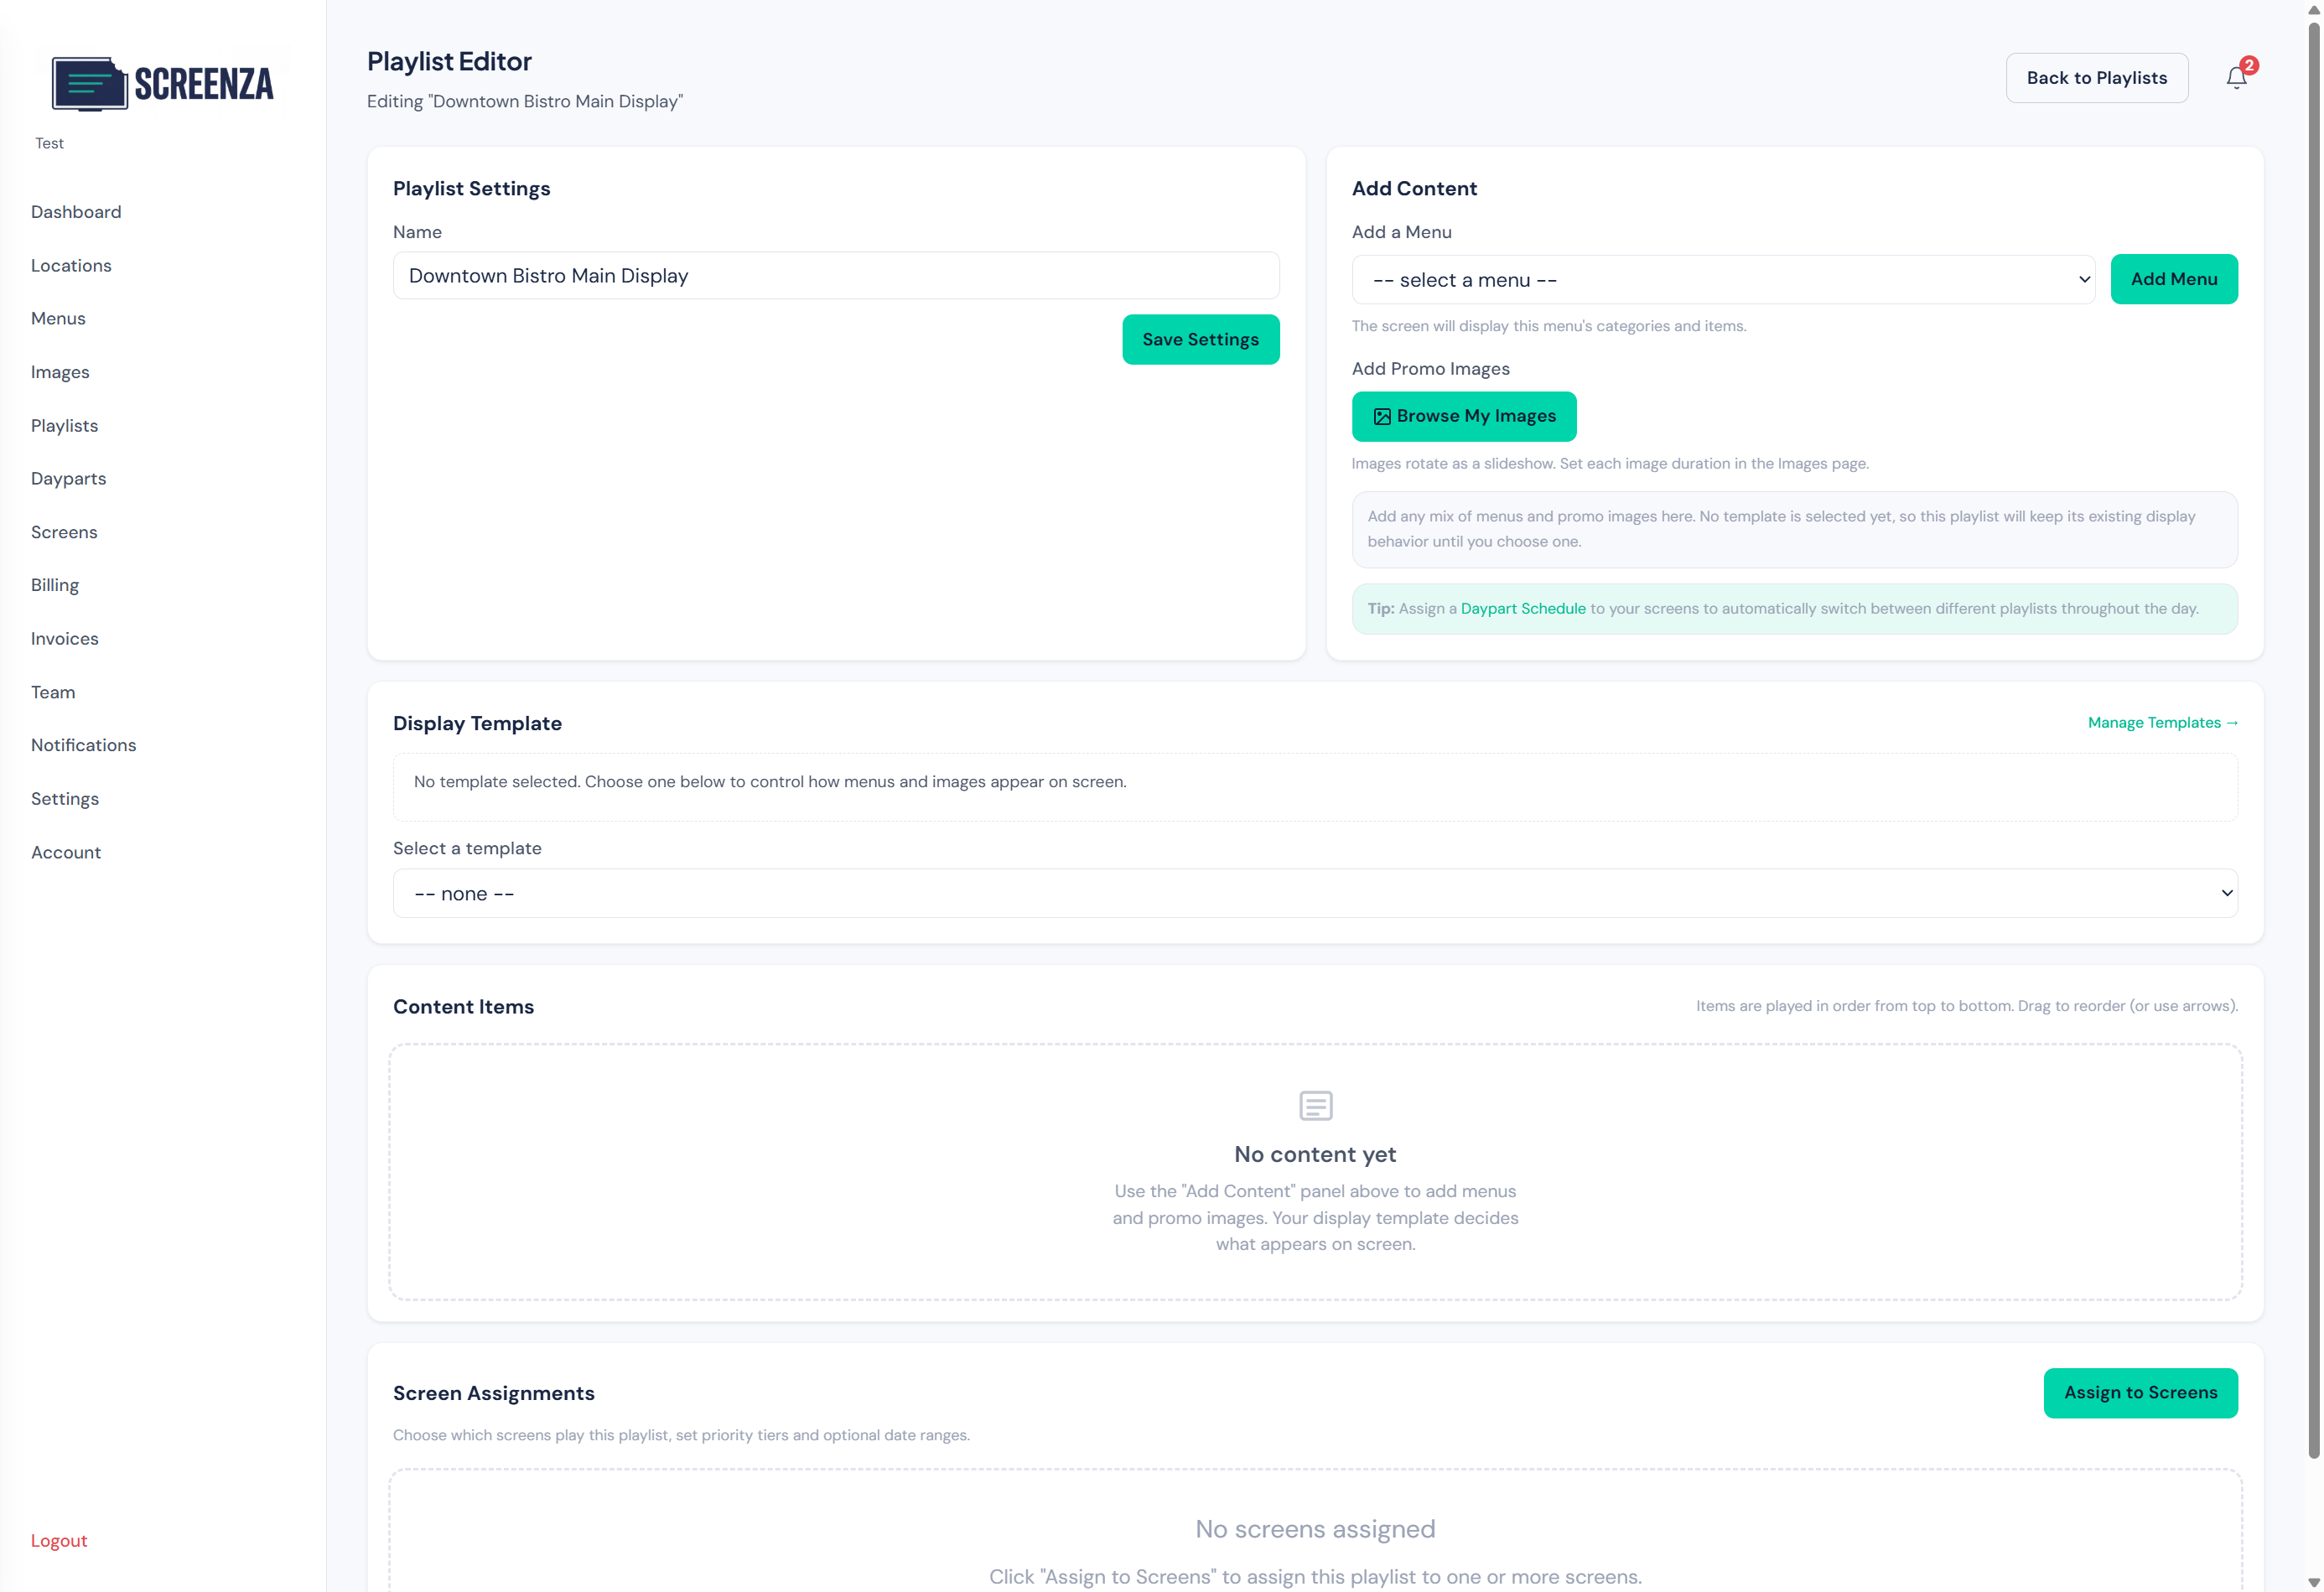
Tip: Playlists organize your content for display on screens.
Add Image to Playlist
Add your generated menu board to the playlist.
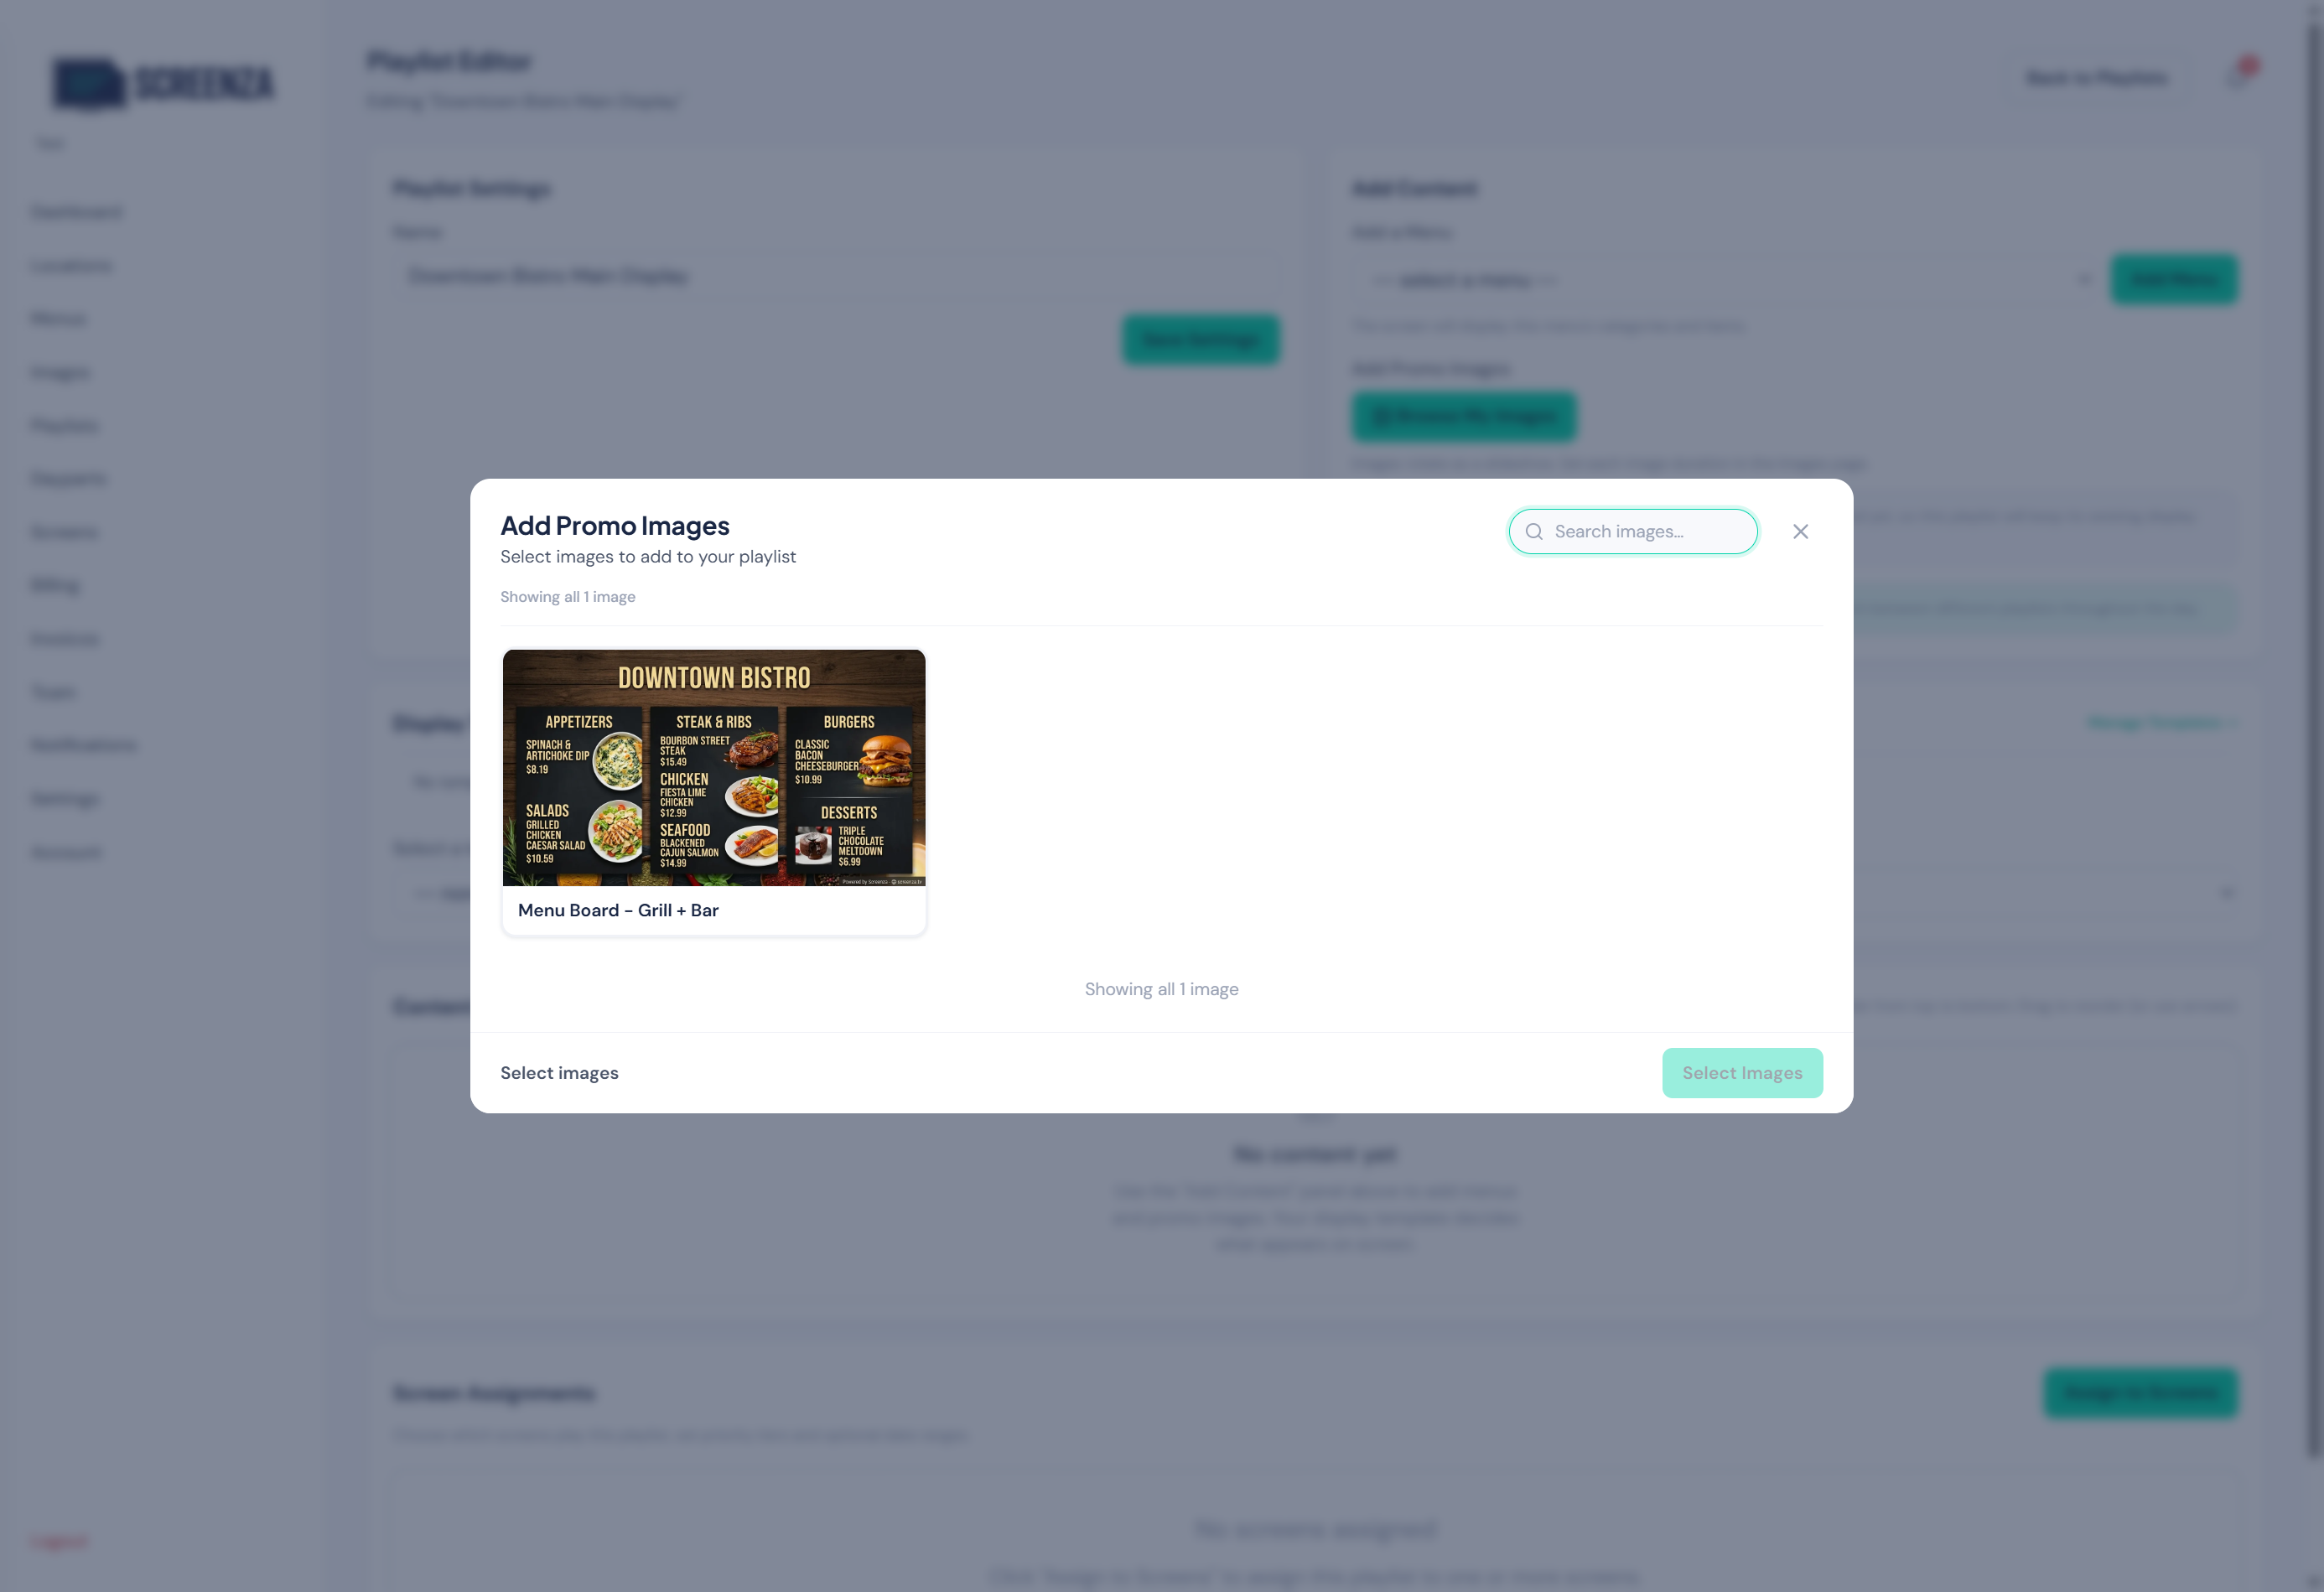
- Click Browse My Images.
- Select the generated menu board image and click to add it.
- Select the “Ads & Menu Boards” display template.
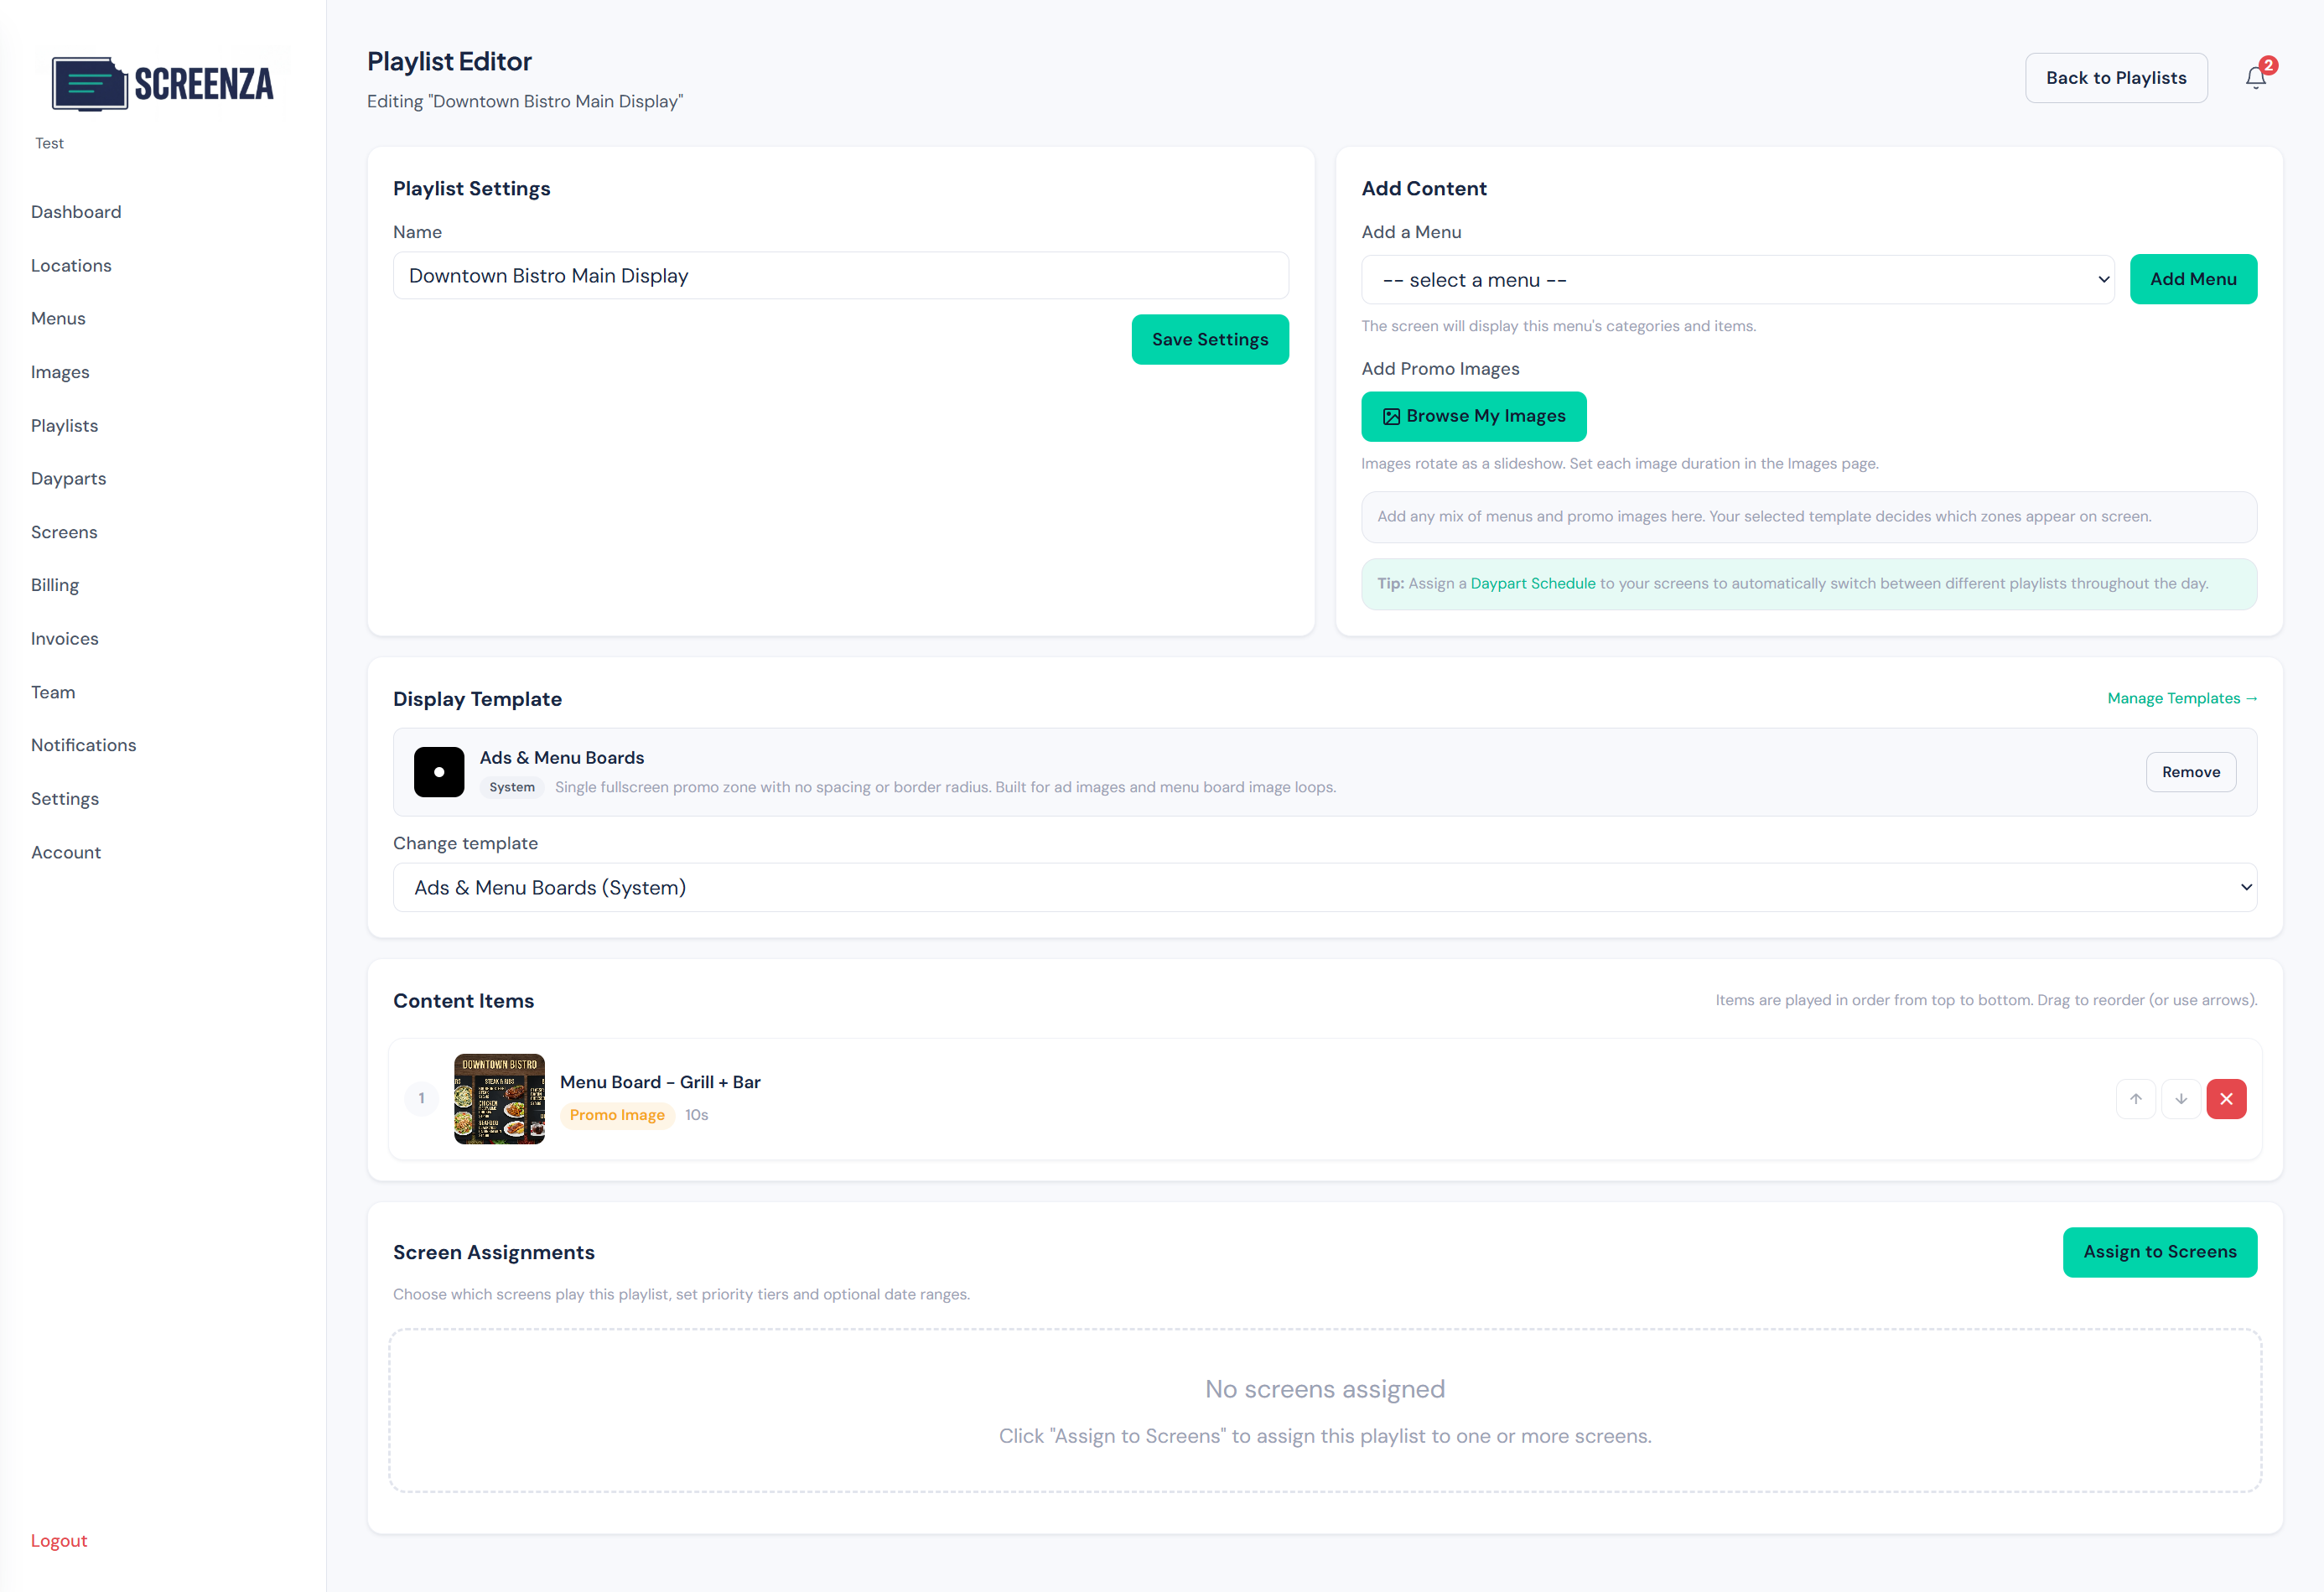
Tip: The “Ads & Menu Boards” template displays your images in a fullscreen slideshow.
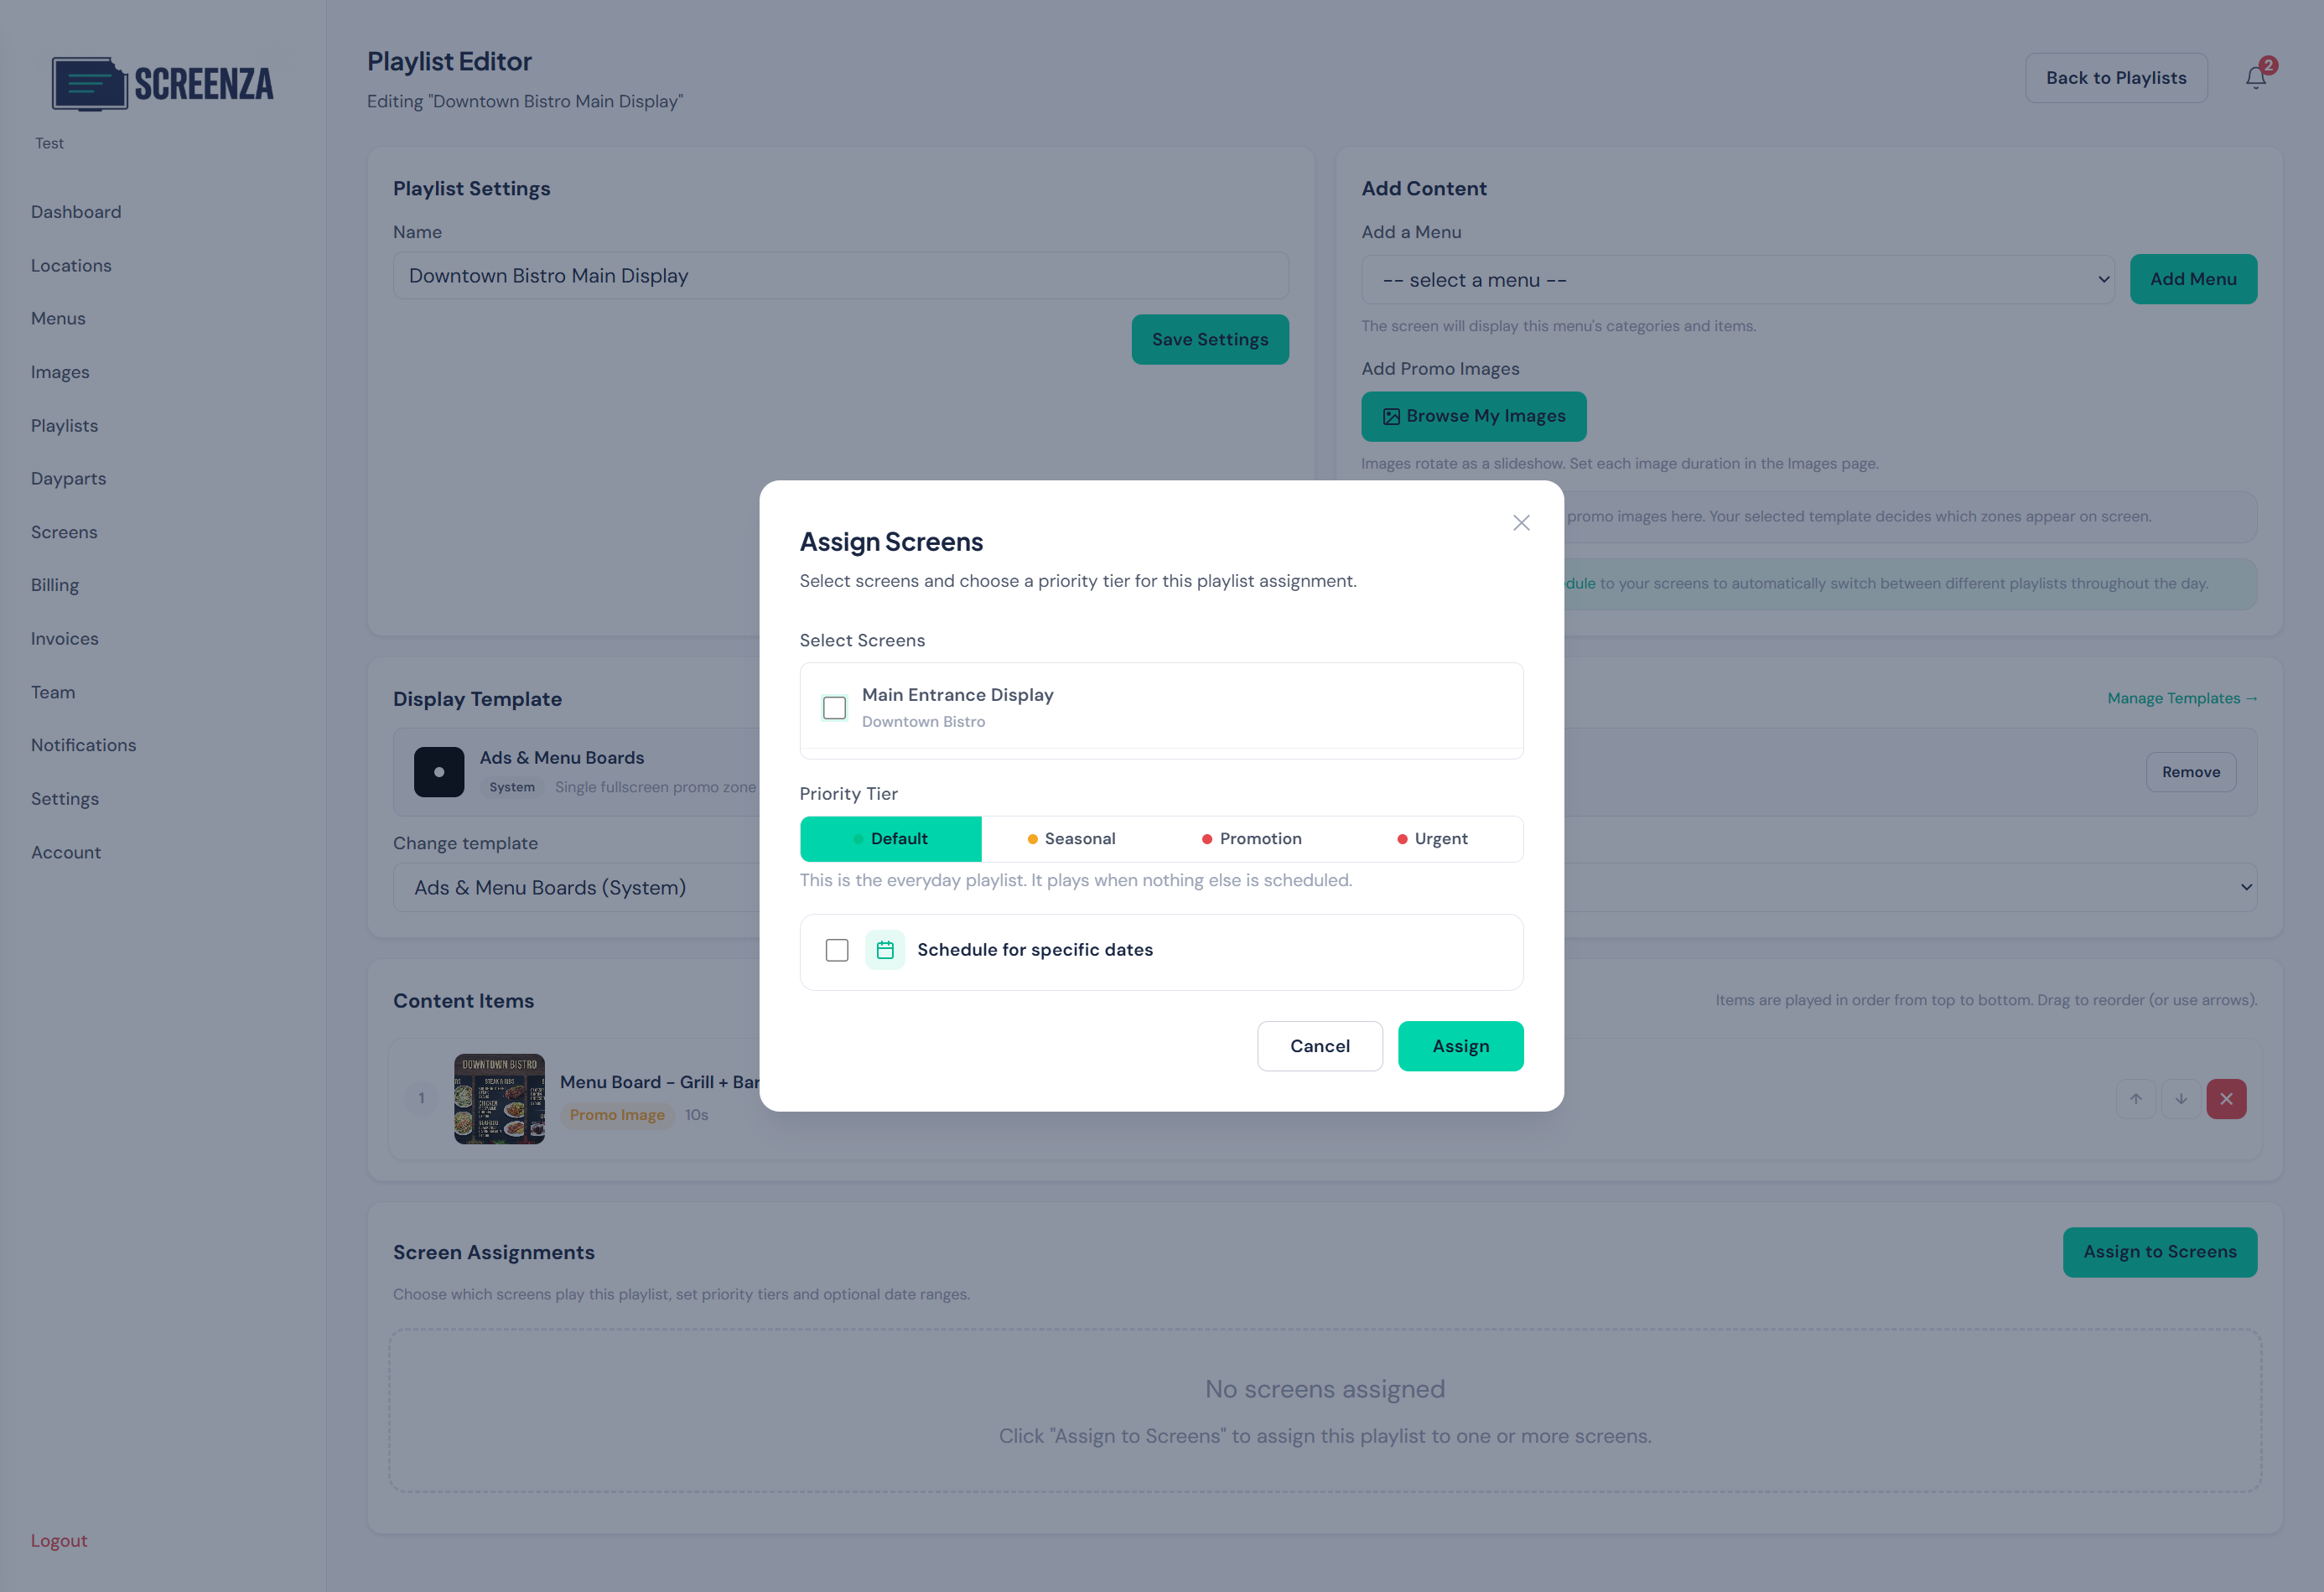
Assign Screen
Connect your playlist to a display screen.
- Click Assign to Screens.
- Check your screen in the assignment modal.
- Click Assign.
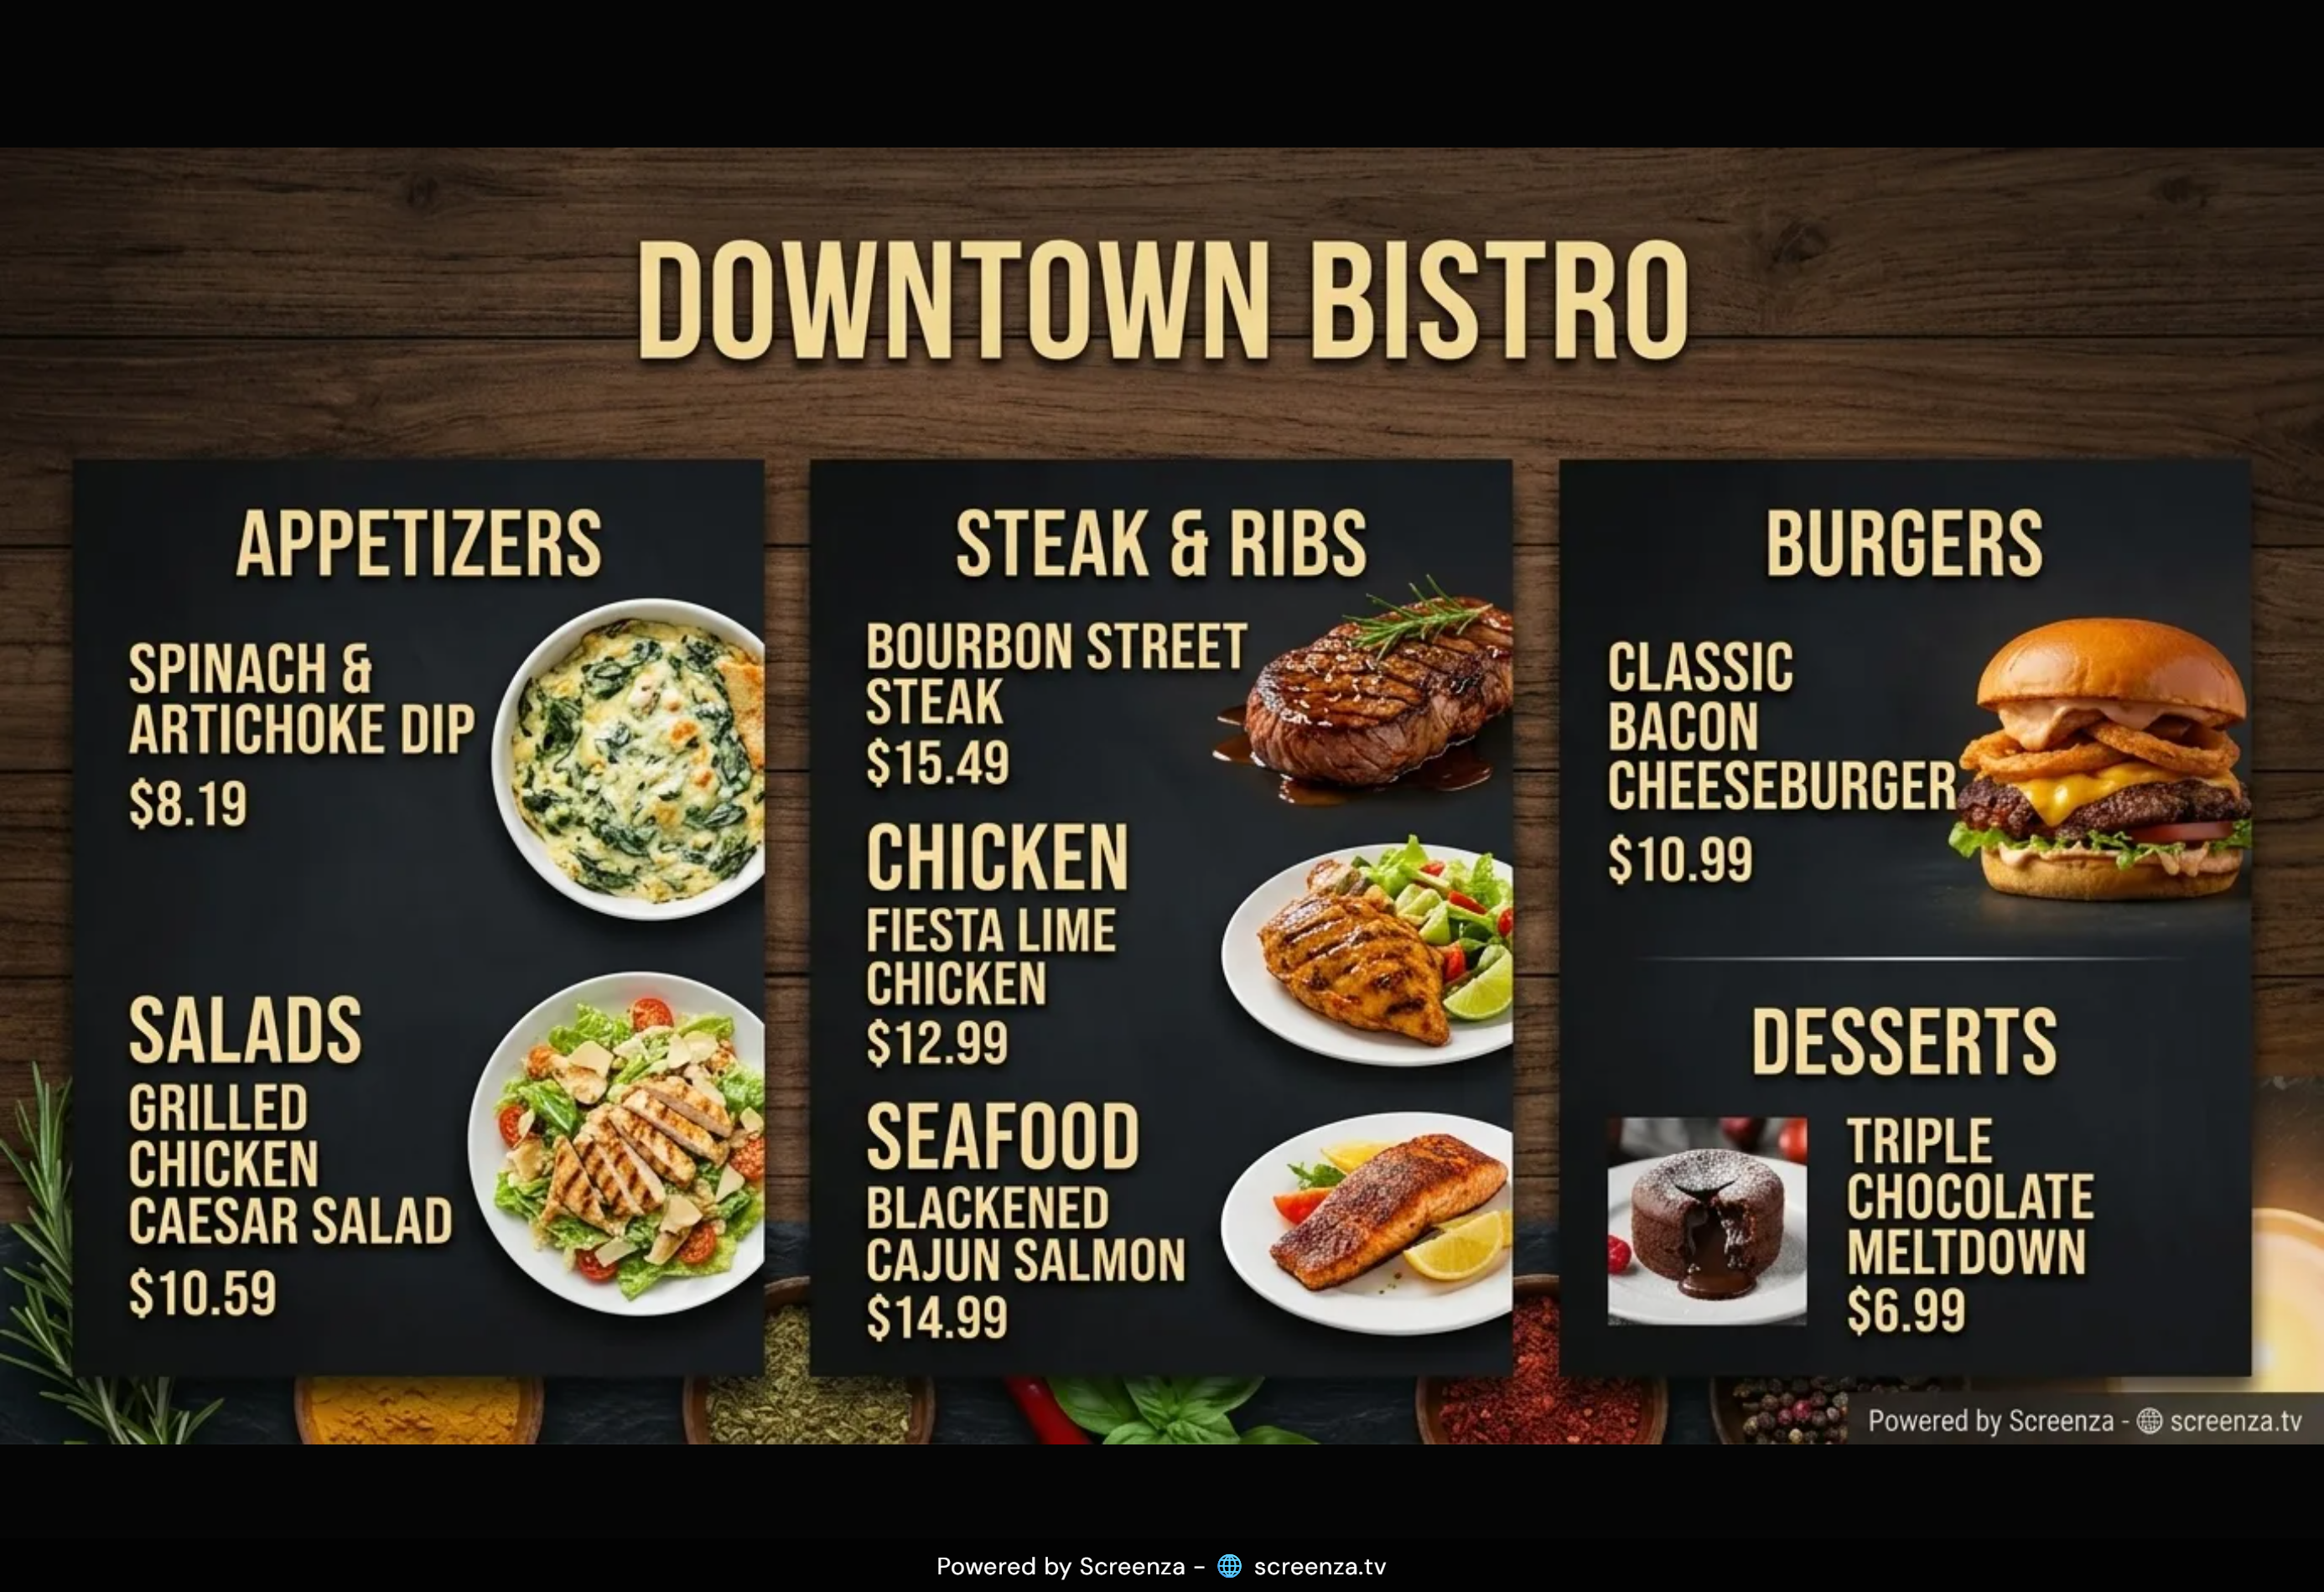
View Your Display
See your menu board live on the browser player.
- Go to Screens in the sidebar.
- Click Preview on your screen to see it live.